


Newbie refinisher/need hand-holding/advice/pics!
mjsee
14 years ago

Sort by:Oldest
Comments (8)
Related Stories
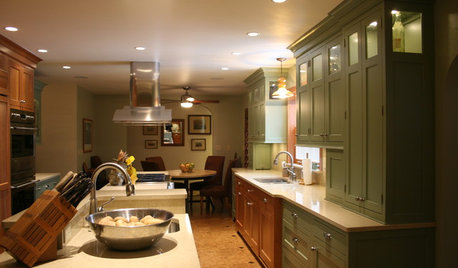
KITCHEN DESIGNSmart Investments in Kitchen Cabinetry — a Realtor's Advice
Get expert info on what cabinet features are worth the money, for both you and potential buyers of your home
Full Story
DECORATING GUIDES10 Design Tips Learned From the Worst Advice Ever
If these Houzzers’ tales don’t bolster the courage of your design convictions, nothing will
Full Story
TASTEMAKERSBook to Know: Design Advice in Greg Natale’s ‘The Tailored Interior’
The interior designer shares the 9 steps he uses to create cohesive, pleasing rooms
Full Story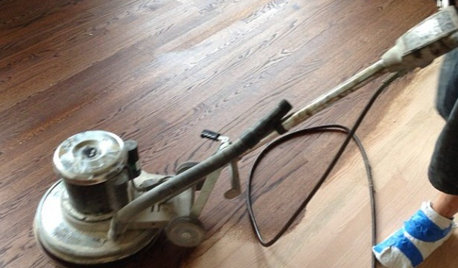
GREAT HOME PROJECTSWhat to Know Before Refinishing Your Floors
Learn costs and other important details about renewing a hardwood floor — and the one mistake you should avoid
Full Story
GREAT HOME PROJECTSHow to Refinish a Wood Deck
Keep your deck looking its best — and save feet from splinters — by applying a new stain and sealant every year or so
Full Story
BATHROOM DESIGNDreaming of a Spa Tub at Home? Read This Pro Advice First
Before you float away on visions of jets and bubbles and the steamiest water around, consider these very real spa tub issues
Full Story
LIFEEdit Your Photo Collection and Display It Best — a Designer's Advice
Learn why formal shots may make better album fodder, unexpected display spaces are sometimes spot-on and much more
Full Story
FURNITUREHolding Out for Quality
Cheap furniture has its place, but more shoppers are waiting to invest for the long haul
Full Story
LIFELate Again? Eliminate the Things Holding You Up in the Morning
If you find yourself constantly running late for appointments, work and get-togethers, these tips could help
Full Story
DECORATING PROJECTSGet a Wallpaper Look With a Hand-Painted Touch
Stencil a pattern for all the beauty of your favorite wallpaper at a fraction of the cost
Full Story

bobismyuncle
mjseeOriginal Author
Related Professionals
Hanover Park Cabinets & Cabinetry · Parsippany Cabinets & Cabinetry · Sugar Land Carpenters · Burlington Flooring Contractors · Lenexa Flooring Contractors · Maltby Flooring Contractors · Melrose Flooring Contractors · New Bern Flooring Contractors · Slidell Flooring Contractors · St. Louis Flooring Contractors · Wheat Ridge Flooring Contractors · Austin Furniture & Accessories · Peachtree City Furniture & Accessories · Reston Furniture & Accessories · Short Hills Furniture & Accessoriesbobismyuncle
mjseeOriginal Author
mjseeOriginal Author
karinl
bobismyuncle
mjseeOriginal Author