


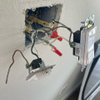
rec room wall plate issue
dinosaur1
12 years ago
Sort by:Oldest
Comments (13)
Related Stories
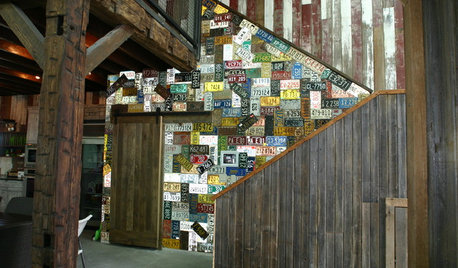
DECORATING GUIDESGive License Plates the Green Light
Imagination is the driving force behind these car and motorcycle plates repurposed as artistic home decor
Full Story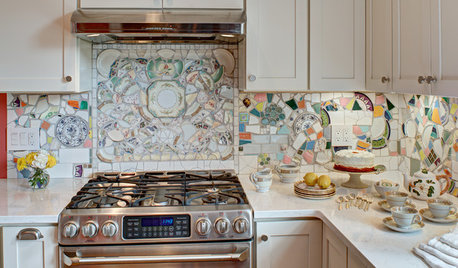
MOST POPULARKitchen of the Week: Broken China Makes a Splash in This Kitchen
When life handed this homeowner a smashed plate, her designer delivered a one-of-a-kind wall covering to fit the cheerful new room
Full Story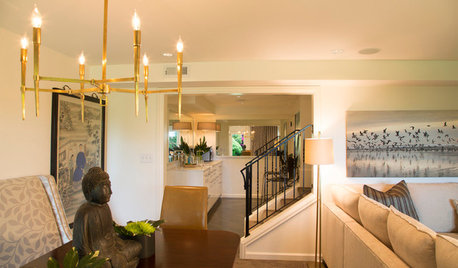
BEFORE AND AFTERSBasement of the Week: A Man Cave Goes Chic and Family Friendly
Renovations lighten up a dad's dark rec room and make space for guests and family
Full Story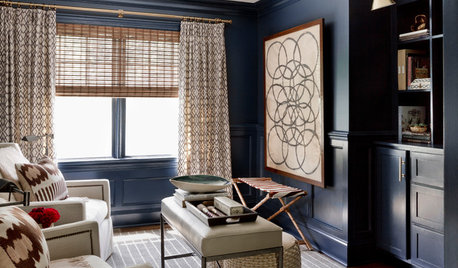
LIVING ROOMSRoom of the Day: Dark and Daring Pay Off in a Den Redesign
Indigo walls and woodwork, textured furnishings, task lighting and a media center turn a neglected room into a family hangout
Full Story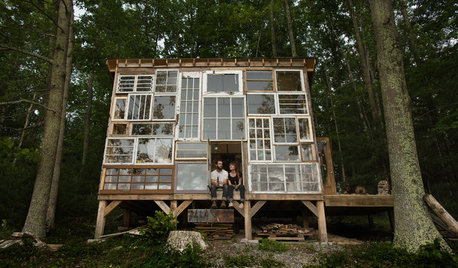
OUTBUILDINGSThe Glass-Walled Cabin That Romance Built
Envisioning sunsets and starry skies, newlywed artists construct a 1-room retreat on a family farm
Full Story
REMODELING GUIDESWhat to Know Before You Tear Down That Wall
Great Home Projects: Opening up a room? Learn who to hire, what it’ll cost and how long it will take
Full Story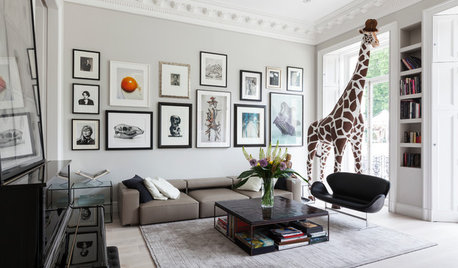
ARTAn Insider’s Guide to Creating the Perfect Gallery Wall
Bring your room to life with these expert tips for grouping artwork and photographs
Full StoryBEFORE AND AFTERSSee a DIY Powder Room Transformation for $1,100
Determination, DIY skill and a stunning tile feature wall helped make this formerly dark and gloomy powder room feel spacious
Full Story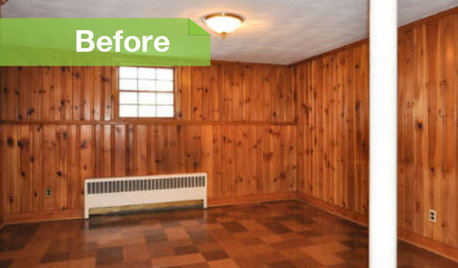
PAINTINGKnotty to Nice: Painted Wood Paneling Lightens a Room's Look
Children ran from the scary dark walls in this spare room, but white paint and new flooring put fears and style travesties to rest
Full Story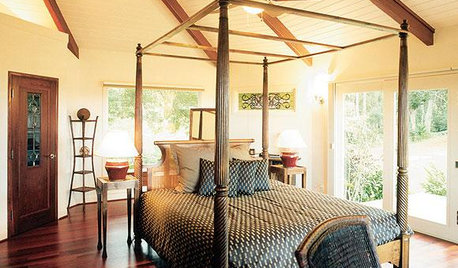
BEDROOMSFloat Your Bed for a Great New Look
Step outside the box and get that bed away from the wall; your room will feel luxurious and balanced
Full StoryMore Discussions
Ron Natalie
dinosaur1Original Author
Related Professionals
Boardman General Contractors · Conneaut General Contractors · Deer Park General Contractors · Klahanie General Contractors · Manalapan General Contractors · Palestine General Contractors · Reisterstown General Contractors · Summit General Contractors · Titusville General Contractors · Selma Solar Energy Systems · Glenview Home Automation & Home Media · Novi Home Automation & Home Media · Pittsburgh Home Automation & Home Media · Federal Heights Home Automation & Home Media · East Cleveland Home Automation & Home Mediabus_driver
brickeyee
dinosaur1Original Author
Ron Natalie
dinosaur1Original Author
dinosaur1Original Author
yosemitebill
dinosaur1Original Author
fa_f3_20
electricalkid
Billl