


my latest project
paintingfool
16 years ago
Related Stories
INSIDE HOUZZHouzz Survey: See the Latest Benchmarks on Remodeling Costs and More
The annual Houzz & Home survey reveals what you can expect to pay for a renovation project and how long it may take
Full Story
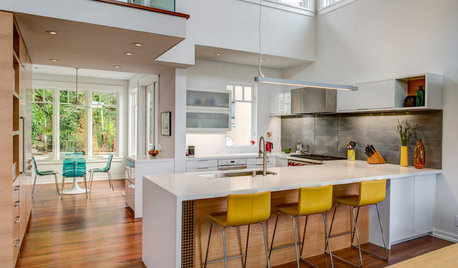
KITCHEN DESIGNHouzz Call: Pros, Show Us Your Latest Kitchen!
Tiny, spacious, modern, vintage ... whatever kitchen designs you've worked on lately, we'd like to see
Full Story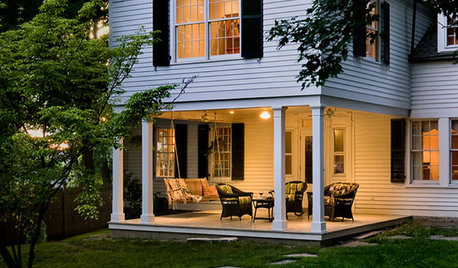
SELLING YOUR HOUSEThe Latest Info on Renovating Your Home to Sell
Pro advice about where to put your remodeling dollars for success in selling your home
Full Story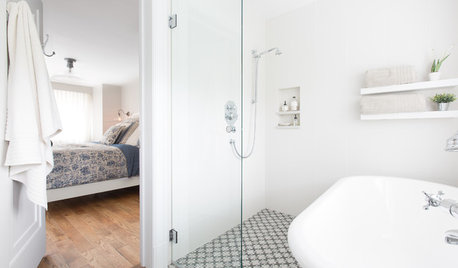
BATHROOM DESIGNSweet Retreats: The Latest Looks for the Bath
You asked for it; you got it: Here’s how designers are incorporating the latest looks into smaller master-bath designs
Full Story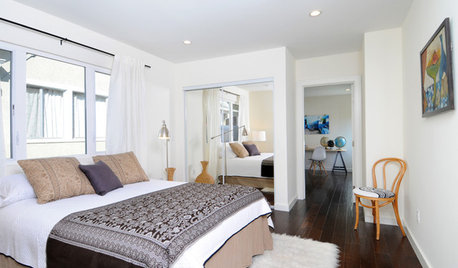
SELLING YOUR HOUSEHome Staging to Sell: The Latest Techniques That Really Work
Get up to speed on the best ways to appeal to potential buyers through accessories, furniture, colors and more
Full Story
DOORSLet's Walk Through the Latest Door Trends
The functional feature has been getting a dose of flexibility, creativity and glamorous detail
Full Story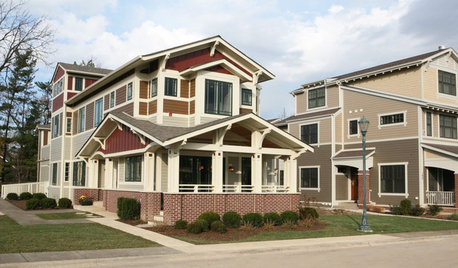
REMODELING GUIDESTour Sarah Susanka's Newest Right-Sized House
Get ideas for neighbor-friendly, efficient home design from best-selling author's latest project near Chicago
Full Story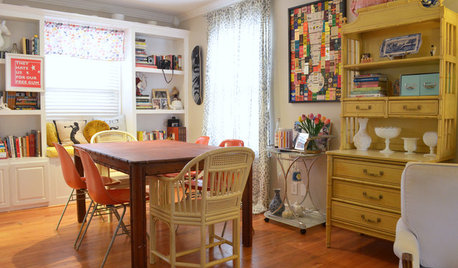
HOUZZ TOURSMy Houzz: Welcoming Baby in an Eclectic Dallas Rambler
Setting up a sweet nursery is just the latest project in a home filled with art, DIY touches and a dream come true
Full Story
COMMUNITYIn L.A.’s Echo Park, a New Urban Development Takes Flight
Blackbirds, a new ‘microneighborhood’ near downtown, is Los Angeles’ latest small-lot urban infill project
Full Story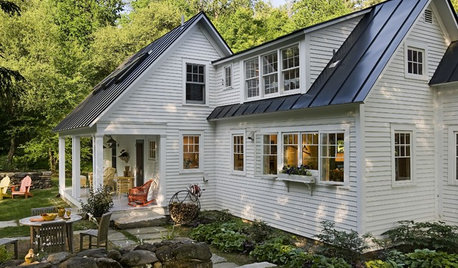
DESIGN PRACTICEContracting Practice: Marketing Your Business
To keep those projects rolling in, combine old-school techniques with the latest in high-tech networking
Full StoryMore Discussions
phonegirl
paintingfoolOriginal Author
Related Professionals
Carlsbad Furniture & Accessories · Eureka Furniture & Accessories · Genova Furniture & Accessories · Hilton Head Island Furniture & Accessories · Wellesley Furniture & Accessories · Ridgefield Park Interior Designers & Decorators · View Park-Windsor Hills Interior Designers & Decorators · Washington Interior Designers & Decorators · Ardmore Painters · Champlin Painters · Westerville Painters · Oregon City Custom Countertops · Kaneohe Custom Countertops · South Miami Custom Countertops · Surfside Custom Countertopsluvstocraft
oddie
anjabee
luvstocraft
paintingfoolOriginal Author
marika5
luvstocraft
paintingfoolOriginal Author
luvstocraft
paintingfoolOriginal Author
anjabee
paintingfoolOriginal Author
craftylady-2006
paintingfoolOriginal Author