


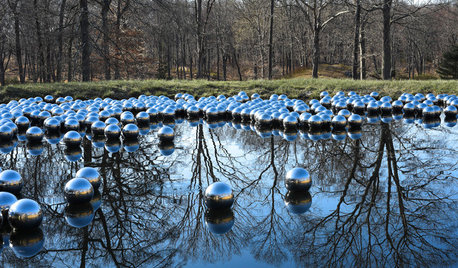
16' Sphere
sereneseen
14 years ago

Related Stories
EVENTSDesign Calendar: Where to Go and What to See in June
Communal architecture, artful wallpaper, spheres, modern chairs and more give us things to think about this month
Full Story
DREAM SPACESWe Can Dream: Nurturing Escapes for Penning a Poem
16 picturesque hideaways built to inspire contemplation and a favorite slow art form
Full Story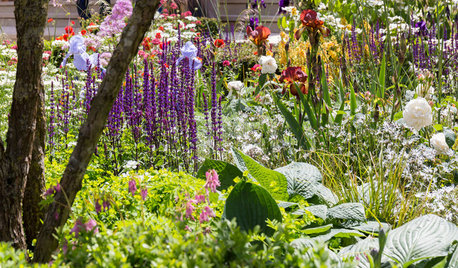
TASTEMAKERSA ‘Medieval Contemporary’ Garden Takes the Silver at Chelsea
This colorful show garden inspired by a Gothic cathedral brings the brilliance of stained glass to Britain's biggest flower show
Full Story
CHRISTMASMake a Traditional Fresh Holiday Wreath the Easy Way
Even beginners can follow these simple steps, layering greenery and bright berries to create a beautiful holiday welcome
Full Story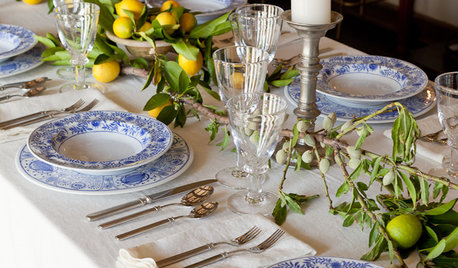
HOLIDAYSLuxurious Holiday Table Settings for Less
Pair colorful glasses, gorgeous garden finds and hand-stamped napkins for a holiday table that looks positively rich
Full Story
FUN HOUZZTaking Cover in a Former Nuclear Missile Silo
A Cold War relic is now a modern home, thanks to an Australian architect with a flair for the unusual
Full Story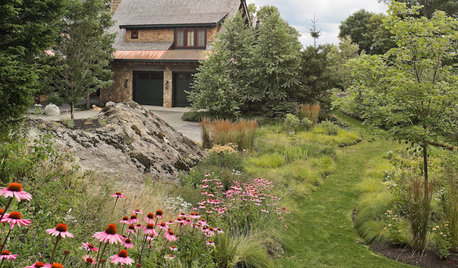
GARDENING GUIDES13 Risks to Take for True Garden Rewards
Go ahead, be a rebel. Breaking rules in the garden can lead to more happiness, creativity and connection with the earth
Full Story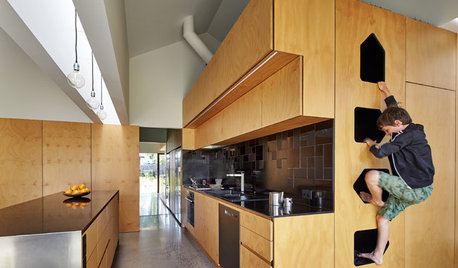
MOST POPULARKitchens Down Under: 20 Design Ideas to Inspire You
These popular Australian kitchens have exciting ideas to borrow no matter where you live
Full Story
PRODUCT PICKSGuest Picks: Geeky-Cool Gifts for Kids
Boost your kids' brainpower this holiday season with toys that aren't just fun — they're truly smart choices
Full Story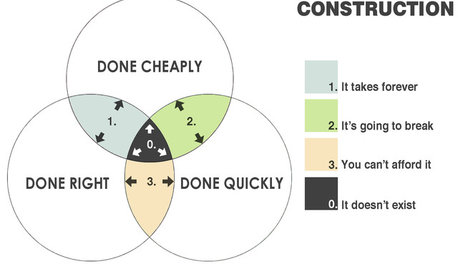
COFFEE WITH AN ARCHITECTThe Elements of Design Explained With Venn Diagrams
Design doesn't have to be hard to understand. It just needs the right presentation
Full StorySponsored
sereneseenOriginal Author
Calamity_J
Related Professionals
Atlanta Glass & Shower Door Dealers · San Antonio Window Contractors · Atlanta Window Contractors · Framingham Window Contractors · Piedmont Window Contractors · Tamarac Window Contractors · Suamico Window Contractors · Merriam Window Contractors · Hagerstown Interior Designers & Decorators · Wanaque Interior Designers & Decorators · Baltimore Window Contractors · Carol City Window Contractors · Fairview Shores Window Contractors · Lansdowne Window Contractors · Phelan Window Contractorskatishooked
wackyweeder
cathyscache
susiewantsroses
sereneseenOriginal Author
texaswild
cathyscache
flagtruck
sereneseenOriginal Author
ladyronnie
sereneseenOriginal Author
texaswild
jaydee_grower
Mermaid
Mermaid