Shop Products
Houzz Logo Print
myrealnameismama_goose

Update on dining room progress--finally :)

I'm posting my update because even though I haven't made a decision on flooring, I'm still plugging along.

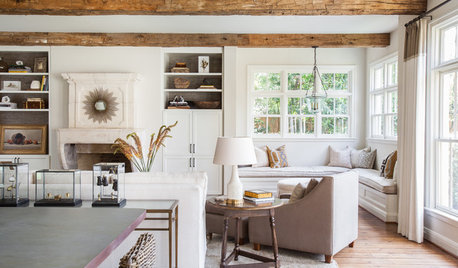
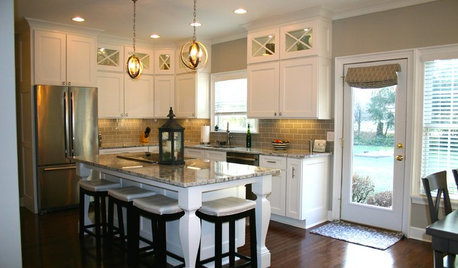
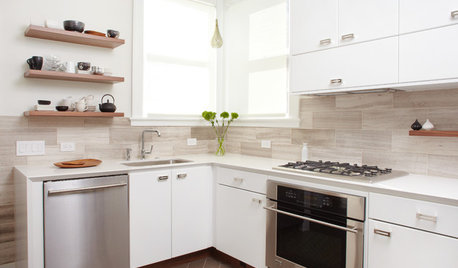
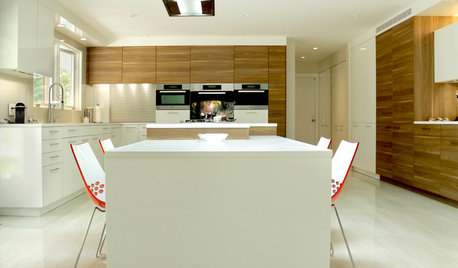
If anyone is new and wants to read the saga of my kitchen, you can click on my username to find the links, but here is a quick view of the (almost) finished kitchen:

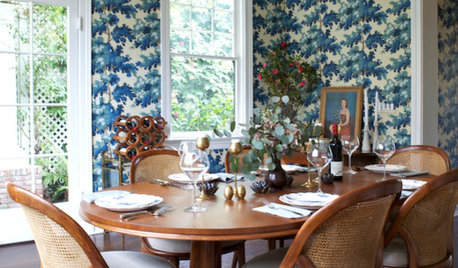
And the before shot of the DR (after I squeezed in a couple of flatwall cabinets that were on either side of the kitchen/DR wall that was removed):

So, I removed wallpaper, washed and patched the old wallboard, and finished off the new drywall after my brother graciously did a nice, neat, final coat for me. Then primed and painted Adobe White to match the kitchen. I like the white, but have no illusions that it will stay that way for very long. That washable vinyl paper was a life-saver on the stairwall--I may look around for a small vintage-style print when the wall gets dirty again.

I painted the ceiling flat Adobe White from the five gallons that we had mixed for the ceilings when we first started the remodel. If you recall, the ceiling in the kitchen is Gelato in the Park, a pale, pale green. I don't have the ceiling trim up yet, and the floor trim won't go down until after the flooring, for which I'm still considering a checkerboard vinyl...I think...maybe...

Well, anyway, the details of the vintage cabinet:

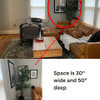
I built a 2x4 frame to set the base on, because there was an AC vent that had to be re-routed out the front, and I didn't want to cut a hole in the actual cabinet. That makes it 3.5" taller that the kitchen cabinet, but other than having a wider baseboard (with an AC vent in it) they are the same. I kept it the original depth of 16", so it is more of a buffet counter. And, BTW, the counter is painted wood--I re-used the original counter from the cabinet that I used in the kitchen. That cabinet's counter had a hole in it, for a small sink that I didn't use--the counter is now marble tile. More on the board with the hole, later...

My father and a couple of his buddies stopped by one day to set the base for me, my daughters helped with the countertop, then I nabbed my brothers, BIL, and nephew to set the top cabinet, after a family dinner (wasn't that convenient?) I painted it to match the cabinet in the kitchen, but there are no doors--I'm trying to decide whether to leave the open shelves or have glass doors built to match. I liked the open shelves in the kitchen (before the glass doors), but I knew exactly what I would put on those shelves, and these will have items that are mostly decorative, or if I have doors, I have more options for storage.

A progress pic:

And now, baseboard not attached:

Wider shot:

And a shot of the stairwall. I'm thinking about painting the spindles Adobe White to break up all the oak. I really like the golden oak, but I'd like to update it:


I promise I wasn't drinking when I took that picture ;).

And to desertsteph who inspired me to get busy and finish the shelves in the family dining/play room closets (built in 2008), Thank You!

My husband had finished adjustable shelves in the two smaller closets, but for the wider closets, I decided to use scrap lumber for the rails, and attached them with 3" screws, so that they can be moved if necessary. The shelves rest on the rails, and are attached with a couple of screws, so that they can be easily removed. I re-used that wonderful 1-1/4" thick board from the vintage cabinet counter--the one that had a hole for a sink--to make two shelves. I used the sides from the pantry cabinet that I sawed off in the kitchen, to make a shelf for one closet, and also a shelf for the cabinet in the DR, and used the top board of the upper vintage cabinet to make shelves in another closet. There was enough 1x12 plywood left from the laminated beam to make the rest of the shelves--so, no investment at all! They're not all the same wood, or the same color; they're not so pretty, but they are sturdy!

Closet #1, which stores folding chairs in the bottom:

Closet #2 which stores the folding tables:

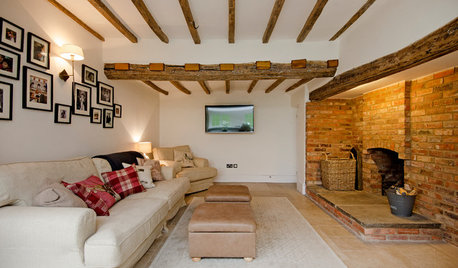
And closet #3, above the gas-log FP--I'm thinking of storing holiday decor in here:

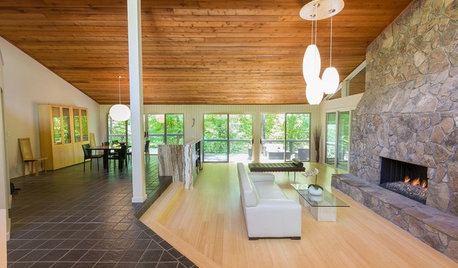
I'm sitting here in my freshly painted dining room, looking toward the kitchen, and it feels good.

Here is a link that might be useful: family dining/play room

Comments (15)

  • EATREALFOOD
    11 years ago
    last modified: 9 years ago

    All I can say is that vintage cabinet looks fantastic !!! LOVE the beadboard. I'm going to add beadboard to my open cabinets...SOOOO glad I didn't order from the dealer. My local BM store matched the cabinet paint after seeing this may decide to go with a color.
    Also SOOOO glad I didn't order the light rail, I'm going to get some inexpensive pieces of molding and have a handy person put it up at a small fraction of the dealer price.
    Another job(s) well done ! Yeah ! You are our inspiration. :)

  • Shades_of_idaho
    11 years ago
    last modified: 9 years ago

    WOW I second ERF. Great job of all of it. I can feel your satisfaction in your last comment. I bet it does feel good. I so love those cabinets you bought from the school ,was it?, and you have really made the perfect spaces with them. It all looks so matched and beautiful. Now I am going to go explore your link. You are amazing Mama_Goose.

  • desertsteph
    11 years ago
    last modified: 9 years ago

    YW mama g! did that inspiration come from a fallen shelf knocking out another shelf and everything sliding off? lol!

    you just wanted to join in the fun? lol!

    all those shelves look great and will be so much storage for you. I like your storage of the folding table and chairs too.

    It doesn't matter that the wood doesn't match - they'll be behind doors. It isn't like an open bookcase. It's a good way to use up that leftover wood - I did it here and still have a few smaller pieces that I'm hanging on to for now in case I can find a use for them.

    If the unmatched shelves would make a difference they could covered with something like oil cloth.

  • TxMarti
    11 years ago
    last modified: 9 years ago

    It looks like a different room! I can't really see the wallpaper in the before photo but I can tell the after is so much brighter. I love how you fit the folding tables in the bottom of that closet. Folding tables are such a problem.

  • mama goose_gw zn6OH
    Original Author
    11 years ago
    last modified: 9 years ago

    Thank you all!

    EATREALFOOD, I used the inexpensive beadboard sheet, left-over from the kitchen, and painted the pieces before attaching with construction adhesive. The beadboard is one of my favorite things about the cabinets.

    Shades, we bought the cabinets from a flea-mkt dealer, advertising on craigslist, but the cabinets had come from an old school. They had been reworked at least once to fit into a teachers' lounge, and it must have been the 'shop' class that did it, because they were rough in some places. I forgot to mention that I had to rebuild the left side, as I had to rebuild the right side on the kitchen cabinet--they had been set up in an ell layout. If you check the link, you can see that there was a rickety extension on the left side--it fell apart while they were being delivered. I know it looks strange to have one section shorter (not centered over the base), but I don't notice it unless I look at a pic.

    steph, nothing fell down, lol, but in closet#1 there were no shelves, with the same amount of stuff piled up, which meant that if I wanted something from the bottom (e.g. paper shredder), I had to unearth it and rearrange. If I have enough left-over paint, I'm going to paint the edges of the shelves to match. Or, maybe I'll find a mis-tint in a really funky color--as you said, it's all behind closed doors.

    It's so nice to be able to pull the tables and chairs out and set up in that room, without dragging everything into the LR.

    marti, the wallpaper was on the stairwall and the outside wall. It was the same print that was in the before kitchen. I found a pic of the back wall, taken after I had stripped off the top layer--I had to use water and liquid starch to remove the bottom layer. And, after it was removed, I remembered why I had papered it 18 years ago--I had to patch and sand some bad spots.

    Do you see the Chinese coin hanging in the window? That is my sister's feng shui cure for the construction mess bad energy!

  • young-gardener
    11 years ago
    last modified: 9 years ago

    Oh, mama!! I LOVE the new hutch style cabinet! Ahhh, I never tire of seeing your kitchen. It's so dreamy.

  • mama goose_gw zn6OH
    Original Author
    11 years ago
    last modified: 9 years ago

    young-gardener, Thank you! It still makes me smile every day.

  • lavender_lass
    11 years ago
    last modified: 9 years ago

    Wow! It looks great...and that beadboard in the back of the cabinets is perfect. And, I like how you see the fireplace from the dining area and kitchen!

    I would definitely paint the spindles white...I think that will look great with your beadboard, shelves and other farmhouse/cottage details...as would the checkerboard floor :)

  • TxMarti
    11 years ago
    last modified: 9 years ago

    If the coin works, let me know!

  • shadygrove
    11 years ago
    last modified: 9 years ago

    Just another voice saying that, as before with your kitchen, you continue to set the standard for do-it-yourselfers. Thanks for posting.

  • Shades_of_idaho
    11 years ago
    last modified: 9 years ago

    "young-gardener, Thank you! It still makes me smile every day."

    This is the most important. Smiling is so good for you. I so admire your workmanship and ability. WOW so impressed.

  • mama goose_gw zn6OH
    Original Author
    11 years ago
    last modified: 9 years ago

    lavender, thank you, and thanks for the vote on the stair spindles. When I have a free minute I've been taping off where the spindles meet the treads, so after the ceiling trim is up, it's a go.

    marti, I think she was more than half in jest, but the room is painted, so it must have worked!

    shadygrove and shades, thank you. Do you all realized that you get to see my new stuff before almost anyone else? I just want to say that I really appreciate everyone's encouragement.

    I've been busy the last couple of days, routing and painting the new ceiling trim. I put up the filler on the top of the DR cabinet this morning, then my father wandered in with a bucket of cherry tomatoes. Lol, any idea how many cherry tomatoes one has to halve to fill a dehydrator? A bunch--but aren't these the cutest little things?!

  • TxMarti
    11 years ago
    last modified: 9 years ago

    Yum! I love cherry tomatoes. I swear you are the busiest woman I've ever seen. How long did it take you to cut all those tomatoes?

  • Shades_of_idaho
    11 years ago
    last modified: 9 years ago

    Oh they are lovely. We are just starting to get pink tomatoes. We had one ripe one early. About a month ago. Then nothing.

    Forgot on the white spindles. I also vote for that. Will look great. Taping is such a pain and I always kick myself when I skip it. I am skipping it less as clean up is worse.

  • mama goose_gw zn6OH
    Original Author
    11 years ago
    last modified: 9 years ago

    marti, these are so good--like candy! It took about an hour to rinse, cull, and halve them. I started with two full mixing bowls, but I couldn't resist popping some of the split ones in my mouth as I worked. I tossed the remainder of the splits with Italian dressing, basil, and shredded mozzarella cheese, for lunch and supper tonight. My tongue will probably fall off 'long about tomorrow morning.

    shades, I had never used painter's tape until last year, but it does make the job easier in confined spots. I still like a nice, sharp brush to cut a line.

Sponsored
Franklin County's Remodeling & Handyman Services