


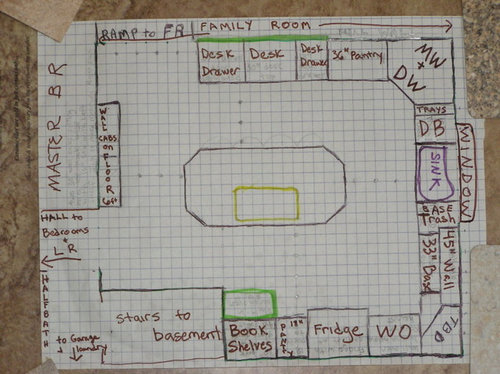
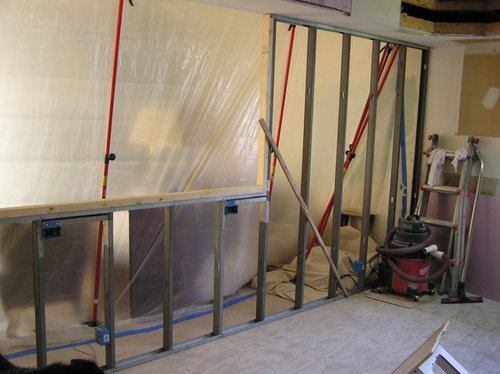
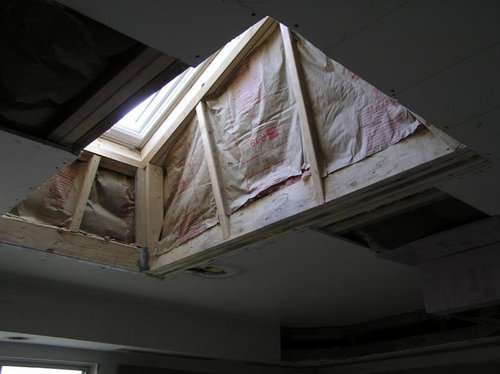
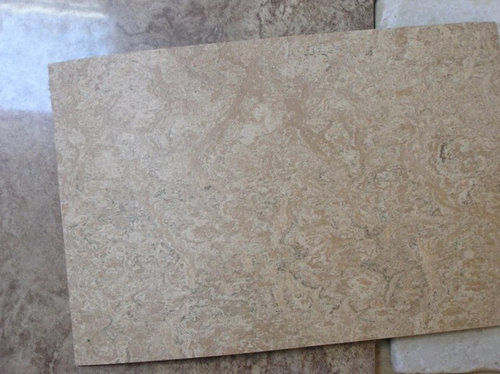
Kitchen remodel has begun! LOTS of Pictures
Nancy in Mich
13 years ago


Related Stories

REMODELING GUIDESOne Guy Found a $175,000 Comic in His Wall. What Has Your Home Hidden?
Have you found a treasure, large or small, when remodeling your house? We want to see it!
Full Story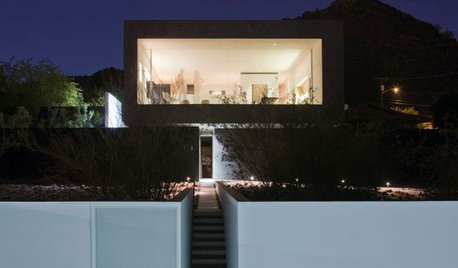
MODERN ARCHITECTUREHouzz Tour: Arizona's Dialogue House Has Something New to Say
Get in on the conversation about this minimalist masterpiece in the Phoenix desert, remodeled by its original award-winning architect
Full Story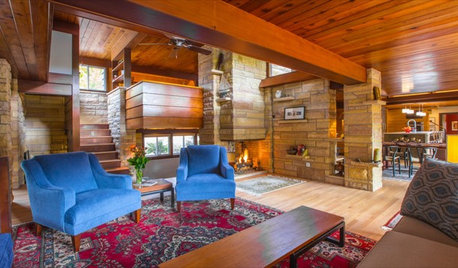
HOUZZ TVHouzz TV: This Dream Midcentury Home in a Forest Even Has Its Own Train
Original wood ceilings, a cool layout and, yes, a quarter-scale train persuaded these homeowners to take a chance on a run-down property
Full Story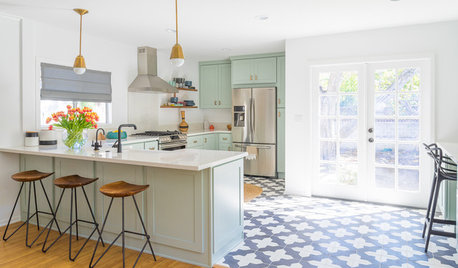
WHITE KITCHENSKitchen of the Week: An Open and Airy Space With Lots of Function
A remodel turns a dated cottage-style bungalow kitchen into a stylish cooking and entertaining space with an open feel
Full Story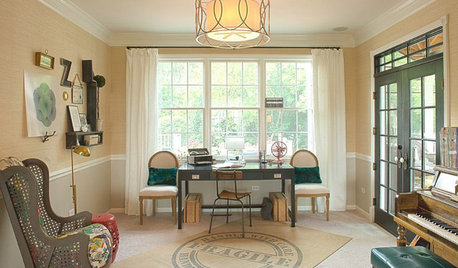
KIDS’ SPACESWho Says a Dining Room Has to Be a Dining Room?
Chucking the builder’s floor plan, a family reassigns rooms to work better for their needs
Full Story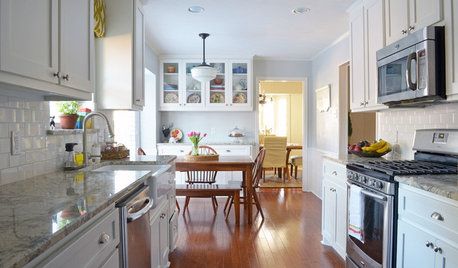
HOUZZ TOURSMy Houzz: ‘Everything Has a Story’ in This Dallas Family’s Home
Gifts, mementos and artful salvage make a 1960s ranch warm and personal
Full Story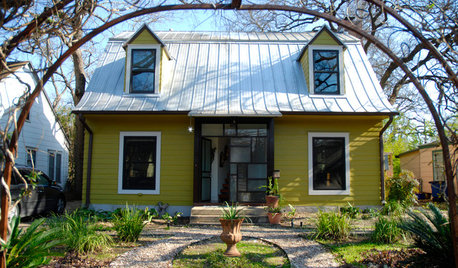
HOUZZ TOURSMy Houzz: An Art-Filled Austin Home Has Something to Add
Can a 90-square-foot bump-out really make that much difference in livability? The family in this expanded Texas home says absolutely
Full Story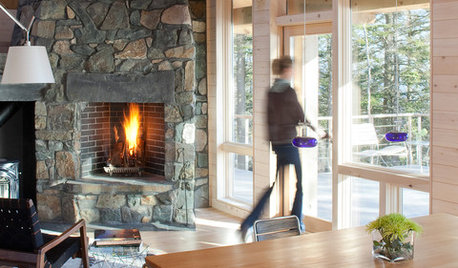
WOODKnotty and Nice: Highly Textured Wood Has a Modern Revival
Whether it's cedar, fir or pine, if a wood has a knot, it's hot
Full Story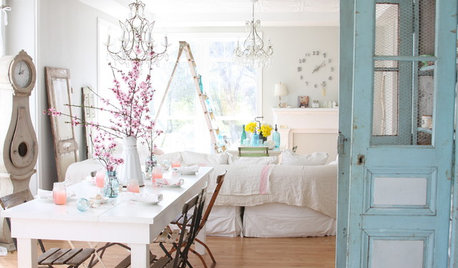
COLORS OF THE YEARPantone Has Spoken: Rosy and Serene Are In for 2016
For the first time, the company chooses two hues as co-colors of the year
Full Story
Houzz Gifts: 31 Finds for the Chef Who Has Everything
Delight serious cooks with the latest in kitchen gadgets, accessories, cookware and small appliances from Houzz
Full StoryMore Discussions
TxMarti
Nancy in MichOriginal Author
Related Professionals
Beachwood Architects & Building Designers · Bonney Lake Architects & Building Designers · New River Architects & Building Designers · Pembroke Architects & Building Designers · Yeadon Architects & Building Designers · Forest Hill Home Builders · Immokalee Home Builders · Lodi Home Builders · Somersworth Home Builders · Spanish Springs Home Builders · Vista Park Home Builders · Wilmington Home Builders · Lomita Home Builders · Rockland Interior Designers & Decorators · Tahoe City Interior Designers & DecoratorsShades_of_idaho
idie2live
Nancy in MichOriginal Author
TxMarti
Nancy in MichOriginal Author
desertsteph
idie2live
User
Nancy in MichOriginal Author
Nancy in MichOriginal Author
emagineer
Nancy in MichOriginal Author
mama goose_gw zn6OH
User
Nancy in MichOriginal Author
trancegemini_wa
emagineer
Nancy in MichOriginal Author
mama goose_gw zn6OH
Nancy in MichOriginal Author
emagineer
mama goose_gw zn6OH
trancegemini_wa
TxMarti
Nancy in MichOriginal Author
TxMarti
User
Nancy in MichOriginal Author
Nancy in MichOriginal Author
TxMarti
Nancy in MichOriginal Author
Shades_of_idaho
Nancy in MichOriginal Author
TxMarti
Nancy in MichOriginal Author
Nancy in MichOriginal Author
desertsteph
Nancy in MichOriginal Author
mama goose_gw zn6OH
TxMarti
desertsteph
Nancy in MichOriginal Author
TxMarti
Nancy in MichOriginal Author
TxMarti
Nancy in MichOriginal Author
desertsteph
TxMarti