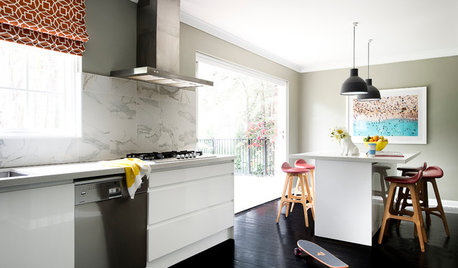
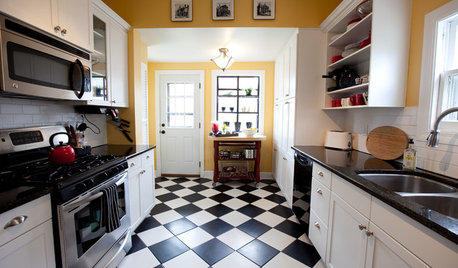
... it's not in the kitchen, and it's not tile. If you recall, I was considering a VCT checkerboard for the kitchen (thread here), and thinking about extending it into the DR, and the playroom.
I still haven't decided what to put in the kitchen and DR, but since I've been 'stuck', I decided to try something in the playroom. That room doesn't have much furniture, isn't necessary on a daily basis (as a kitchen is), and has several entrances, so it's easy to work on.
After reading about resilient vinyl planks, I briefly considered that type of flooring--even bought a box to try in the room. I liked the look, but the cost would have been ap. $500 for the 240 (m/l) sq.ft room. And, I had read that there are often mold issues because the vinyl doesn't let moisture from the crawlspace evaporate. We live on soggy clay, so I didn't want to chance using the vinyl.
A friend had suggested that I paint the OSB sub-floor until I decided what type of permanent flooring to use, but I didn't want the bumpy surface that would naturally look like painted OSB. I'd found a blog that described how a couple had installed a plywood floor, so I decided to try that.
Instead of cutting the plywood into planks, I laid 4x8 sheets, then scored grooves to simulate 8" planks. Following are my pics, and instructions, if anyone else is crazy enough to try this:
First sheet of hardwood underlayment plywood, lined up with the joists.
{{gwi:2067318}}
Plywood finished, using ring-shank nails and construction adhesive. (The scrap piece has sample grooves cut with a circular saw, router, and by hand. I didn't want to build a jig for the saw or router, so I decided to go the by-hand route--I should have my head examined.)
{{gwi:2067320}}
Grooves finished. It took a long time to do this part, but cost me nothing in materials (except knife blades). I had marked my nail placement on a 4' template, leaving room for the lines. I used a laser level to mark the 'edge' lines, from one end of the room to the other (LOL, had to wait until after dark to mark them!), then used the 4' level as a straight edge. I cut one side of the groove, using a utility knife, then moved the level over 1/16", and cut the other side. I had to make a couple of passes with the knife to clean out the groove, and had to change blades often. I used a small file to pry out stubborn pieces.
{{gwi:2067324}}
A coat of oil-based primer, a base coat of satin latex (mixed some left-over colors), a coat of 'Dry Earth' latex porch and floor paint, and I'm ready to measure and tape the designs.
{{gwi:2067327}}
I forgot to take pictures of the taped design, but this is the finished hopscotch board.
And here's my checkerboard! I plan to use some wood scraps to make checkers and chess pieces, so the grands can lay on the floor to play.
Close-up of hopscotch square. I used some of the 'Adobe White' cabinet paint, and some metallic paint left over from the accent wall in the LR. Then used three coats of water-based sealer, to protect the paint.
{{gwi:2067334}}
Since I used some left over paints and sealer, the cost of the floor was about $150.00. Compare that to $500 for vinyl planks, or sheet vinyl. This is an experiment--I don't know how it will wear long term. If it holds up well, I may do the same thing in the kitchen and DR. And, there's no harm done--it's underlayment--it can eventually be covered with vinyl, tile, or hardwood.
I still need baseboard trim, door trim, and thresholds, but it's so gloomy and overcast here today, I wanted to share my fun floor. A few more pics:
{{gwi:2067336}}
If anyone is thinking about doing this, and has questions, I'll be happy to help.
(Edited to correct spelling, of course :P)
**Editing to try to add a photo:
Here is a link that might be useful: Painted plywood floors/Skydrive album
This post was edited by mama_goose on Tue, Feb 19, 13 at 10:31


tuesday_2008
marymarymaryk
Related Professionals
Anchorage Architects & Building Designers · Auburn Hills Architects & Building Designers · Rocky Point Architects & Building Designers · Griffith Home Builders · Grover Beach Home Builders · Lakeland South Home Builders · Norco Home Builders · Spanish Springs Home Builders · East Patchogue Interior Designers & Decorators · Linton Hall Interior Designers & Decorators · Mount Sinai Interior Designers & Decorators · Rosaryville Interior Designers & Decorators · Bell Design-Build Firms · Honolulu Design-Build Firms · Mililani Town Design-Build Firmsmama goose_gw zn6OHOriginal Author
schoolhouse_gw
TxMarti
mama goose_gw zn6OHOriginal Author
Shades_of_idaho
EATREALFOOD
Laura6NJ
TxMarti
Brenda89
mama goose_gw zn6OHOriginal Author
Laura6NJ
mama goose_gw zn6OHOriginal Author
lavender_lass
mama goose_gw zn6OHOriginal Author
Laura6NJ
daisyblue
rafor
mama goose_gw zn6OHOriginal Author
autumn.4
mama goose_gw zn6OHOriginal Author
mama goose_gw zn6OHOriginal Author
shadygrove
Nancy in Mich
mama goose_gw zn6OHOriginal Author
enduring
jannie
mama goose_gw zn6OHOriginal Author
enduring
mama goose_gw zn6OHOriginal Author
enduring