


Calling all plaster wall repair experts!
While removing wallpaper I came across a 1 foot square of loose plaster that feels as if it is pulling away from the lathe and is a little crumbled. If I can frost a cake, surely I can repair this wall. Can anyone suggest a good source for step by step repair?
Also, how difficult is it to repoint brick? I am in the process of stripping all my windows and doing all the reglazing myself. I enjoy it and have had good results. Is repointing lots more difficult that stripping, priming, painting and reglazing?
Thanks in advance for any and all help.
Debbie
Comments (54)

sycamore_guy
19 years agoI am always learning something on these posts - what is a 'fibered base coat'? Is this like the horse hair in old plaster?
brickeyee
19 years agoYes. Adding fiber strengthens the base coat and allows the keys to form correctly.
"Basecoat plaster is ordinarily purchased premixed, with retarder included, so you only add water and stir. It may be applied as thick as is necessary, and it will not crack or shrink."
Red Top Wood Fiber Plaster is a common product. No USG base plasters contain retarder. Faster setting produces a stronger plaster. Base coat is available in 50 and 100 pound bags, and is a PITA to mix and use without power mixing (even with retarder added). If excessive water is added to try and delay setting (a common beginner mistake) all plasters can exhibit excessive shrinkage (and some will crack during drying).
Durabond is a more modern version of gypsum plaster with longer working times (over 120 minutes or as short as 20 minutes if you have a small job or can work very quickly). Like plaster it hardens by chemical reaction, not loss of moisture. It is available in 20 pound bags. You could actually fiber the Durabond and add sand for use as a base coat (I still occasionally do this in an emergency by using fiberglass insulation and builders sand).
No attempt is made to make the drywall patch conform to an odd shaped opening tightly. It is more of a material saver, and avoids the need for fibered base coat. Rough cut it to fit flat on the lath, coat the back with Durabond, moisten the lath with a spray bottle, and slap the piece in place. A few drywall screws will hold it in position tightly until the compound sets.
I do smaller repairs using 20 minute compound so the entire job can be finished in a few hours.Related Professionals
Ewa Beach Kitchen & Bathroom Remodelers · Banning General Contractors · McPherson General Contractors · Newburgh General Contractors · Ravenna General Contractors · Stoughton General Contractors · Palm River-Clair Mel General Contractors · Dayton Painters · Decatur Painters · Culpeper Painters · La Quinta Painters · Meridian Painters · Saint Louis Park Painters · Welby Painters · Winnetka Painterssycamore_guy
19 years agoAs mentioned earlier, I am always learning on these posts.
Corgilvr - don't give up. I am certain brickeyee is completely correct with his/her advice, but I have mucked through plaster repair without fibered plaster and so far the patches are holding up. It seems to me the most critical thing is to get the surrounding area moistened before starting so the patch cures before it dries.
The idea of drywall instead of a base coat seems absolutely brilliant though.
My advice - go for it. I was afraid to start, but actually the patches I made in one room are better than the parts I didn't patch and I'm getting better with each attempt, and will be better still after reading these posts. And, I have lots of holes and cracks to practice on.
brickeyee - any comment on where perlited plaster fits in (if at all)? That is what I can find fairly readily in local shops.
ericwi
19 years agoIn case no one has noticed, the world of homebuilding has moved away from lath & plaster, to sheetrock. It should not be surprising, then, that folks who are out in the field doing remodeling, repair work, or new house construction, would be more familiar with sheetrock, and also be highly skilled with joint compound, used to finish off a sheet rock repair. I have no doubt that these methods and materials work, and can produce good results.
I am familiar with more traditional methods of lath & plaster repair, although I have never worked with horsehair as an additive to basecoat plaster. I am not THAT traditional...
If your missing plaster is odd shaped, and looks like it might be difficult to fit with chunks of sheet rock, then you might consider using basecoat plaster followed by finish coat plaster, to accomplish the repair. The materials are available, they work well, & the repair will be permanent.
Perlited plaster would generally be used for a basecoat, because the added perlite is soft. A finish coat of lime and gauging plaster would be applied over the perlited base coat. However, the base coat plaster we have available locally contains added fiberglass. It is very strong when it sets up.
brickeyee
19 years ago"In case no one has noticed, the world of homebuilding has moved away from lath & plaster, to sheetrock."
It depends on your location. Single coat veneer plaster is still common in the Northeast and higher end construction. Two coat on gypsum backer is done in some larger Eastern cities.
Structo-lite is USGs premixed perlite plaster. It is lighter, has better insulation value (though in typical wall thickness it does not buy very much). It requires a finish coat, and can be harder to get a smooth finish than sanded plaster due to the larger aggregate size.
Unless you have a truly historic building and need to preserve the complete plaster system, using modern setting compounds for smaller repairs works very well. The typical drywall finisher does not have a clue how to perform these repairs, and normally wants to slap a layer of drywall over everything and move on.
Fiberbond was available for a while and made an excellent substitute for 2 and 3 coat plaster walls. It used recycled paper and gypsum with no surface cardboard layers. It had larger gypsum particles in the center and finer particles at the surface. It was very strong and very heavy (over 85 pounds for a ½ x 4 48 sheet. USG has something by the same name, but I have not used it yet (I have been conserving the old stuff I have carefully).
I am starting to work on repairing run in place plaster cornice molding in a 1950 era house in a few weeks. Plaster is on order and the molding horse with pattern is built. About 12 feet along one wall, around a corner, and 5 feet on the next wall are water damaged. I do these types of repairs about 1-2 times a year. The bill is very large.frenchgirl2838
19 years agoDoug, won't liquid nails eventually leech through and stain the new plaster you've applied to the patch? Just a thought, becuase it seems anything that is "foreign" in my patching has eventually, shown up again down the line. I've never done it that way, so I'm just curious.
victorian_bellefonte
19 years agoI wouldn't call myself an expert, but certainly an old house enthusiast with experience on three old homes done with sympathetic restorations. One small request...
PLLLLEAAAASE don't use "regular premixed sheetrock compound" (or unmixed) when repairing plaster! You are dooming the next owner/restorer to a miserable redo of your work. Sheetrock compound will dissolve in water, so the next wallpaper removal will leave the same mess you found. I have undone many wallpapered plastered walls, and it is very frustrating to find when someone half-a$$ed the job instead of researching the right way to do it. I am currently redoing a 25'x15' room with 12' ceilings, and plaster dating to 1883. The guy who papered our home in 1898 (and signed the walls!) did it right, but someone later did a poor job with a non-plaster patch that dissolves. So I'm looking for a plaster retardent as I go to patch the surface holes...
There used to be an old thread on the "This Old House" website bulletin board entitled "Inappropriate Alterations" and you wouldn't believe what people do to houses. Anyone remember it? It was the funniest thing I've read online. Anyway...
"Anything worth doing is worth doing well"
michorion
19 years agoI'm no expert, just what I've done. I use metal lath for big holes and screen for the cracks. If I have an area that is all crumbly I take it down and put drywall up and then build it up. I just make sure to get drywall that's thinner than the plaster on the wall.
sandyb1126
19 years agoI have a small crack in the dry wall and I would like to know the correct way to fix it before I paint. I also have to do something about the crack between the wall and the base board. There is caulking there that has cracked. Do I have to scrap all the old caulking away or can I just put caulking over it. And what kind of caulk do I use? I get so confused when I go the home improvement store. There is so much to choose from. Thanks for you help. I want to do everything the correct way so I don't have to repair again.
starskygirl
19 years agoOkay guys...I got one for you. I live in a post war home (1945) and my daughters bedroom walls are..(you guessed it!) lath and plaster. Actually the whole house is pretty much that way except for the kitchen where the guy TRIED to put drywall up (no corner joints- just drywall side to side and painted not taped).
A few years ago when I was ignorant I used drywall compound to fix a 2 foot by 3 foot hole in the wall. Now I have taken the wallpaper down on the other wall and discovered it is extremly crumbling just with a touch. I am going to have to fix a major hole by the time I am done, knocking out large amounts of old plaster.
The other wall is toast as well. It looks like someone stuck their finger in and made a hole and its going from there. When you press on the wall its pretty much gone. SO......
Here is my question...If I am to repair a HUGE portion of wall, should I stick with the plaster you have all mentioned as well as metal lath if I need it OR should I just make the hole square...put up drywall and drill it on (I dunno about liquid nails...does it really leech thru?)
I am NOT restoring this home historicalyy just fixing it up. I dont want to leave the mess that the SFB's who had the house prior to us left us (painted wallpaper and silicone caulked wall cracks) but I also dont want to spend alot of money nor have a shitty job.
What do you all suggest? I want it to last since its a kids room, and I want to make it sturdy in case we ever sell, not leaving behind some crud job. I know I can do this, just not sure which way to go.
Oh yeah...have any of you ever started to knock out the old plaster and have almost the entire wall neededing repair? If so, what did you do to fix it. I'm afraid that might happen to me.
Starsk
brickeyee
19 years agoI do not know about Canada, but multi-coat plaster is expensive throughout the US. Single coat veneer plaster is reasonable in some areas, and unheard of on others.
You can repair the plaster using setting type joint compound (Easysand and Durabond are two US brands). They are a modern form aof plaster and do not soften on exposure to water (or dissolve either). You can even mix fiberglass into them to make a base coat for a multi-layer plaster repair.
If you just want a good repair and do not have the time or money for plaster, replacing with drywall is liable to be a viable repair. If the plaster is over wood lath, stripping to the bare studs is typically required. New sections of wood can be sistered to the sides of the old studs to project out and create a flat plane for the drywall (this is a lot faster than trying to shim).thisgirlshouse
19 years agoI'm in the process of repairing plaster walls in my 1920s home, and have found this thread very helpful. I was wondering, though, about options for repairing plaster when the base coat is still sound. Let me explain: sometime before I bought my house, some walls suffered water damage and the top coat was severly damaged in spots (no spot is bigger than 2 sq. feet). The top coat cracked so badly that it has completely flaked off the wall, but the horse-hair base coat is still in great shape.
Because the plaster is mounted to brick, rather than lath, drywall patches aren't the easiest solution. Removing the base coat won't be easy either since it's very firmly attached to the brick still. What options does this leave? Can I just apply a new top coat to the base coat? Suggestions?
brickeyee
19 years agoSkim with Easysand or Durabond. Use a plaster trowel and the work goes pretty fast.
mfiligenzi
19 years agoWow - just stumbled on to this thread. It's excellent. I have a question regarding "patching plaster". Our house is a 1930's vintage and I've used this to do some small repairs in my daughter's room. There's nothing on the bag to identify other than the "patching plaster" designation.So far, I've just used it in a single coat. Can anyone tell me if it's useful for larger repairs and what the advantages/disadvantages are to using it?
Thanks very much in advance for any help.
Mike
brickeyee
19 years agoIt is pretty terrible stuff since it hardens quickly and retarder is rarely available at the places selling it.
You probably noticed how hard it sets and how quickly. If you want as hard a finish and a little more working time try Durabond90. It is plaster product that sets up in 60-90 minutes (no matter how much water is added) and is as hard as plaster (since that is what it really is). Easysand is similar but formulated to be softer and can be sanded if you cannot get a perfect flat surface.mfiligenzi
19 years agoThanks for the info. The stuff is indeed very hard and sets quickly. Sanding it is no fun. I don't think I really need anything that hard, so I'll look for the Easysand.
Thanks again,
Mike
loomis
18 years agoI'm here to throw you another curve. Many years ago, in an old timey home repair book, I came across the section on plaster repair. They advised using old-fashioned plaster of paris. I tried it and it worked beautifully. The book mentioned that this type of plaster expands slightly when it dries. (Now I know you're all snickering out there, but I filled some very large cracks 15 years ago, and not a single one has opened up since.)
So here goes: Clean out the cracked area & wet thoroughly. A spray mister works fine. This will help the plaster to adhere and prevent the adjoining area from drawing the water out of the patching compound too quickly. Then go and mix a small batch in a disposable cup. It should be about the consistency of sour cream. Set your timer for 10-15 minutes. This is the down side of working with this stuff. It sets up quickly and needs to be thrown out as soon as it starts getting too thick, so you'll have to keep making fresh batches. Fill the cracked areas. Large cracks might require several coats. For small cracks, a damp sponge will smooth things out. Let it dry and then sand it smooth. Plaster of paris sands very easily, and this is why I like using it so much. Prime the area, then paint.
I have used premixed spackling compounds but have found that they dry rock hard and are nearly impossible to sand smooth.
Plaster of paris is wonderful stuff and it's cheap. I also used it to repair an area around the bathtub where the tiles fell out and the drywall behind them had crumbled. The tiles haven't budged since. I've also read that it can be used as a filler on grainy wood prior to painting (I may try this on my old wood kitchen cabinets). However, always remember to prime first.
brickeyee
18 years agoPlaster of Paris is the wrong thing to be using in a wall. The 'slight expansion; can lead to cracking when the material hardens in the surrounding surface.
Classic plaster was a mixture of lime putty and plaster. The plaster provided a faster set, while the lime putty provided the required work time. In parts of Europe, they use straight lime putty plaster and wait up to a year for it to cure (it cures by absorbing CO2 from the air).
Easysand and Durabond are modern versions of plaster with controlled setting times and better handling characteristics.
Durabond is as hard or harder than Plaster of Paris, while Easysand sacrifices hardness for the ability to be able to sand the repair if it id not to your liking. Durabond and PofP are nearly impossible to sand.LauraM62
18 years agoThis is a great topic right now for me! Brickeyee I hope you can give me an answer as you seem to know allot about these walls. We have a 1933 farm house we bought that we are repairing/remodeling. I have an area that I have removed paneling from the walls & acostic tiles from the ceiling. The tiles are easy, mounted on 1x2's, will just be repairing the plaster where the nails were. But the paneling was not only nailed on but also glued. The glue was old, and the paneling popped off easily, but I was wondering now about the plaster walls? Can I sand the glue down then skim with Easysand? Or is there something else I need or could do to clean up the patches of brown dried glue on the walls? Thanks !
bullheimer
18 years agoi'm using this powdered plaster stuff called Structolite. couple coats o that then i use taping compound over the top after squiring some water over it. dont need tape, fiber, nothin, sand the taping mud and BAM smooth wall. right now i am trying to figure out how to put the brush strokes in the light coat of taping compound for the original look
brickeyee
18 years agoI have removed glue from ceiling tiles and mirror walls (remember those?) from plaster walls over the years (who ever thought a mirror wall would look good in a 1936 house needs serious treatment). If the material is not hard as a rock, a heat gun (looks like a blow dryer but gets a LOT hotter) can usually soften enough to get almost everything off. The older stuff that will not soften I remove with a cheap 2 inch wide chisel (bevel down) and then just repair the surface. A dead blow hammer is easier to use for both control and avoiding wrist and elbow damage (dead blows have lead shot inside the head and deliver a blow without rebound).
robinesque
18 years agoI have a hole in the plaster AND the lath behind it. Someone sawed through the lath to make a 12" square hole. The hole is inside a high cupboard, so the repair doesn't have to look good. The hole is in an un-insulated exterior wall, so the repair has to restore the insulating properties of the plaster wall, and seal off the dead air space. Any suggestions for the best way to restore the insulating properties of the wall without expending effort on making it look good? Thanks!
brickeyee
18 years agoPlaster walls do not have very much insulation value. They are effective at preventing infiltration (air leakage) but the R value is nothing to restore.
If you want additional insulation use some fiberglass.
To repair the hole you can place some pieces of 1x lumber across the opening behind the plaster and attach it using drywall screws and construction mastic the glue in the caulking tubes). The attach drywall to the 1x using screws and stack enough layers to get close to the original surface without being to high. Mix Easysand about as thick as peanut butter and there will be almost no shrinkage and it will fill the remaining gaps a long as they are less than the thickness of the plaster. After the first coat, apply mesh tape and put on the top coats.cjbwillow
18 years agoSomeone suggested that I use ThinCoat to apply over my plastered walls. You apply it with a trowel. Am I making a mistake?
mindyb
18 years agoI'm wondering how in the world people made their ceilings & walls flat and thick in the olden days when they first made these.
Did they start by mooshing the plaster mixture through the lathes like peanut butter, and building more layers on top of that? And did they have levels a year ago? How did the ceiling not fall on their heads as they were applying this stuff above them?
ericwi
18 years agoBasecoat plaster is very thick, about the consistency of peanut butter. You have to force it between the wood lath, when applying this material to a ceiling. There is some effort involved, and arms get tired after a few hours of this work. It will not fall while wet, provided that the wood lath was properly wetted beforehand. Also, there is a limit to thickness-I am sure that a 2 inch layer would fall away from the lath.
corgilvr
Original Author18 years agoEric, I hope you and your family have a great holiday. You have helped so many of us solve problems in our homes. I'm sure we'll all have new issues in the new year!
mindyb
18 years agoThank you, Eric.
I bought "patching plaster" at Home Depot (orange box). I'm guessing this is neither basecoat nor finish. It goes on tan and dries gray. My plaster ceiling is white or yellow depending which room you're standing in. Therefore, it will be hard to match. Do you guys try to match or do you just re-do the entire ceiling?
I've looked at some online videos from "This Old House" and most say to repair holes with drywall, and to repair cracks with joint compound. Are they right?
I'd love to try to repair a hole with basecoat and cracks with iridescent finish if I can find them, but if not, I will probably give up and put up joint compound and make textures with one of those mud rakes.
ericwi
18 years agoI have never tried to color match with plaster. Plaster does not stick well to a painted surface, so the emphasis is on getting rid of the paint before a local repair is made. After the repair is completed, paint can be applied a week or so later, when the new plaster has cured.
If you have plaster walls/celings, with wood lath underneath, it might be worth the time and trouble to obtain a bag of basecoat plaster, gauging plaster, and finish lime. It is fairly simple to use these materials and get good results on smaller holes, up to 18 inches in diameter. If you have to repair an entire wall or ceiling, then you will very likely end up with a wavy and unacceptable surface, for your first attempt. It takes some skill and experience to plaster a large area, and get a flat and smooth result.
Cracks in plaster walls/ceilings are a problem, because they tend to reappear in the same place, at a future date. That is, they don't "stay fixed." I have had some success using paintable caulk in long cracks, and then painting the surface when the caulk has cured. Caulk is more flexible than either finish plaster or joint compound, and it might therefore resist cracking at a future date.
rgaidies
18 years agoPull the old plaster down to the lath.
Make sure lath is secure and not rotted.
Cut some metal screening (chicken wire) Staple into the void.
Pull wire mesh back from lath to allow plaster to flow into wire mesh.
Fill with brown coat plaster.
For scratch coat I applied it using a foam roller to rough surface, worked great.
Finish wih final coat and trowel smooth, sand if reqd and paint.gretch0547_hotmail_com
17 years agoas I speak our kitchen is being plastered and I am worried that the people doing it are not doing it right...I have spoken to my husband who says don't worry they know what they are doing. They put up blue board and then are mixing one step veneer plaster with sheetrock brand joint setting compound 90. once that is dry they will then cover with 100% venner plaster...will this be ok???
brickeyee
17 years agoIt will be fine.
The 90 minute compound will stretch the hardening time a little.pikklls
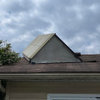
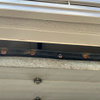
14 years agoI had a roof leak which caused damage to the plaster wall over the windows in a bedroom. The plaster there is crumbling and powdery. The roof has been replaced and now I want to fix this wall. The damaged area is between the window molding and the ceiling. It's about 8" high by 3 feet long. I'm not sure if it would be easier to replace with plaster or drywall. The wood lathe looks fine. oh yeah, the house is circa 1930 and there is alot of wallpaper and paint. will this hamper the repair? any suggestions?
brickeyee
14 years agoThe wallpaper will need to be removed around the edges of the repair to allow making a good joint.
If the paint is solidly attached it is not a real issue, but if it is thick enough to alligator or is peeling it can be a problem.
Durabond and Easysand are modern versions of plaster.
They set by chemical reaction in preset times.Wood lath would indicate a 3-coat plaster job.
How much of the plaster is actually damaged?
In many cases the finish coat lifts but the scratch (2nd coat) and base coat (AkA brown coat) are still solid enough to repair over.skyedog
14 years agoBrickeye,
We have a part of a back hallway where the plaster is missing. There is is wood lathe exposed for about 1/2 a sq foot and then the rest is brick. The portion of repair with brick backing is about 1 sq foot. If I put sheet rock over the entire patch the sheet rock is too thick on the bottom of the patch because the wall is not plumb and I am up against a door jamb. If I put sheet rock over the wood lathe the thickness is OK. Can I just Durabond/ easy sand over the brick in layers until I get to the correct thickness and still use sheetrock on the top portion of the repair? I've been repairing the plaster in this house for years using Durabond and Easysand because no other plaster products are available where I live.
So far so good but I've never has a problem like this before.brickeyee
14 years agoUse Durabond for a base layer over the brick.
Be sire to moisten the brick enoough that it looks damp or it will dry out the Duran=bond before it can cure correctly.
A bonding agent like EucoWeld can help here.
If you cannot find a bonding agent Elmer's white glue cut about 50% with water can work.
After brushing it onto the brick let it dry enough to start getting thicker and tacky, then apply Durabond.
The Durabond should be about as thick as peanut butter.
Start with a layer about 3/8 to 1/2 inch thick.
If you go to thick the material may slump and pull away before it hardens.
Press it pretty hard against the brick so it grabs with no gaps.After the Durabond hardens you can finish filling with Easysand if you want, or add more layers of Durabond.
Durabond is very hard and does not sand well, so make sure you do not have to much of it anywhere.
Another layer is a lot easier than trying to carve off material.You can switch to Easysand for the final thin layers if you do not think you can work the Durabond well enough for a finished surface.
jai77
13 years agoBrickeye,
We moved into this 5,000 sq feet home back in feb. We absolutly love it as we have 7 children. There is one room however that I am having problems with. A tree fell on the roof back in Dec. and we have a metal roof. well water got down into the wall (roof has been repaired). All the walls in the house are brick with I am guessing plaster on top of them. Its really hard like cement but in the corner where there is water damage its crumbling like sand. I removed all the paint, wallpaper, paint again that was on top because it had started to mildew and thats when i got down to this stuff that looks like cement but when you run your fingers across some areas it looks like sand on your fingers. Im not rich and its one complete corner in the room. Any Ideas on how I can fix this or atleast get it to a point where we can use the room? Again we have 7 children, not alot of money and we dont know anything about plaster.
brickeyee
13 years agoIt sounds like you are down to the brown coat of a 3-layer plaster job.
Sand and fiber (horsehair) were often mixed into the coat.The sand as a filler and the horsehair to let the plaster create 'keys' when pushed through lath.
The fiber was often omitted for a brown coat on masonry (keys not really needed there).You can take off everything loose and use Durabond to put a new base coat up. Be sure to dampen the substrate so it does not pull water from teh patch and prevent correct hardening.
I would stretch it with sand a little bit to save $$ on the job.
Plain old 'builders sand' works fine.
Use a long seting time Durabond so you can get everything mixed before it starts to harden up.
Once hardening starts you have to throw away the rest of the batch.abbott2617_comcast_net
13 years agoWe are remodeling our 1930s kitchen. The plaster is cracked and crumbly in some good-sized areas (2' by 4' and 3' x 5' approx). Our trusted electrician insists that the kitchen contractors should demo the plaster and replace it with drywall in the worst areas. The kitchen contractors (whom we've never used before) do not believe this is necessary, and that patching the plaster will be sufficiently strong. They say that if we apply drywall to the old plaster, the new cabinets will not fit, and it seems to me that the extra weight of drywall on already-cracked plaster will only worsen the problem. They caution against doing a complete plaster removal due to the expense and amount of dust. (2 people in our household have asthma, so this is an issue). One wall is exterior brick with no studs beneath the plaster. Another is terra cotta block, also without studs. Metal mesh lathe is used throughout. Because there are no studs, how can they anchor the new 42" solid cherry wall cabinets with either scenario? Without studs, will the brick-plaster or brick-terra cotta systems hold up? (Our previous cabinets were 32" metal). Chat room advice is as varied as my contractors'. I don't know whom to believe!
brickeyee
13 years agoYou can repair the damaged plaster without that much work.
In areas directly on masonry use Durabond as the base coat with a liberal application of bonding agent (Eucoweld works well).
If perlite base plaster is available it is lighter and will work well on masonry with no fiber added.You can top it with Easysand to make a finish coat (plaster is very hard to sand, so make sure the base coat is at least 1/8 inch below the finished surface).
Your cabinet installer has a couple options for anchoring.
He needs to anchor into the masonry.
A common method is to remove a strip of plaster 3/4 inches deep and about 3 inches wide, then use masonry anchors (likely with different types for brick vs. terra cotta) to attach a wooden ledger to the wall.
The cabinets are then fastened to the wood ledger.
chipster_2007
13 years agoThis was an excellent thread. I will print for future use. Thanks to Everyone.
I have one question: when using a metal screen (holes look like they are 1/4" wide, how exactly do I staple this? To the lath? With what type of staples? Under what circimstances would you use a metal screen? Thankssombreuil_mongrel
13 years agoOne uses roofing nails to attach metal lath, but if I have them, I use screws with plaster washers, because there's less chance of dislodging things if there's no hammering.
Caseyciv_IV_fan
13 years agothis is a fantastic thread.
anyone use water putty (like durham's) to repair plaster? it doesn't expand and dries fast. it is also sandable.
brickeyee
13 years ago"anyone use water putty (like durham's) to repair plaster? it doesn't expand and dries fast. it is also sandable."
And costs much more than a bag of Easysand20.
brickeyee
12 years ago"Third, if you have lath and wet plaster walls, and the plaster is actually missing, then you need to get out the plastering tools (or hire a plasterer)."
Good luck even finding a plasterer in may areas.
It is mostly a dead profession.
buffaloranch
11 years agoI have seen a sand and plaster of paris in a 3:1 ratio used as scratch coat and brown coat. Is the durabond product better than that mix or more convenient? I have been researching and so many different mixtures are being used. Just checking on the correct products for the three coats.
brickeyee
11 years agoHow authentic do you want to be?
Retarder, fiber, plaster of Paris, and sand are typical base coat ingredients.
The next coat gets less sand, no fiber, plaster ad retarder.
The finish coat is lime putty and plaster the lime putty acts as the retarder.
Straight lime plaster takes months to cure.
floodandwatercare
9 years agoHey Debbie, here is a site that you could use.. www.floodandwatercare.com


corgilvrOriginal Author