


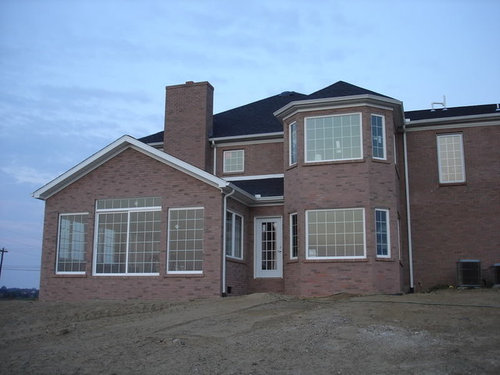
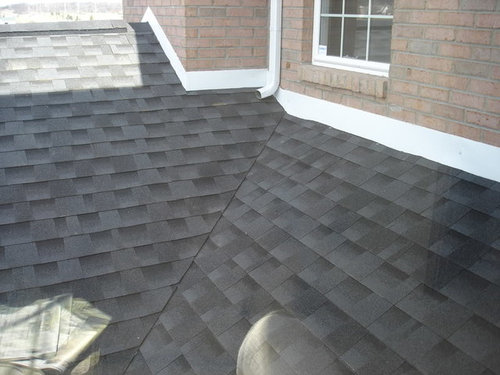
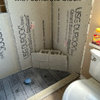
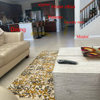
Where is our leak coming from?
weedyacres
15 years ago
Sort by:Oldest
Comments (38)
Related Stories
STUDIOS AND WORKSHOPSStudio Tour: A Sunny Space Where Ceramic Creations Come to Life
Tour a dynamic and organized Brisbane, Australia, home studio
Full Story
ECLECTIC HOMESHouzz Tour: A Toronto Home Comes Back From the Brink
Not even squatters deterred an interior designer from turning an abandoned 4-bedroom into a chic, unique home
Full Story
LIFEReading in Bed Comes Out From Under the Covers
No more sneaking a flashlight beneath the sheets. Grown-up bedtime reading deserves grown-up lighting and other bedside amenities
Full Story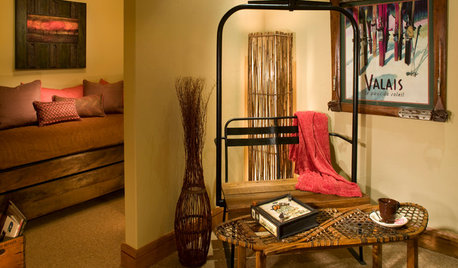
FUN HOUZZDouble Take: Did That Chair Come From a Ski Lift?
Clever homeowners find ways to repurpose chairlift seats indoors and out
Full Story
DECORATING GUIDES25 Design Trends Coming to Homes Near You in 2016
From black stainless steel appliances to outdoor fabrics used indoors, these design ideas will be gaining steam in the new year
Full Story
HOUZZ TVHouzz TV: First Comes Love, Then Comes a Wildly Colorful Mosaic Home
This couple spent two decades covering their home inside and out with brightly colored mosaic tile, vibrant paint, small toys and more
Full Story
REMODELING GUIDESWhere to Splurge, Where to Save in Your Remodel
Learn how to balance your budget and set priorities to get the home features you want with the least compromise
Full Story
MOST POPULAROvernight Guests Coming? How to Be a Great Host
Ensure a good time for all — including yourself — by following these steps for preparing for and hosting houseguests
Full Story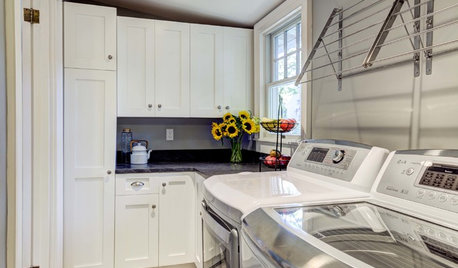
THE HARDWORKING HOMEWhere to Put the Laundry Room
The Hardworking Home: We weigh the pros and cons of washing your clothes in the basement, kitchen, bathroom and more
Full Story
SELLING YOUR HOUSEA Moving Diary: Lessons From Selling My Home
After 79 days of home cleaning, staging and — at last — selling, a mom comes away with a top must-do for her next abode
Full Story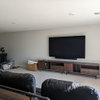


homebound
mightyanvil
Related Professionals
Cuyahoga Falls Kitchen & Bathroom Designers · Bethel Park Kitchen & Bathroom Remodelers · Hickory Kitchen & Bathroom Remodelers · Kuna Kitchen & Bathroom Remodelers · South Park Township Kitchen & Bathroom Remodelers · Trenton Kitchen & Bathroom Remodelers · Ashtabula General Contractors · Bartlesville General Contractors · Geneva General Contractors · Irving General Contractors · Klahanie General Contractors · Mira Loma General Contractors · Mishawaka General Contractors · North New Hyde Park General Contractors · Rowland Heights General Contractorsron6519
sierraeast
jejvtr
mightyanvil
weedyacresOriginal Author
jejvtr
frodo_2009
homebound
weedyacresOriginal Author
homebound
homebound
weedyacresOriginal Author
homebound
frodo_2009
weedyacresOriginal Author
mightyanvil
weedyacresOriginal Author
mightyanvil
weedyacresOriginal Author
weedyacresOriginal Author
sierraeast
sierraeast
mightyanvil
weedyacresOriginal Author
mightyanvil
weedyacresOriginal Author
jejvtr
annzgw
mightyanvil
mightyanvil
mightyanvil
jejvtr
klaire2001
weedyacresOriginal Author
weedyacresOriginal Author
sierraeast