


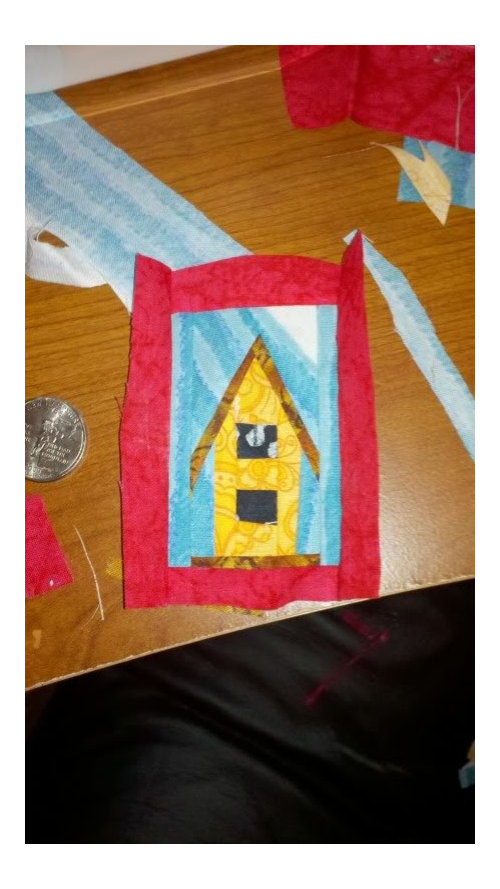
paper peicing question
vacuumfreak
11 years ago
Related Stories
REMODELING GUIDESSurvive Your Home Remodel: 11 Must-Ask Questions
Plan ahead to keep minor hassles from turning into major headaches during an extensive renovation
Full Story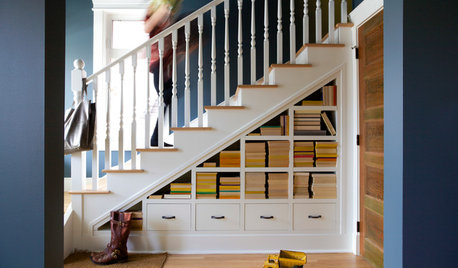
ORGANIZINGPre-Storage Checklist: 10 Questions to Ask Yourself Before You Store
Wait, stop. Do you really need to keep that item you’re about to put into storage?
Full Story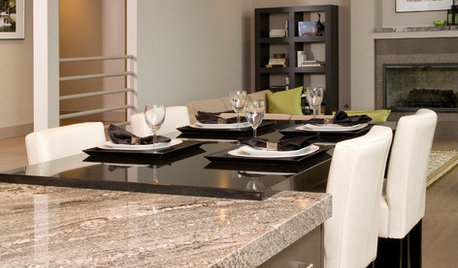
REMODELING GUIDES9 Hard Questions to Ask When Shopping for Stone
Learn all about stone sizes, cracks, color issues and more so problems don't chip away at your design happiness later
Full Story
DOORS5 Questions to Ask Before Installing a Barn Door
Find out whether that barn door you love is the right solution for your space
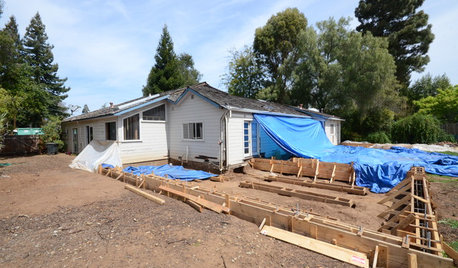
Full StoryREMODELING GUIDESConsidering a Fixer-Upper? 15 Questions to Ask First
Learn about the hidden costs and treasures of older homes to avoid budget surprises and accidentally tossing valuable features
Full Story
FEEL-GOOD HOMEThe Question That Can Make You Love Your Home More
Change your relationship with your house for the better by focusing on the answer to something designers often ask
Full Story
WORKING WITH PROS9 Questions to Ask a Home Remodeler Before You Meet
Save time and effort by ruling out deal breakers with your contractor before an in-person session
Full Story
GREEN BUILDINGConsidering Concrete Floors? 3 Green-Minded Questions to Ask
Learn what’s in your concrete and about sustainability to make a healthy choice for your home and the earth
Full Story

MOST POPULAR8 Questions to Ask Yourself Before Meeting With Your Designer
Thinking in advance about how you use your space will get your first design consultation off to its best start
Full Story

magothyrivergirl
lola99
Related Professionals
Houston Furniture & Accessories · Kearny Furniture & Accessories · Carlsbad Furniture & Accessories · Highland Park Furniture & Accessories · Hilton Head Island Furniture & Accessories · Millburn Furniture & Accessories · Corona Flooring Contractors · Mesa Flooring Contractors · Roselle Flooring Contractors · Silver Spring Flooring Contractors · Camarillo Furniture & Accessories · Fort Carson Furniture & Accessories · Genova Furniture & Accessories · San Diego Furniture & Accessories · Temple Terrace Furniture & Accessoriesjennifer_in_va
vacuumfreakOriginal Author
msmeow
magothyrivergirl
Robbi D.
msmeow
colleenny
lola99
vacuumfreakOriginal Author
new2quilting