GardenWeb provided some great tips for building my Brazilian Redwood deck and since Spring is here I thought I might provide DIY’ers a little of what worked for me.
I built my original deck 18 yrs ago with all heartwood domestic redwood using hidden deck fasteners to create the look of a floor. It was beautiful but the lack of spacing between the boards created poor airflow causing it to rot. When I removed the redwood I found the green treated joists were still in great condition but the joist hangers had reacted with the copper in the treated wood and had become paper thin and near failure. I researched more about the reaction and learned I needed heavier joist hangers made for treated wood.
I purchased 5/4x6”x14’ Brazilian Redwood from a local lumber yard in Boulder CO. The thickness was uniform and most boards were 5 ½” wide but some were 5 3/8”. I stacked the boards on 2x4’s in a covered garage for drying adding “stickers” between layers for air flow. Warped boards were faced against each other with the ends touching and the middles often having a gap exceeding 1 inch. I threaded heavy belt clamps around the stack and with 2x6’s on the sides so the belt wouldn’t damage the boards I tightened it all down pulling everything together. While I couldn’t draw some stacks totally flat the first day I was able to pull it together as the days went by. I had 4 of these stacks of wood pulled tight to remove the warp. Box fans blew air through the wood and a month later when I removed the clamps the boards remained straight with only a few moving back to a warp of less than ¼” over their 14’ length.
The first row installed went down the middle of the deck along a chalk line. I selected the straightest boards and made sure they were all the same width. From then on I used the middle row as the reference to insure all boards were continuing straight and occasionally used clamps to force them into position. I used boards of the same width on each row and I used a plastic deck jig that when placed between rows provided the ¼” spacing. The jig also had holes for correct screw location. I used a scratch awl to mark the hole locations and then slid the spacer back enough so I could drill pilot holes.
I have found that when looking at the end grain of a board the curve of the rings want to straighten flat as the board dries. Therefore I placed all boards with the ends showing the growth rings turned up like a smile. One of my boards was cut in such a way that one end had rings facing up and the other end had the rings facing down. The end of that one board with the rings facing down is the only board on my deck that has a slight cup and holds water after snowmelt (a major irritant to me). Placing my boards this way also positions them so that the drier heartwood is on top and the rings from the outer part of the tree that tend to be damper (sapwood) are facing down. I also made sure to design the sides of my deck to allow good air circulation.
I used SS 8x2-1/2” auger pt screws (0824-FAS-M) from McFeeley’s and drilled a full pilot hole complete with taper for the head and used a power drill to sink them most of the way and hand tightened them to complete the job (this avoided accidentally breaking a screw). My pilot hole did not extend into the softer pine joist. I also jabbed the threaded end of each screw in a can of paste wax to aid sinking the screws. To prevent quick drying of the ends of the boards and the resulting cracking I put George’s Club House Wax on the ends. This is a softer wax used on cutting boards and I was hoping for some penetration of the end grain. In fact it worked a little too well and even though I thought I was frugal it still soaked in on some boards and left a little discoloration where the ends met.
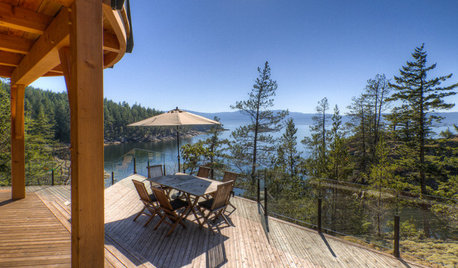
The deck will be two years old in July and has weathered to a nice gray with no end checking and minimal surface cracking (there are some surface cracks but not noticeable). I did not put on a sealer as I found too many conflicting reports as to how well it would take. In another area around the deck I built another project using leftover wood and I purchased a few stainless steel screws from a big box store. Those have discolored the Brazilian Redwood used on that project. I guess you get what you pay for. The Brazilian Redwood was extremely dense and I did go through two carbide blades and several pilot bits. It also created a dust that really set off my sinuses so I ended up using a mask, probably a good idea anyway. I did not anticipate how good the old joists would be and replaced very few of them but was shocked at the condition of the joist hangers which were from a leading company. I’m not sure anyone knew 18 years ago the effect the metals in the treated lumber would have on the hangers. I’m now reluctant to step out on older higher decks. I hope someone finds this useful and a heartfelt thanks to those who contributed in the past. Your advice was much appreciated.


Related Professionals
Norman Decks, Patios & Outdoor Enclosures · Orange County Decks, Patios & Outdoor Enclosures · Westminster Decks, Patios & Outdoor Enclosures · Ammon Home Builders · Converse Home Builders · Garland Home Builders · Roseburg Home Builders · Bossier City Flooring Contractors · Bristol Flooring Contractors · Green Bay Flooring Contractors · Superior Flooring Contractors · Cypress Siding & Exteriors · Derry Siding & Exteriors · Millburn Siding & Exteriors · Newington Siding & Exteriors