


Confusing....Photo fun!
juanital
15 years ago

Featured Answer
Sort by:Oldest
Comments (6)
Related Discussions
Need feedback on my seedlings
Comments (3)They look good to me, except for the dry soil in the spinach. It sounds like you are not giving either of them enough water, especially if you started with dry soil and have only sprayed. I would suggest continuing to put water in the saucers until they wont soak any more of it up. I would add water to the top of the spinach, not just bottom water it. It looks dry enough that it may be difficult to hydrate the soil. I use a water bottle with a drinking nipple. It makes it very easy to avoid flooding the seedling, since even holding the bottle upside down nothing comes out unless you squeeze it. Spinach like moist soil. Moving them closer to the lights. 2"-3" is what everyone recommends. At 5" they will get to leggy very soon. They dont need fertilizer until they have true leaves. Congrats on your babies - they should be just fine....See More'twas the night before drywall ... A Christmas rhyme
Comments (15)LOL mtnfever! On the right is actually a piece of framing that had to come down from elsewhere, placed here on my dining room floor for the time being. Behind it is the stack of sheet rock hopefully being installed as we speak. Together it looks a bit like a stage in the middle of my dining room, now that I see it with fresh eyes. I see how it could be confusing! The photo is taken from my entrance, there are two stairs to get up to the main floor. To the left is the stairs and landing that head up to the second floor. The dining room is immediately to the right/front and the kitchen is WAAAYYYY in the back behind the big beam/bulkhead. Hope that perspective helps a bit! Thanks to all for appreciating my late night ode. Breezy, nice to see you have internet again, I know your kitchen is fabulous so seeing your "before" helps me have hope that this process may end one day in a functional and pretty kitchen! CEFreeman I hope you'll get your finished space sooner than later! You clearly have much more patience and tolerance than me....See MoreRootstock question.
Comments (8)Nice link--excellent photos. Sow&grow--yes, this May/June, I'll cut the the cane of the rootstock, (the Fortuniana plant) between each bud, & root it under mist. The root stock, by definition, is easy to root. It will already have a successful bud growing on it. Here's a photo of a Fortuniana cane with lots of things budded to it. You can see that several of the buds (the 2 Kordes Brilliant at the bottom, especially) have grown into substantial canes. I could harvest cuttings from these to grow own-root--they are big enough--but I'm confident enough that the Fortuniana will root this summer with the buds already developed into canes. So, you might think, why go to all that trouble? Why not bud onto rooted sticks? Well, that IS even better. NOW, I have lots of sticks of various root stocks already rooted in band pots--this summer, I am READY to BUD! Rooted Dr. Huey sticks: Rooted Banksia stick, already planted in a band & ready to bud: When you get confident that you can root & bud reliably, the very easiest thing is to root & bud together. In early summer, cut your root stock canes, sit on your porch & bud them, then stick them under mist to root & for the buds to heal. Bud & root in one operation. I've done some of this, but am not confident enough in my success to choose this method every time. Especially with marginal or scarce scions, I prefer to bud to already rooted sticks--just one operation to deal with at a time. Here's a Pink Clouds stick budded last fall. I've trimmed off the top, Pink Clouds, growth. You can see three scions sprouting enthusiastically. Yes, tape as many buds as you want on a stick. I like to do 3-4. It's shockingly easy if you use the right materials. I'd say using Parafilm is a must--it's cheap, you can get it from Amazon for ~ $2.50 per roll & it's vastly superior to the old florists' tape. I first tried it years back--in total ignorance--just fooling around. I tried to graft actual stems, not buds, I did it in cool weather, I used florists' tape---everything wrong--& got zero success. I had no real incentive to try again until I started getting interested in some of the old HTs--always hard for me to root, & often poor plants own-root (e.g. Talisman--achingly beautiful bloom, such a poor plant own-root, & getting hard to find). They weren't available from Vintage anymore & if I didn't learn to bud, I couldn't maintain them, get many flowers or be able to share them. Confusing photo, but the big cane on the right is from a Talisman bud on RR. In a couple of months growth in the late spring, that bud made a cane larger than the own-root mother plant that's a couple of years old--and this isn't unusual. You'll have much better luck using buds, doing budding during warm weather (when the plants are actively growing & pushing the sap that will feed the buds while they're knitting into the stock) & using Parafilm--which actually lets you tape over the bud, snugging it into the cane firmly. After actually studying it recently, using chip budding, Parafilm & doing it at the right time of year, I got successful takes on everything I tried: Talisman on Ragged Robin, Mme. de la Roch-Lambert on Spray Cecil Brunner, etc. Here's a photo of one of my first tries. Mme. de la Roche was dying, so I slapped a few buds on a vigorous Spray Cecil Brunner plant--what was there to lose? That was in fall. Next spring, I was astonished to see a mossy cane shooting out from Spray Cecile! Then the 2 auxiliary buds sprout canes--neat! Another confusing photo, but I'm pulling the prickly Mme. dlRL cane out from the Spray Cecile Brunner bush it's still budded to. It's now several feet long. Since the excitement of getting it right I started a bunch of things last year & am enjoying seeing them develop. It's easy & presents success with just a little playing around. I hope you'll enjoy budding this year. This page from Kim's (Roseseek's) blog has very clear photos of all steps Pushing the Rose Envelop--budding And this video, showing Burling Leong's method is also very clear: chip budding Burling Leong's method...See MoreFALL is upon us... "seasonal thread"...
Comments (402)Flowers, I've had Russian sage in back in crucial spots, but I usually combine it with boxwood and lavender, along with butterfly bush and four o'clocks, slightly toxic like morning glories, to deer. None of this is much deterrence, though I think deer hate boxwood the most of all. It smells like cat pee. The deer here (mule deer) seem to be only interested in roses and occasionally tomatoes. They go for the blooms, buds, and growing tips of the rose. For some reason, they went beyond this typical damage when it came to Eglantyne, and they reduced her size a bit, and left a half dozen leaves on the poor rose. Any other flowering plant or shrub they don't seem to care about with two exceptions: a certain dianthus (Raspberry Surprise) that they wouldn't leave alone, and pumpkins, which they tried to bite. Mainly they just marked up the pumpkins with their teeth. I suppose if I had a lot of hosta and tulips they would destroy those. Thanks for your nice comments on Eglantyne. I'm not doing right by her, leaving her out in back to the deer. Noseo, your Russian sage is quite gorgeous. And you have the perfect home style for it and lavender. I just don't have any room anymore for R sage or lavender, so they end up down the slope. This helps with soil erosion, plus the deer, but it's a rip roaring mess out there on the slope. When I see what you have done with your sage and lavender, I am so jealous. I do have some roses blooming, but nothing like a flush, except for Julia Child, perhaps. It warmed up several days ago, and voila new buds and a few new roses. This will all end on Nov 6--the last day for photosynthesis here. After that, the sun will not be shining long or strong enough to promote new growth. Flowers is even farther north than I am, so her last day is a little earlier. You are south of us, so you have more good days left. Now I am jealous of you! Thanks, Sheila and Jim. Sheila, I'll bet you still have some wonderful R sage and lavender growing. Diane...See More
juanital
15 years agojuanital
2 years ago
Related Stories

GREEN BUILDINGLet’s Clear Up Some Confusion About Solar Panels
Different panel types do different things. If you want solar energy for your home, get the basics here first
Full Story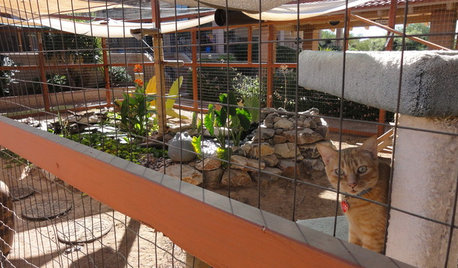
PETSSee a Deluxe 'Catio' Built for Feline Fun
Sixteen lucky cats get the run of a protected outdoor patio with ramps, steps and even a koi pond
Full Story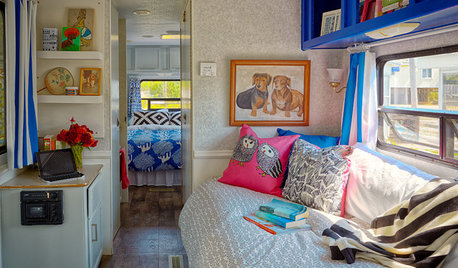
MOST POPULARBudget Beach House: A Trailer Gets Ready for Summer Fun
Punchy prints and colors star in a creative approach to Jersey Shore living
Full Story
LIVING ROOMS15 Fun Features for Family Rooms
Put the family back in your family room with a colorful mural, photo gallery or table ready for your gang’s favorite game
Full Story
DECORATING GUIDESRubber Duckie Day Fun to Float Your Boat
We’ve been in fine feather at Houzz gathering all the photos of duckies making their home in yours
Full Story
KIDS’ SPACESPhotos of 2013: The Most Popular Kids’ Spaces
Built-in bunk beds, cool colors and other smart design elements offer ideas for kids’ bedrooms, nurseries and playrooms everywhere
Full Story
KITCHEN PANTRIES80 Pretty and Practical Kitchen Pantries
This collection of kitchen pantries covers a wide range of sizes, styles and budgets
Full Story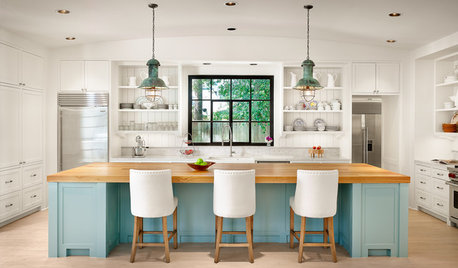
MOST POPULARHouzz TV: Let’s Go Island Hopping
Sit back and enjoy a little design daydreaming: 89 kitchen islands, with at least one for every style
Full Story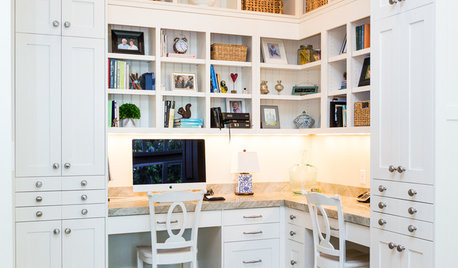
HOME OFFICESThe 20 Most Popular Home Office Photos of 2015
Technology paves the way for space-saving work areas, while designers make up for small sizes with style
Full Story
GREAT HOME PROJECTSHow to Design a Family Photo Wall
New project for a new year: Display your favorite images of loved ones for the most personal gallery wall of all
Full Story
zitro_joe