I posed this question several months ago when I first began researching (...and obsessing) about this project. There doesn't seem to be a lot of information out there (perhaps because it's an annoying and tedious task...).
But, as one of those who have tackled this and come out the other side, I thought I would share some tips and tricks and pics regarding the process. I won't post every picture, but I have documented the entire process.
Keep in mind: "YMMV!" This is one of the most important factors I learned with the process.
I found some info here and elsewhere. I posted questions at multiple DIY sites. I even called the American Brick Union for advice which was 'never sandblast'.
Some DIYers said they were able to complete this project in 30 days or less. Oh - really? It can't be that bad, right? Again - YMMV.
It took me about 4 and a half months from start to finish. This isn't working on it all day every day. You will loose your mind stripping brick 'all day, every day'. You have to walk away to keep your sanity as your friends will constantly be questioning if you have lost your mind by even attempting this task.
Also, it's a very physical process - my arms were quite tone and well muscled after this was done. My knees hurt...so get a good stool to sit on.
What matters is the type of paint on the first surface and then, how many layers of paint in total and the TYPE of paint on each revealed surface. As each layer of paint is removed, you're going deeper into time when oil based-lead paint was used or milkpaint, etc.
This requires different types of products in order to effectively strip the paint. It's not a 'one remover for all' situation. I used 2 types of paint stripper: Peel Away 7 for the first layers of latex paint and Peel Away 1 for the remaining layers oil based/lead paint - in that order due to the type of paint on the brick and both were recommended by PeelAway for masonary. I did speak w/PA several times for assistance. They were very helpful and even sent me a free sample of Peel Away 1 to test.
In my initial start, I discovered that there were 9-10 layers of paint. The original being the most difficult to remove - an ugly, mint green oil (?) based paint.
Even at the end of the process, I was not able to remove ALL paint. Paint over years somehow embeds into a porous product like brick to the point where full removal may be impossible.
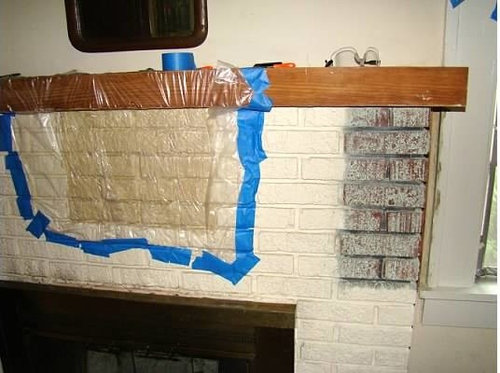
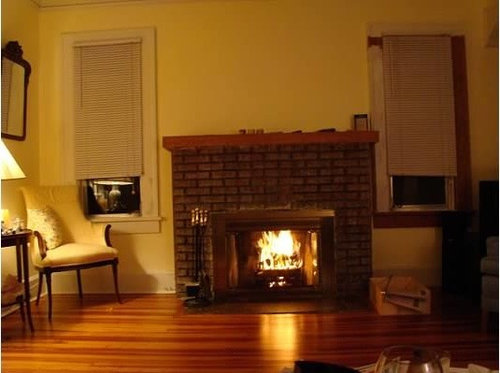
Starting the process...fireplace is currently painted an off-white that just looks 'dirty' all the time.
A very important point on floor protection. I have lovely hardwood floors that I didn't want to damage in the process. Again - YMMV - but, through trial & error, I discovered that using layers helped the most.
First, layer thick and many, many towels, then, plastic paint drop sheeting, then thick layers of newspaper. I also took paint drop sheeting and taped it up the walls to prevent the walls from being flicked with paint removal particles.
It's goopy and runny and scrubbing brick with wire brushes is a dirty, dirty job and sprays/flicks paint chunks every where - walls, floors, your hair....every where...wear goggles/eye protection for this process.
It takes lots of buckets of water to rinse Peel Away off. For PeelAway 1, you also have to rinse with vinegar at the end. ALOT of vinegar! I used about 14-20 gallons of vinegar. I learned that the hard way when I began cautiously sprayer vinegar and it didn't do much. So, I filled a bucket with it and used it to SCRUB the brick. HUGE improvement and right away.
None of the PeelAway products had awful odors and I had no problems with it in the house for months. It is not a 'quick' product due to it having to sit for 24hours and sometimes a second application is required. But, I was pleased with how it worked overall. Oh, it really doesn't come off onto the paper when you are applying this to brick. Don't waste your time being frustrated by that. Still cover it up with plastic sheeting to 'cook', but, you'll be scraping the goop off with plaster scrapers the next day.
Another tip, purchase a wide variety of wire brushes, plastic brushes, scraping tools, picks, grout cleaners and use your imagination on creating what you need. You'll go through a lot of brushes due to scrubbing brick.
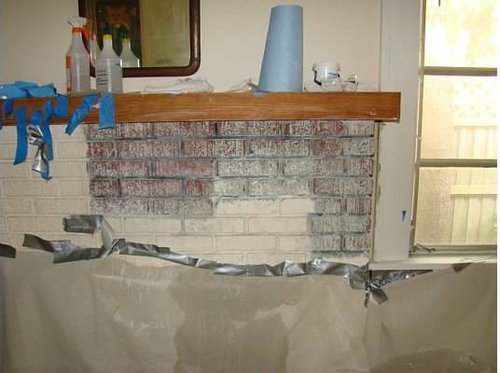
Again, some of this required multiple applications of PeelAway (PA). You can see the difference in some prior pics. This was the point that I was wondering if it would ever look good and if I was wasting my time doing this?...all that work and it wasn't looking "lovely" by any means...major panic happening!
Close up of brick. The top row had a second treatment...the bottom did not. Btw, failed to mention, my brick has a rough-cut brickface. Nothing smooth about it. If it were smooth, it would probably be a much easier process.
With white vinegar and heavy scrubbing/rinsing...you can see the big difference!
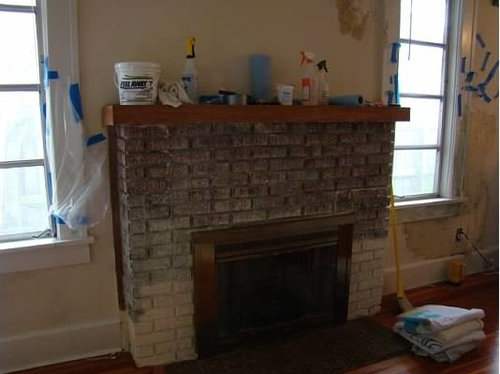
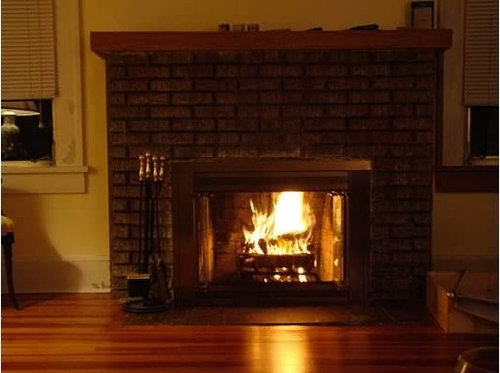
Done with the stripping!!!
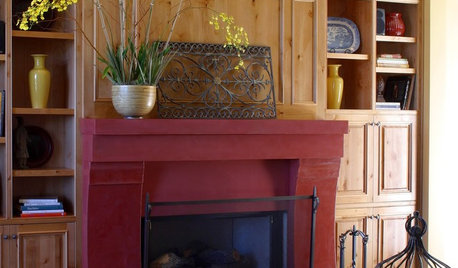
Applied several coats of 50/50 BLO (Boiled Linseed Oil) and mineral spirits. Really brings the color of the brick back. I hate the smell of BLO personally....eventually it does dissipate.
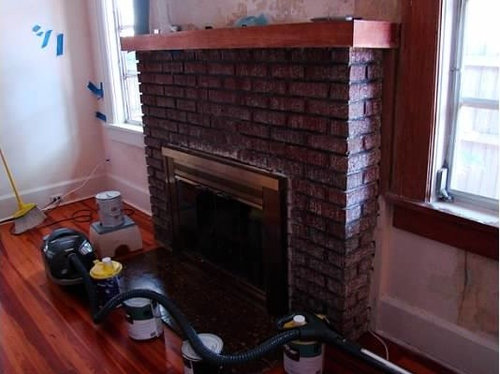
Here it is - done. For the most part, anyway. I still need to stain the mantle and trim. I'd like to touch up some of that brick too to remove some of the paint that is still showing. It's not 'perfect' but I'm happy with the outcome and do not regret taking the time to do this hard job. Although, during this process, I definitely had my 'second thoughts', but was too invested to stop.
I hope those of you who are contemplating this job find viewing my experience helpful!
In the process, while I was working on the fireplace, I also replastered the wall and stripped the window trim which still needs repainting. So, there is still more tasks to be tended too.


lido
SaintPFLAOriginal Author
Related Professionals
Euclid Kitchen & Bathroom Designers · Hammond Kitchen & Bathroom Designers · Hershey Kitchen & Bathroom Designers · Owasso Kitchen & Bathroom Designers · Sun City Kitchen & Bathroom Designers · Wesley Chapel Kitchen & Bathroom Designers · Bellevue Kitchen & Bathroom Remodelers · Durham Kitchen & Bathroom Remodelers · Glen Carbon Kitchen & Bathroom Remodelers · Hickory Kitchen & Bathroom Remodelers · Las Vegas Kitchen & Bathroom Remodelers · San Juan Capistrano Kitchen & Bathroom Remodelers · Doctor Phillips Architects & Building Designers · New River Architects & Building Designers · Saint Louis Park Architects & Building Designersgildomilo