


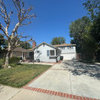
Stripping trim
justducky22
13 years ago
Sort by:Oldest
Comments (25)
Related Stories
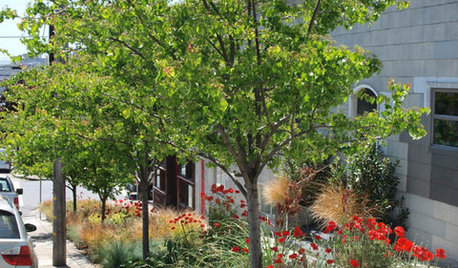
CURB APPEALTake Your Hell Strip to Heavenly Heights: 8 Design Ideas
Trade weedy dirt and trash for a parking strip filled with wispy grasses, low-growing flowers and textural trees
Full Story
HOUSEKEEPINGLower Your Heating Bills With Some Simple Weather Stripping
Plug the holes in your house this winter to make sure cold air stays where it belongs: outside
Full Story
TRIMWhat Color Should You Paint Your Trim?
Learn the benefits of painting your trim white, black, neutral, a bold color and more
Full Story
MODERN ARCHITECTUREDesign Workshop: 10 Surprising Twists on Window Trim
These modern approaches to window trim include no trim at all. Can you wrap your head around them?
Full Story
REMODELING GUIDESRenovation Detail: Arts and Crafts Interior Trim
Utilitarian doesn't have to mean afterthought with window and door trim that highlights finely crafted interior openings
Full Story
DECORATING GUIDESUse Trim to Modernize a Traditional Home — or Vice Versa
Bridge the gap between old and new styles with subtle variations in trim style and color
Full Story
COLORAccent a Room With Colorful Trim
Watch rooms come to life when you add color to trim, mantels and more
Full Story
DECORATING GUIDESDIY: How to Use Tapes and Trims to Embellish Your Decor
Trim soft furnishings and window coverings with decorative edgings to add definition and style
Full Story
DECORATING GUIDESAdd a Metallic Edge with Nailhead Trim
See what a line of studs or nailheads can do to upholstery, wood furniture, doors and more
Full Story
REMODELING GUIDESRenovation Detail: Beadboard Wainscoting
Tastefully protecting your walls from knocks and splashes, beadboard wainscoting is an eye-pleasing design element as well
Full Story

User
Carol_from_ny
Related Professionals
Henderson Kitchen & Bathroom Designers · Leicester Kitchen & Bathroom Designers · Manchester Kitchen & Bathroom Designers · Midvale Kitchen & Bathroom Designers · Rancho Mirage Kitchen & Bathroom Designers · Apex Kitchen & Bathroom Remodelers · Garden Grove Kitchen & Bathroom Remodelers · Hickory Kitchen & Bathroom Remodelers · Jacksonville Kitchen & Bathroom Remodelers · Paducah Kitchen & Bathroom Remodelers · Placerville Kitchen & Bathroom Remodelers · Spokane Kitchen & Bathroom Remodelers · Princeton Kitchen & Bathroom Remodelers · Plant City Kitchen & Bathroom Remodelers · Baton Rouge Architects & Building Designersrosesr4me
ks_toolgirl
artemis78
brickeyee
jlc102482
justducky22Original Author
kimkitchy
karinl
jonnyp
sombreuil_mongrel
columbusguy1
brickeyee
sombreuil_mongrel
karinl
brickeyee
SK97232
tinker_2006
graywings123
tinker_2006
sombreuil_mongrel
graywings123
ks_toolgirl
ks_toolgirl