


Very rough texturzation over plaster - leave or cover?
jlc102482
13 years ago
Sort by:Oldest
Comments (5)
Related Stories

REMODELING GUIDESInterior Brick: Paint it or Leave It?
Here's how to know if covering that brick is a sin or solution
Full Story
ARCHITECTUREStates of Style: Alabama’s Icons Leave Their Mark
In the first of a new series, discover the natural beauty, the architectural icons and some of our favorite homes deep in the heart of Dixie
Full Story
DECLUTTERINGDownsizing Help: Choosing What Furniture to Leave Behind
What to take, what to buy, how to make your favorite furniture fit ... get some answers from a homeowner who scaled way down
Full Story
POOLSPlaster Tops Popularity List for Pool Finishes
Classic white or dyed to suit a mood, plaster is the most common and affordable finish for pools today
Full Story
HOUZZ TOURSHouzz Tour: Historic Fieldstone Home in Pennsylvania
With stone, rough plaster and wood all around, a historic home in the countryside is heavy on charm
Full Story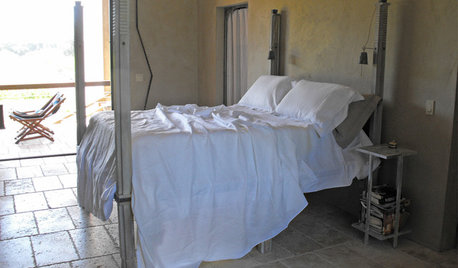
PRODUCT PICKSGuest Picks: Loving Linen All Over the Home
Charmingly rumpled or ironed smooth, these linen finds from napkins to curtains bring casual elegance to rooms
Full Story
GARDENING GUIDESGarden Myths to Debunk as You Dig This Fall and Rest Over Winter
Termites hate wood mulch, don’t amend soil for trees, avoid gravel in planters — and more nuggets of garden wisdom
Full Story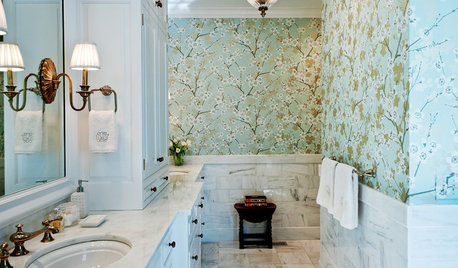
WALL TREATMENTS11 Ways to Roll With Wallpaper All Over the Home
Ditch the misconceptions and latch on to some great ideas for decorating your walls with patterned, textural and colorful wallpaper
Full Story
MOST POPULARA Fine Mess: How to Have a Clean-Enough Home Over Summer Break
Don't have an 'I'd rather be cleaning' bumper sticker? To keep your home bearably tidy when the kids are around more, try these strategies
Full Story
KITCHEN CABINETSColorful Ways to Make Over Your Kitchen Cabinetry
Try these inspiring color updates to spice up your kitchen a little — or a lot
Full StorySponsored
Custom Craftsmanship & Construction Solutions in Franklin County
More Discussions

calliope
kimkitchy
Related Professionals
Corcoran Kitchen & Bathroom Designers · Lockport Kitchen & Bathroom Designers · Northbrook Kitchen & Bathroom Designers · Ojus Kitchen & Bathroom Designers · Woodlawn Kitchen & Bathroom Designers · Saint Charles Kitchen & Bathroom Designers · Glade Hill Kitchen & Bathroom Remodelers · Cocoa Beach Kitchen & Bathroom Remodelers · Niles Kitchen & Bathroom Remodelers · North Arlington Kitchen & Bathroom Remodelers · Vienna Kitchen & Bathroom Remodelers · Waukegan Kitchen & Bathroom Remodelers · Forest Hills Kitchen & Bathroom Remodelers · Palestine Kitchen & Bathroom Remodelers · Frisco Architects & Building Designerskimkitchy
cooperbailey
igloochic