


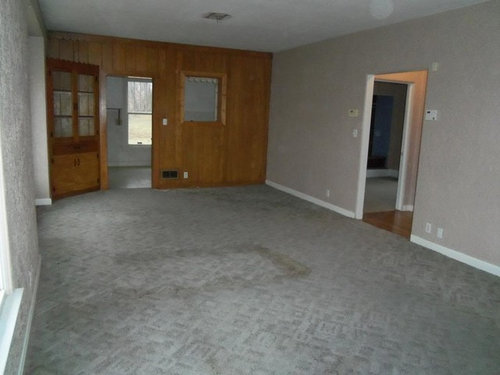
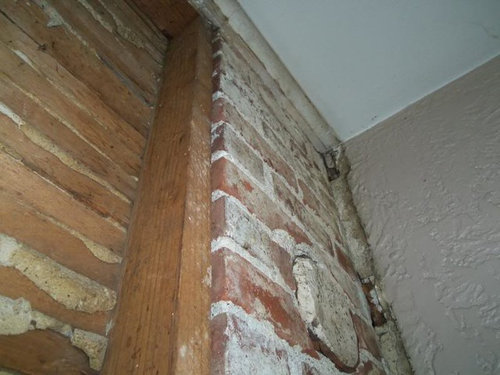
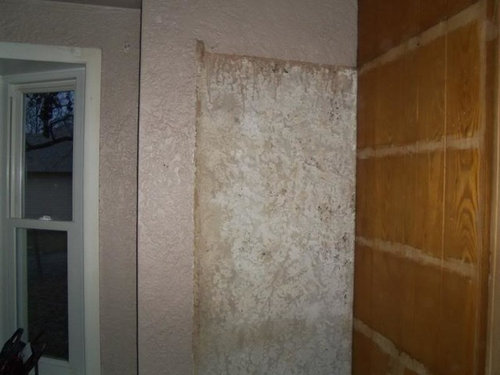
Fixing the wall
weedyacres
11 years ago


Sort by:Oldest
Comments (9)
Related Stories
DECORATING GUIDESQuick Fix: Find Wall Studs Without an Expensive Stud Finder
See how to find hidden wall studs with this ridiculously easy trick
Full Story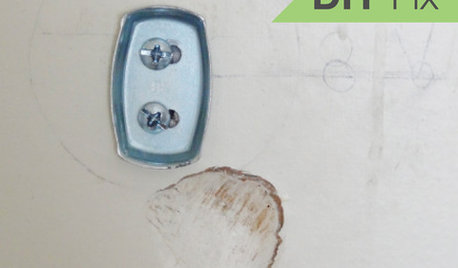
HOUSEKEEPINGQuick Fix: How to Patch a Drywall Hole
Dents and dings disappear, leaving your walls looking brand new, with this fix that even a novice can do
Full Story
DECORATING GUIDESQuick Fix: Update Bookshelves With a Coat of Color
Hungry for quick color? Turn your shelves into a mini accent wall
Full Story
DECORATING GUIDESCompany Coming? 8 Quick Decorating Fixes
Declutter that bookshelf, flesh out the gallery wall check the light bulbs,
Full Story
DECORATING GUIDESQuick Fix: Protect Your Mirrors!
See how a common carpet protector can save your mirrors, too
Full Story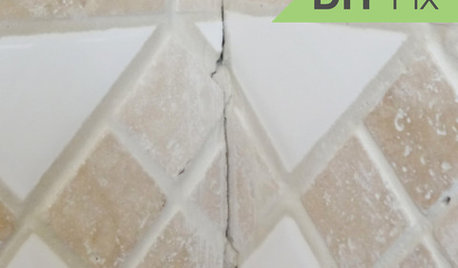
BATHROOM TILEQuick Fix: Repair Cracked Bathroom Grout
Banish an eyesore and safeguard your bathroom from water damage in 30 minutes or less with this DIY repair
Full Story
TRIMHow to Fix a Mirror-Above-the-Mantel Dilemma
Got an unmovable mirror over your fireplace? Use trim to turn it into a feature that will turn heads
Full Story
GARDENING AND LANDSCAPINGSpring Patio Fix-Ups: 12 Wonderful Ways With Planters
Change the look of your whole patio with just a few thoughtfully placed containers or a trellis brimming with greenery
Full Story
GARDENING AND LANDSCAPINGSpring Patio Fix-Ups: Earn Rave Reviews for Your Patio's Entrance
Consider innovative doors, charming gates or even just potted plants to cue a stylish entry point for your patio
Full Story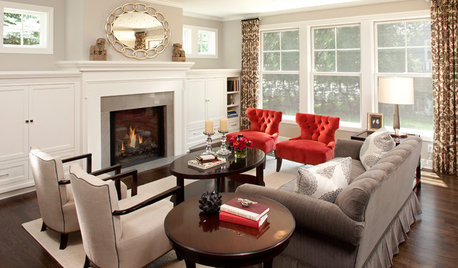
COLORColor Fix: Energize Your Room With a Colorful Club Chair
Less commitment than a sofa but making a major impact, club chairs in vivid hues can work wonders
Full StoryMore Discussions


brickeyee
weedyacresOriginal Author
Related Professionals
College Park Kitchen & Bathroom Designers · Everett Kitchen & Bathroom Designers · Magna Kitchen & Bathroom Designers · Portland Kitchen & Bathroom Designers · Redmond Kitchen & Bathroom Designers · South Farmingdale Kitchen & Bathroom Designers · South Sioux City Kitchen & Bathroom Designers · Normal Kitchen & Bathroom Remodelers · Bay Shore Kitchen & Bathroom Remodelers · Garden Grove Kitchen & Bathroom Remodelers · Kendale Lakes Kitchen & Bathroom Remodelers · Patterson Kitchen & Bathroom Remodelers · Pueblo Kitchen & Bathroom Remodelers · Vienna Kitchen & Bathroom Remodelers · Bell Gardens Architects & Building Designersmaryinthefalls
lazy_gardens
geokid
weedyacresOriginal Author
chibimimi
geokid
lazy_gardens