


Craft of the Day ~ Photo tiles
User
11 years ago

Sort by:Oldest
Comments (2)
Related Stories
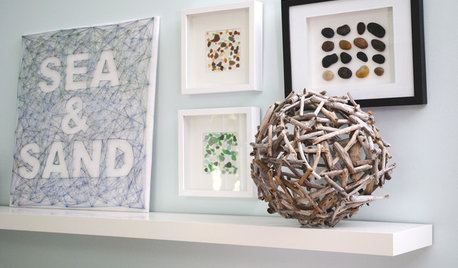
DECORATING GUIDES10 Craft Ideas for Lazy Summer Days
Put those beach finds and extra time to good use — even the kids can do some of these creative projects
Full Story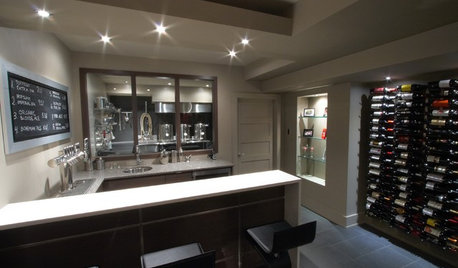
BASEMENTSRoom of the Day: Cheers to a Home Basement Brewery for Craft Beers
An engineer in Ottawa, Canada, turns his decades-long love of home-brewed beer into a basement project, then a side business
Full Story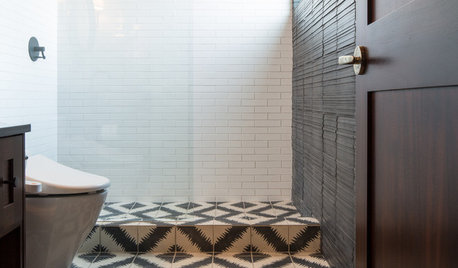
BATHROOM DESIGNRoom of the Day: Moroccan Tile Inspires a Guest Bathroom Design
Sharp contrast warmed by cedar and brass creates an unexpected jewel box in a ski house
Full Story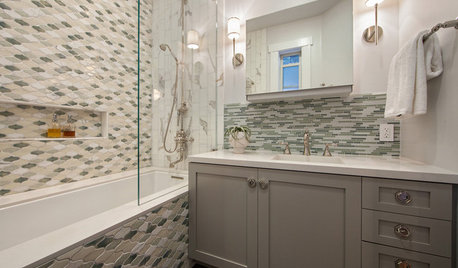
BEFORE AND AFTERSRoom of the Day: Tile Patterns Mix It Up in a Master Bath
Contemporary and classic elements mix in a boldly detailed San Francisco bathroom makeover
Full Story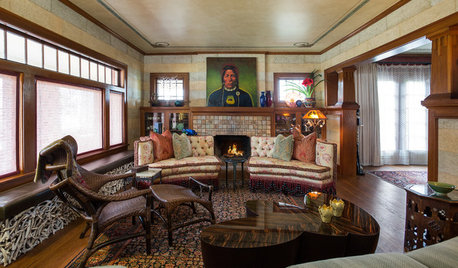
LIVING ROOMSRoom of the Day: An Artisan Renaissance
An Arts and Crafts living room in Oklahoma City gets restored to past glory
Full Story
ADDITIONSRoom of the Day: New Kitchen-Living Area Gives Family Together Time
An airy add-on becomes the hub of family life in a formerly boxy Arts and Crafts-style home
Full Story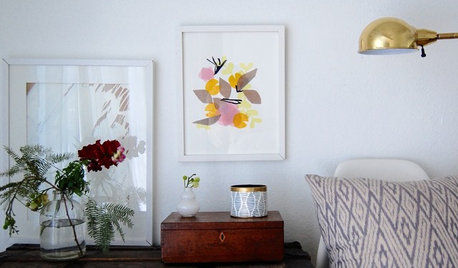
DIY PROJECTSDIY: Two Colorful, Personalized Gifts for Mother’s Day
Follow along to make a patterned photo frame or floral artwork using simple materials
Full Story
STUDIOS AND WORKSHOPSRoom of the Day: Instant Craft Studio on Vashon Island
A prefab workshop in the backyard of a waterfront vacation home makes a cost-friendly alternative to a home addition
Full Story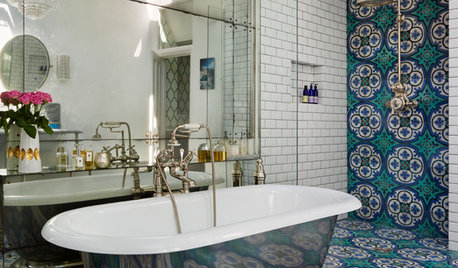
BATHROOM DESIGNRoom of the Day: Bold Tile and Classic Style in a London Bath
Vivid Mediterranean hues and vintage-style hardware create a stunning family bathroom
Full Story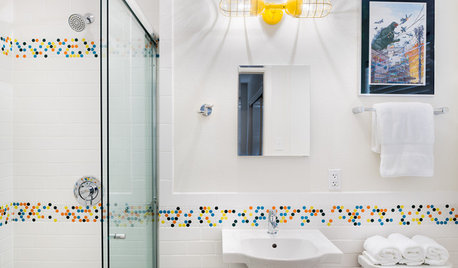
ROOM OF THE DAYRoom of the Day: Vibrant Retro Tile Adds Pizazz to a Small Bathroom
Playful colors punch up a clean white backdrop in a 1950s ranch house
Full Story
cheryl_ok
kayjones
Related Discussions
Arts & Crafts-99.9% done- 1st photo-drumroll...
Q
Photo reveal of Arts& Crafts 1917 house kitchen
Q
another..... Craft of the day ~ Photo tiles
Q
Craft of the Day ~ Memories in a Jar
Q