


Aesthetics Only
aloha2009
11 years ago
Sort by:Oldest
Comments (24)
Related Stories

HOUZZ TOURSHouzz Tour: Abbey's Aesthetic Outburst
Tour an 'Organized Eclectic' Home Full of Art, Collections and Kid-Friendly Color
Full Story
HOUZZ TOURSMy Houzz: Raw Aesthetics Rule in a Toronto Family Home
Exposed plywood and beams, rough concrete and unfinished walls give the interiors a unique look — and give the family more time together
Full Story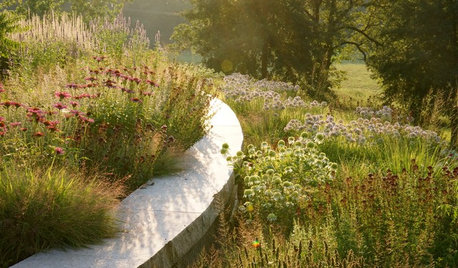
GARDENING GUIDES4 Ways Gardens Can Go Beyond Aesthetic Beauty
Our landscapes can play an even more meaningful role if we rethink their purpose
Full Story
FURNITUREShow More Leg for an Airy Aesthetic
Banish bulk and give your rooms openness and balance with furniture that bares its legs
Full Story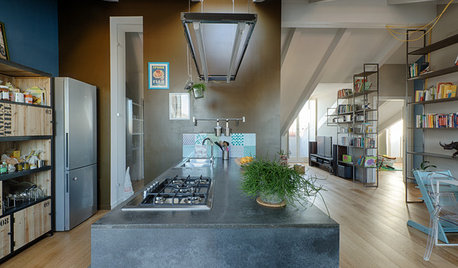
HOUZZ TOURSHouzz Tour: Aesthetics on a Budget in Turin, Italy
A converted attic combines thoughtful design with innovative materials
Full Story
LIFE21 Things Only People Living With Kids Will Understand
Strange smells, crowded beds, ruined furniture — here’s what cohabiting with little monsters really feels like
Full Story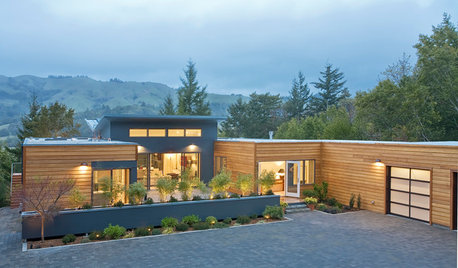
GREEN BUILDINGEfficient Architecture Suggests a New Future for Design
Homes that pay attention to efficient construction, square footage and finishes are paving the way for fresh aesthetic potential
Full Story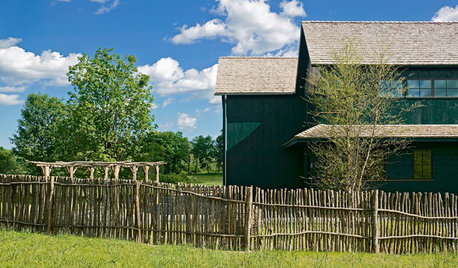
FARMHOUSESHouzz Tour: Minimalism in a Pastoral Mood
Local materials help a Connecticut farmhouse look right at home, while its simplicity fits the owners’ aesthetic
Full Story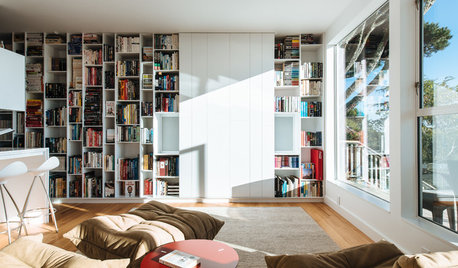
LIVING ROOMSLiving Rooms That Don’t Revolve Around the TV
In these spaces, the television takes a back seat to conversation, relaxation and aesthetics
Full Story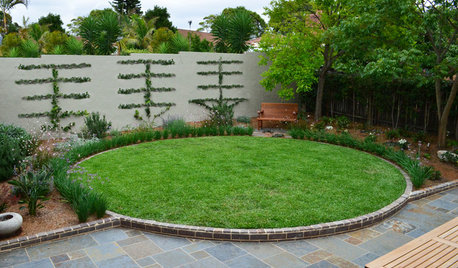
GARDENING GUIDESSmall Gem Lawns: More Impact From Less Grass
Instead of letting the lawn sprawl, make it a shapely design element in your yard. You’ll reap benefits both practical and aesthetic
Full StoryMore Discussions

palimpsest
aloha2009Original Author
Related Professionals
Bonita Kitchen & Bathroom Designers · Georgetown Kitchen & Bathroom Designers · Durham Kitchen & Bathroom Remodelers · Franconia Kitchen & Bathroom Remodelers · Hanover Township Kitchen & Bathroom Remodelers · Honolulu Kitchen & Bathroom Remodelers · Jefferson Hills Kitchen & Bathroom Remodelers · Sicklerville Kitchen & Bathroom Remodelers · Hawthorne Kitchen & Bathroom Remodelers · Aspen Hill Cabinets & Cabinetry · Burlington Cabinets & Cabinetry · Harrison Cabinets & Cabinetry · Maywood Cabinets & Cabinetry · Norfolk Cabinets & Cabinetry · Lake Butler Design-Build FirmsUser
aloha2009Original Author
justmakeit
aloha2009Original Author
crl_
aloha2009Original Author
pricklypearcactus
aloha2009Original Author
crl_
cawaps
sochi
aloha2009Original Author
crl_
aloha2009Original Author
crl_
GreenDesigns
aloha2009Original Author
thirdkitchenremodel
sochi
aloha2009Original Author
thirdkitchenremodel
bellsmom