


Help! Cleaner used Scrubbie on new soapstone...
gayl
12 years ago
Sort by:Oldest
Comments (15)
Related Stories
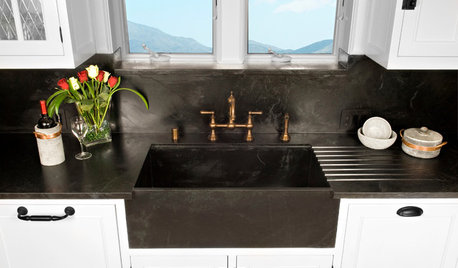
KITCHEN DESIGNKitchen Sinks: Soapstone for Germ-Free Beauty and Durability
Stains and bacteria? Not on soapstone's watch. But this sink material's benefits don't come cheap.
Full Story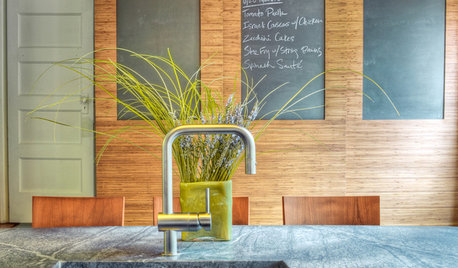
KITCHEN DESIGNKitchen Counters: Durable, Easy-Clean Soapstone
Give bacteria the boot and say sayonara to stains with this long-lasting material that's a great choice for kitchen and bath countertops
Full Story
GREEN DECORATING8 Questions to Help You See Through Green Hype
With the ecofriendly bandwagon picking up some dubious passengers, here's how to tell truly green products and services from the imposters
Full Story
BLACKCooking With Color: When to Use Black in the Kitchen
Consider sampling Caviar or Cracked Pepper on your kitchen walls or cabinets for richness and impact
Full Story
LIVING ROOMS8 Reasons to Nix Your Fireplace (Yes, for Real)
Dare you consider trading that 'coveted' design feature for something you'll actually use? This logic can help
Full Story
HOUSEKEEPINGHow to Clean Grout — Stains and All
If your grout is grossing you out, this deep-cleaning method will help it look new again
Full Story
MATERIALSAre You a Maker? Show Us Your Favorite Tool or Material
Houzz Call: A tool or material can be a maker’s best friend. We’d like to see your favorite — and what it helps you achieve
Full StoryMOST POPULARYour Guide to 15 Popular Kitchen Countertop Materials
Get details and costs on top counter materials to help you narrow down the choices for your kitchen
Full Story
KITCHEN DESIGNHouzz Quiz: What Kitchen Countertop Is Right For You?
The options for kitchen countertops can seem endless. Take our quiz to help you narrow down your selection
Full Story
CLEANINGEco-Friendly Tips and Tricks for Cleaning Your Home
Are you wary of using chemicals to clean? These simple products and tricks will keep your home spotless naturally
Full Story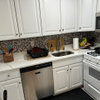


enduring
gaylOriginal Author
Related Professionals
Barrington Hills Kitchen & Bathroom Designers · Federal Heights Kitchen & Bathroom Designers · Highland Park Kitchen & Bathroom Designers · Ocala Kitchen & Bathroom Designers · Saratoga Springs Kitchen & Bathroom Designers · Adelphi Kitchen & Bathroom Remodelers · Morgan Hill Kitchen & Bathroom Remodelers · Oklahoma City Kitchen & Bathroom Remodelers · Olney Kitchen & Bathroom Remodelers · Thonotosassa Kitchen & Bathroom Remodelers · Prairie Village Kitchen & Bathroom Remodelers · Allentown Cabinets & Cabinetry · Lackawanna Cabinets & Cabinetry · Reading Cabinets & Cabinetry · Tenafly Cabinets & Cabinetryaliris19
enduring
enduring
gaylOriginal Author
house_obsessed
gaylOriginal Author
mjsee
gaylOriginal Author
house_obsessed
gaylOriginal Author
house_obsessed
weedmeister
Fori