


diy backsplash tiling
sparkier73
10 years ago
Sort by:Oldest
Comments (16)
Related Stories
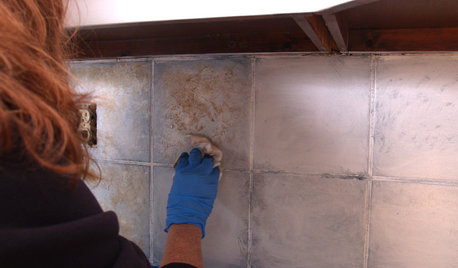
DIY PROJECTSDIY Backsplash Makeover: Get a New Tile Look for Less Than $50
Give old tile a painted faux-stone facade for a brand-new look at a superaffordable price
Full Story
KITCHEN BACKSPLASHESHow to Install a Tile Backsplash
If you've got a steady hand, a few easy-to-find supplies and patience, you can install a tile backsplash in a kitchen or bathroom
Full Story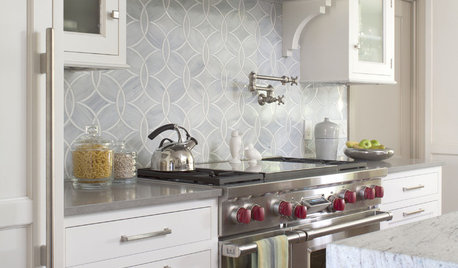
KITCHEN DESIGN8 Top Tile Types for Your Kitchen Backsplash
Backsplash designs don't have to be set in stone; glass, mirror and mosaic tiles can create kitchen beauty in a range of styles
Full Story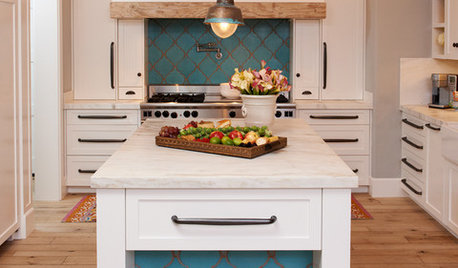
KITCHEN DESIGN10 Gorgeous Backsplash Alternatives to Subway Tile
Artistic installations, back-painted glass and pivoting windows prove there are backsplash possibilities beyond the platform
Full Story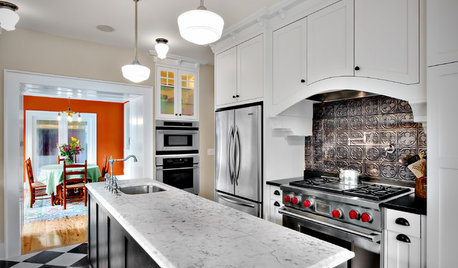
KITCHEN DESIGN8 Statement-Making Kitchen Backsplashes Beyond Basic Tile
Look to metal, glass and even wooden crates for an attention-getting backsplash that might even save you some money
Full Story
TILE5 Head-Turning Tile Styles for Backsplashes and More
If plain subway tile would derail your bold decorating vision, these dashing tiles can help you arrive at a brilliant solution
Full Story
KITCHEN DESIGN5 Stunning Alternatives to the Tile Backsplash
Try Stone Slab, Glass, Steel, Concrete or Beadboard Above the Kitchen Counter
Full Story
SHOP HOUZZShop Houzz: Transform Your Kitchen Backsplash
Raise the bar on your kitchen backsplash with a tile, paint or wallpaper update
Full Story0
KITCHEN DESIGNHow to Add a Kitchen Backsplash
Great project: Install glass, tile or another decorative material for a gorgeous and protective backsplash
Full Story
LOFTSDIY Spirit Reinvents an Industrial Home
Armed with a detailed plan from a designer, this homeowner rolled up his sleeves and transformed his Edmonton loft space
Full Story
suzanne_sl
debrak2008
Related Professionals
Arlington Kitchen & Bathroom Designers · Everett Kitchen & Bathroom Designers · Highland Park Kitchen & Bathroom Designers · Midvale Kitchen & Bathroom Designers · Owasso Kitchen & Bathroom Designers · Verona Kitchen & Bathroom Designers · Glen Carbon Kitchen & Bathroom Remodelers · Luling Kitchen & Bathroom Remodelers · Oxon Hill Kitchen & Bathroom Remodelers · Paducah Kitchen & Bathroom Remodelers · Saint Helens Kitchen & Bathroom Remodelers · East Saint Louis Cabinets & Cabinetry · Charlottesville Tile and Stone Contractors · Roxbury Crossing Tile and Stone Contractors · Whitefish Bay Tile and Stone Contractorsautumn.4
Cindy103d
bicyclegirl1
debrak2008
Circus Peanut
kitchendetective
Joseph Corlett, LLC
sparkier73Original Author
autumn.4
wolverine2
annac54
julieste
debrak2008
ChristineWelby