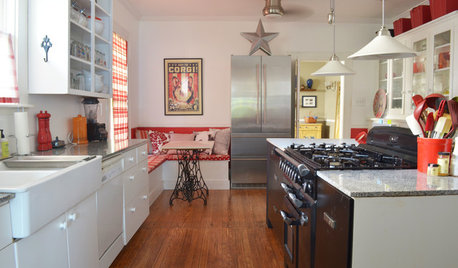
Our banquette was one of the key parts of making our kitchen plan work. But, we had a devil of a time trying to reverse engineer a plan from all of the pictures we saw. So I thought I would post ours with pictures & info as a small contribution to offset all the wonderful help and advice we got from the amazing GWers.
Hats off to my fantabulous DH for his perseverance with the arced wall and making the drawer work!!
Of course, many will recognize the inspiration from kitchenkelly and her fantastic morgue drawers : ) Our drawer is very tall so I think of it as the coffin drawer. Okay, so we keep the dog food & treats in it - but everyone needs a little levity in with their storage solutions.
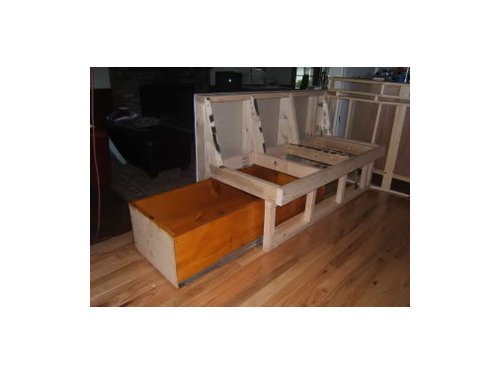
NOTE: The bench isn't trimmed out yet, I'm posting now 'cause marilyn234 was asking for help with bench plans.
The table is a soapstone top support by 2 oak planks and a 4x4 table leg. The planks are 12" and 8" wide. It's 30 wide by 60 long. The table is rounded at the right end and the left end is flat and sits into a wall/frame on the peninsula end. The face of the peninsula is covered in bead board that was scored in the back to make it curve. The effect is a left curve to the table top. The leg against the peninsula is a half leg. The idea was to have the peninsula hug the table and not look like two squares butted up against each other. The soapstone on the peninsula was cut to arc in to mirror the curve on the outside end of the table. The top of the arc is 4" deep by 30 wide.
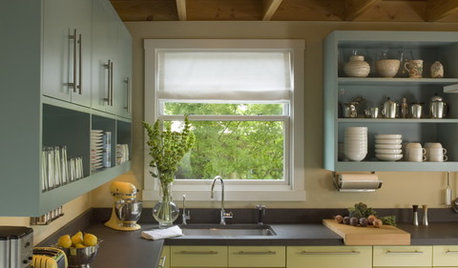
We got BM satin impervo matched to cabinets and painted everything to match.
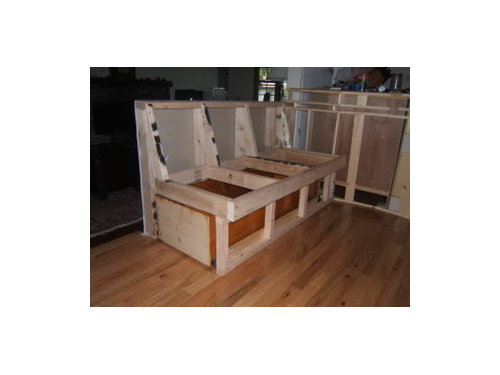
Here's a picture of the bench frame. The heal kick is tall - the seat hangs out to create the heal kick. The drawer isn't centered because we would run into the wall if we did - or we'd only have a shallow drawer. The back of the bench is 30" tall. We wanted it short because the chairs face a fireplace. It is good height - very comfy. the bench is 54" long and 17.5 deep (finished seating depth). A detailed plan with measurements is below.
The bench is very comfy with the angled back and the foam padding. The bench seat is plywood with 3" foam & batting and the back is plywood with 2" foam & batting. The foam was angle cut where the seat and back meet. I used a bread knife because I could NOT find the electric knife - word of advice - FIND THE ELECTRIC KNIFE!!!! I used sharpie to draw the angle and lines on the foam. You may notice that I screwed that up the first time and had to glue it back together and re-cut it (with the freakin' bread knife!). The foam also hangs over each exposed edge by at least 1". I would have it over hang the sides more so we could use a wider trim. The foam stops 1-2" from the seat inside edge so the back can rest there. You need to affix the foam to the plywood with a spray adhesive - I used 3M adhesive. We covered the foam in upholstery fabric using a stapler. It's a bit tricky to get the pattern to line up so make sure you have plenty of overhang to adjust up/down & left/right. We laid it all out - both seat and back - taped everything down - stapled the back - then lined up the seat again - re-taped and stapled it.
The drawer is a big box of pine planks that are screwed together. The screws run perpendicular to the force so it's very sturdy. We used orange shellac and lacquer to finish the wood. You can see in the photo above the 1x4s that run horizontally inside the frame bottom to hold the drawer glides. The drawer box is 48" long x 10.5 tall x 16.75 wide (outside measurement). We got a drawer face from our cabinet company. It's wonderful!!!!! (Can't wait unit the drawer pulls arrive!)
We keep the dog food, meds and treats in here. I got bins from the container store that each hold about 20 lbs of dog food. Maybe I should call it a trough drawer!
In this picture you can kind of see the wall/frame that is attached to the peninsula to support the table.
a href="http://s254.photobucket.com/albums/hh108/bvanney/?action=view¤t=bench1.jpg"; target="_blank">
IT still needs trim along the sides and bottom of the seat (beaded screen trim) and base board on the bottom of the bench and peninsula.
Here's the plan:
Sources:
Fabric: fabricguru.com
Drawer glides: schockmetal.com 037 series 47.24 full extension 255lb capacity - $105 a pair - great deal
Legs: Osbournewood.com


holligator
brutuses
Related Professionals
Ridgefield Kitchen & Bathroom Designers · Riviera Beach Kitchen & Bathroom Designers · St. Louis Kitchen & Bathroom Designers · Bay Shore Kitchen & Bathroom Remodelers · Andover Kitchen & Bathroom Remodelers · Garden Grove Kitchen & Bathroom Remodelers · Glendale Kitchen & Bathroom Remodelers · Green Bay Kitchen & Bathroom Remodelers · Honolulu Kitchen & Bathroom Remodelers · Republic Kitchen & Bathroom Remodelers · Shaker Heights Kitchen & Bathroom Remodelers · Wheat Ridge Cabinets & Cabinetry · Lake Nona Tile and Stone Contractors · Chaparral Tile and Stone Contractors · Oak Hills Design-Build Firmsshelayne
busybme
marilyn234
kitchenkelly
bethvOriginal Author
Fori
kitchenkelly
bethvOriginal Author
bethvOriginal Author