


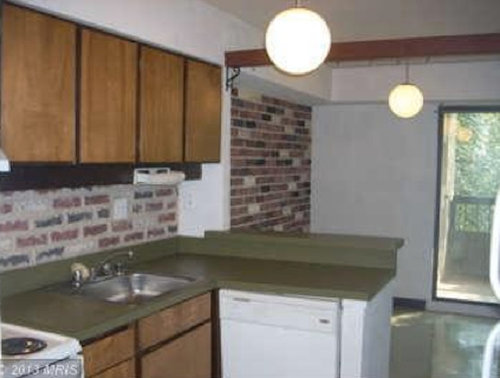
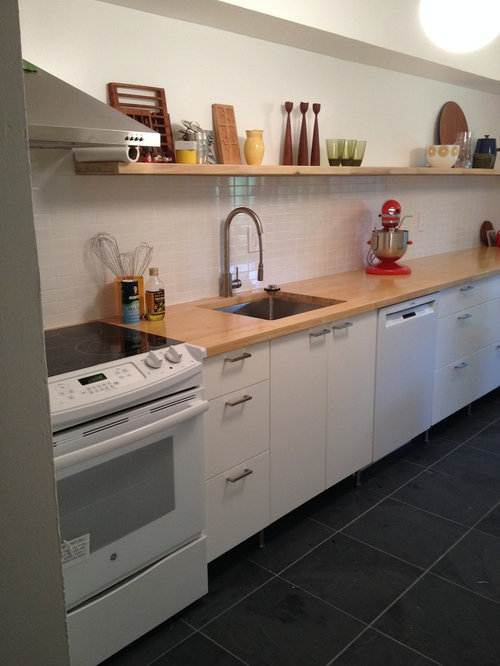
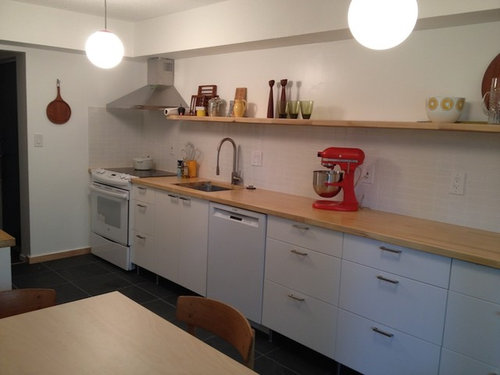
REVEAL on Holy 70s, Batman! condo kitchen
spanky_md
9 years ago


Featured Answer
Comments (31)

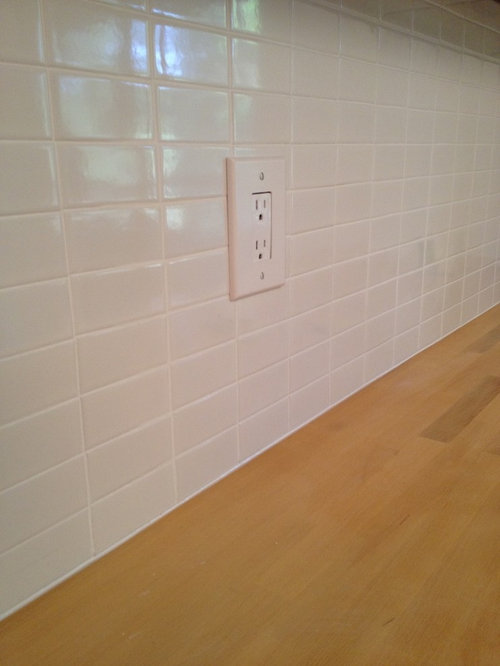
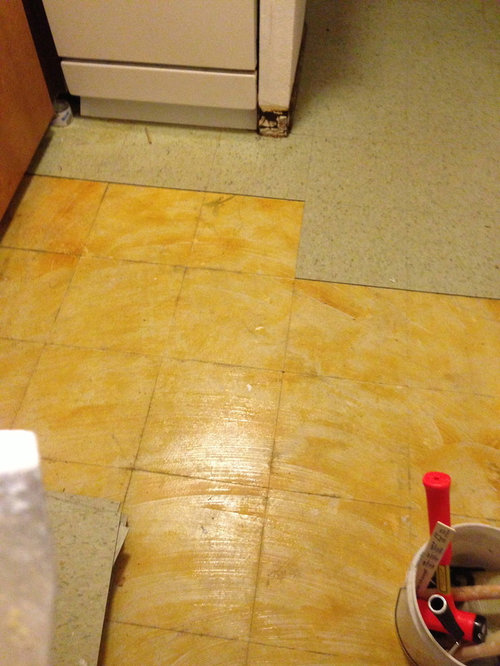
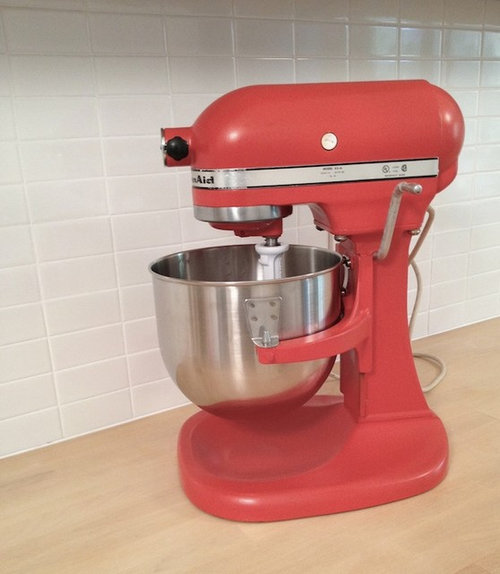
spanky_md
9 years agolast modified: 9 years ago
lazy_gardens
9 years agolast modified: 9 years agoRelated Professionals
Grafton Kitchen & Bathroom Designers · Riviera Beach Kitchen & Bathroom Designers · St. Louis Kitchen & Bathroom Designers · South Farmingdale Kitchen & Bathroom Designers · University City Kitchen & Bathroom Remodelers · Bloomingdale Kitchen & Bathroom Remodelers · Fort Pierce Kitchen & Bathroom Remodelers · Mesquite Kitchen & Bathroom Remodelers · Saint Helens Kitchen & Bathroom Remodelers · Spokane Kitchen & Bathroom Remodelers · Glenn Heights Kitchen & Bathroom Remodelers · Citrus Heights Cabinets & Cabinetry · Wilkinsburg Cabinets & Cabinetry · Elmwood Park Tile and Stone Contractors · Suamico Design-Build FirmsTexas_Gem
9 years agolast modified: 9 years agoheritagehd07
9 years agolast modified: 9 years ago
my_four_sons
9 years agolast modified: 9 years ago
Errant_gw
9 years agolast modified: 9 years agolee676
9 years agolast modified: 9 years ago
Terri_PacNW
9 years agolast modified: 9 years agoemilymch
9 years agolast modified: 9 years ago
poohpup
9 years agolast modified: 9 years agopalimpsest
9 years agolast modified: 9 years agovdinli
9 years agolast modified: 9 years agomomfromthenorth
9 years agolast modified: 9 years agospanky_md
9 years agolast modified: 9 years agochicagoans
9 years agolast modified: 9 years agospanky_md
9 years agolast modified: 9 years agobrightm
9 years agolast modified: 9 years ago
lisa_a
9 years agolast modified: 9 years ago
oldbat2be
9 years agolast modified: 9 years agomgmum
9 years agolast modified: 9 years ago
a2gemini
9 years agolast modified: 9 years agotracie.erin
9 years agolast modified: 9 years agomusicgal
9 years agolast modified: 9 years agospanky_md
9 years agolast modified: 9 years agoemilymch
9 years agolast modified: 9 years agotracie.erin
9 years agolast modified: 9 years ago
romy718
9 years agolast modified: 9 years agobellsmom
9 years agolast modified: 9 years ago
teeda
9 years agolast modified: 9 years agospanky_md
9 years agolast modified: 9 years ago
Related Stories

INSIDE HOUZZA New Houzz Survey Reveals What You Really Want in Your Kitchen
Discover what Houzzers are planning for their new kitchens and which features are falling off the design radar
Full StoryREMODELING GUIDESBathroom Remodel Insight: A Houzz Survey Reveals Homeowners’ Plans
Tub or shower? What finish for your fixtures? Find out what bathroom features are popular — and the differences by age group
Full Story
HOUZZ TOURSMy Houzz: Retro Vibe for a Boston Condo
Bright, happy colors paired with midcentury modern-inspired furnishings complete this couple’s 850-square-foot cozy home
Full Story
HOUZZ TOURSHouzz Tour: Travel and Art Intertwine in a California Condo
A bland 1960s high-rise in Hollywood gets a colorful, contemporary redesign inspired by a global art collection
Full Story
CONTEMPORARY HOMESHouzz Tour: Unboxing a San Francisco Condo
Feminine glam replaces boxy and boring in a remodeled luxury condominium with a view
Full Story
APARTMENTSMy Houzz: Travel-Inspired Style for a Boston Condo
An elegant neutral palette and modern finishes give personality to this 860-square-foot home
Full Story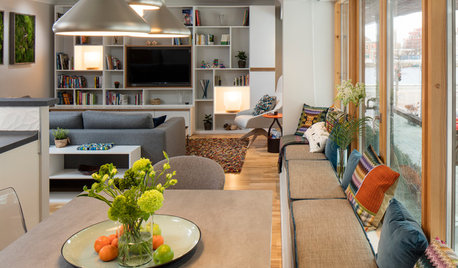
HOMES AROUND THE WORLDHouzz Tour: A Cozy Dublin Condo Full of Smart Storage Ideas
This redesigned home is packed with stylish ideas for small-space living
Full Story
KITCHEN DESIGNExpert Talk: 12 Ways to Get a Designer-Kitchen Look
Professional designer Ines Hanl reveals her thought processes on select kitchen remodels
Full Story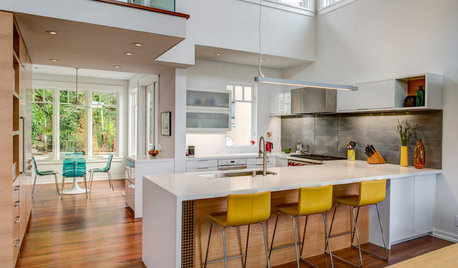
INSIDE HOUZZHouzz Survey: See the Latest Benchmarks on Remodeling Costs and More
The annual Houzz & Home survey reveals what you can expect to pay for a renovation project and how long it may take
Full Story
HOUZZ TOURSMy Houzz: Fairy-Tale Charm in a Historic Hollywood Landmark
Just a stone’s throw away from Hollywood Boulevard, vine-covered walls hide a magical courtyard and a couple’s condo
Full Story


amck2