


Light rail and backsplash
brightm
9 years ago
Related Stories
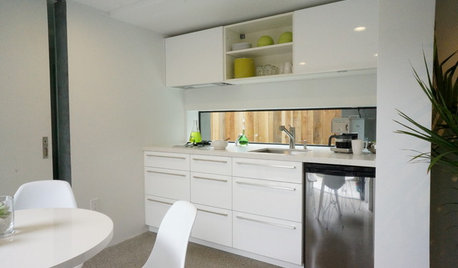
KITCHEN DESIGNPut Your Kitchen in a Good Light With a Window Backsplash
Get a view or just more sunshine while you're prepping and cooking, with a glass backsplash front and center
Full Story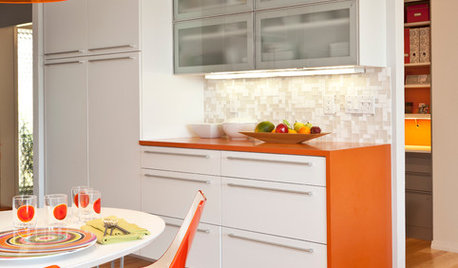
KITCHEN DESIGNCountertop and Backsplash: Making the Perfect Match
Zero in on a kitchen combo you'll love with these strategies and great countertop-backsplash mixes for inspiration
Full Story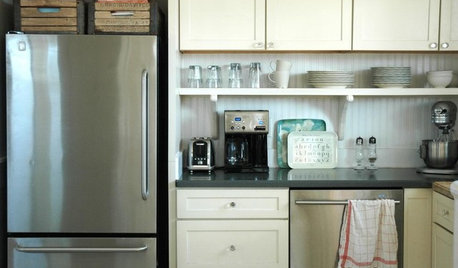
KITCHEN DESIGNTrick Out Your Kitchen Backsplash for Storage and More
Free up countertop space and keep often-used items handy by making your backsplash more resourceful
Full Story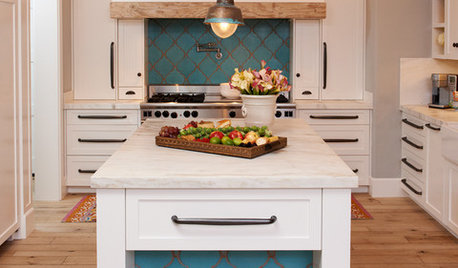
KITCHEN DESIGN10 Gorgeous Backsplash Alternatives to Subway Tile
Artistic installations, back-painted glass and pivoting windows prove there are backsplash possibilities beyond the platform
Full Story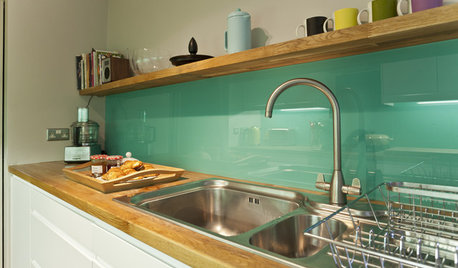
KITCHEN DESIGNHow to Pick a Kitchen Backsplash That Wows
Design your ideal backsplash with help from these Houzz guides and inspiring ideas for every kitchen style
Full Story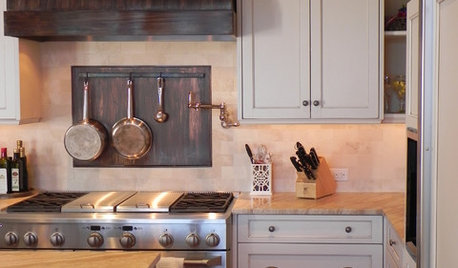
KITCHEN BACKSPLASHESKitchen Confidential: 8 Options for Your Range Backsplash
Find the perfect style and material for your backsplash focal point
Full Story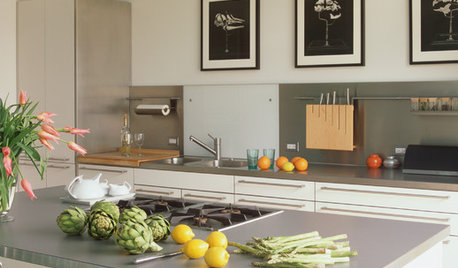
KITCHEN BACKSPLASHES8 Clever Ways to Put Your Backsplash to Work
Leave art for art's sake to another spot. Hardworking cooks deserve a kitchen backsplash that helps them do their job
Full Story
KITCHEN DESIGNKitchen of the Week: Sunlit Garden Views in Bristol, U.K.
Garden access and a bright green backsplash bring color and light to this British kitchen — and the new dining room opens things up
Full Story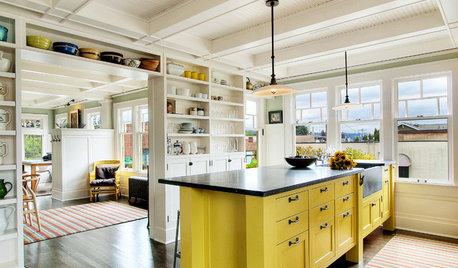
KITCHEN DESIGNHow to Lose Some of Your Upper Kitchen Cabinets
Lovely views, display-worthy objects and dramatic backsplashes are just some of the reasons to consider getting out the sledgehammer
Full Story
HOUZZ TOURSMy Houzz: Quirky Charm on Aussie Farmland
With skateboards adorning the kitchen, a trash-inspired backsplash and a retro trailer, this home shows passionate creativity
Full Story


Evan
brightmOriginal Author
Related Professionals
Ballenger Creek Kitchen & Bathroom Designers · Federal Heights Kitchen & Bathroom Designers · Grafton Kitchen & Bathroom Designers · Highland Park Kitchen & Bathroom Designers · New Castle Kitchen & Bathroom Designers · Bethel Park Kitchen & Bathroom Remodelers · Cocoa Beach Kitchen & Bathroom Remodelers · Fort Washington Kitchen & Bathroom Remodelers · Trenton Kitchen & Bathroom Remodelers · Princeton Kitchen & Bathroom Remodelers · Indian Creek Cabinets & Cabinetry · Gladstone Tile and Stone Contractors · La Canada Flintridge Tile and Stone Contractors · Redondo Beach Tile and Stone Contractors · Oak Grove Design-Build Firmslive_wire_oak
brightmOriginal Author
coco4444
Gracie
Muffett
Evan
brightmOriginal Author
Evan
brightmOriginal Author
kompy
brightmOriginal Author
vdinli
brightmOriginal Author
KBSpider