I have been stalking this forum for a couple of years planning our kitchen renovation. Our soapstone is finally in so I thought I'd do a mid-way reveal of the work we've done so far. We built the house in 1998 and the kitchen was what we could afford at the time. It really needed to be reworked to make it more functional. Dh and I are MAJOR DIY'ers. The only thing we've hired out is the counters so it has been LONG and SLOW (we started Dec 26 last year) but we are getting there ;) I still need to paint most of the doors/drawer fronts, but you'll get the idea of where we're going I hope...
We added a 2nd story to the house to accommodate all the kids (4!) and the extra weight cracked the ceiling in the open doorways (2) between the kitchen and living room. We narrowed the doors a bit and added transom windows above.
Before (actually, kind of during. I had already narrowed the door and was working on the drywall :)
After...
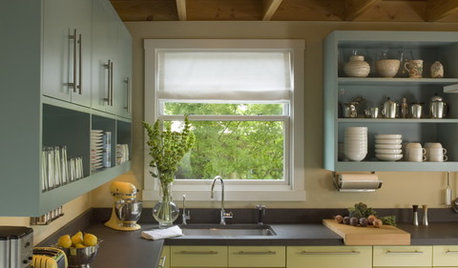
This is ::almost:: a before of the kitchen. We had already put the new paint on some of the walls, done the ceiling, added can lights, and painted the cabinets beside the sink window. Notice the dorky white formica with the oak edge. Oy, what was I thinking!?!?!?
We added new crown and trim along the bottom of all the cabinets...
The original refrigerator and cabinets (although we had moved the cabinets UP-- see the red paint line? That was originally where they hung)...
We cut eleventy-billion holes in the ceiling and added a bunch of can lights. The original kitchen only had one light in the center of the room @@. It's nice being married to an electrician ;)
Putting in the bead board ceiling to cover the eleventy-billion holes...
Ripping up the hardwood floors. I would never, never, NEVER suggest putting hardwood in your kitchen. My dishwasher and ice maker leaked and ruined my floors not once, but TWICE. Never again!!! (FYI - my boys LOVE demo LOL!)
This is the view through the pantry door. We gutted it down to the studded walls and cut holes in the ceiling to move/add lights. My whole kitchen used to be that red color.
The other half of the pantry "L"
Now for the afters :) No criticizing my housekeeping skills LOL! Everything is still junked up from things being out of place, but you get the idea. I used a fisheye lens to shoot most of this so everything would be in one picture but the fisheye lens makes the cabinets and walls look curved on the edges of the pictures. I can assure you, everything is actually straight :)
View through the pantry door. We covered the ceiling with pressed tin...
The other half of the pantry "L"
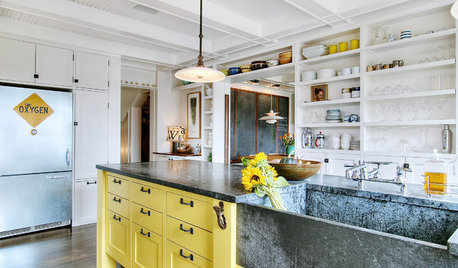
Slightly different angle so you can see the plate rack we built into the wall :)
New refrigerator and re-worked cabinets :) (there's still hardwood under the refrigerator. We will pull it up when we move it to lay the tile. That sucker is HEAVY!)
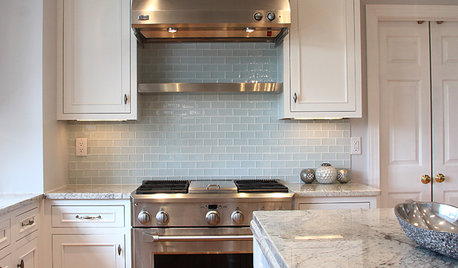
Cooktop area (ignore the junked up dining room)...
Looking toward the pantry (the pantry door is nearly in the center of the picture)
Standing in the pantry door looking into the kitchen (see the unpainted doors? LOL!) We have a new oven ordered that is stainless to match the other appliances, but it is not here yet. We're putting cabinet doors over the microwave because we hardly ever use it.
The sink side...
I LOVE that big ol' vein that runs the length of my sink cabinet!!!
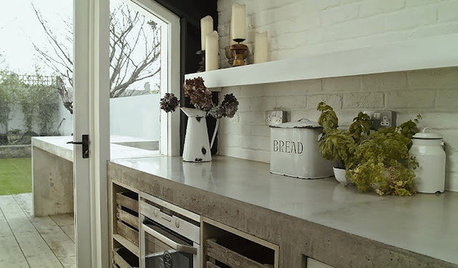
Our soapstone was procured from Dorado Soapstone in Atlanta and installed by Premier Surfaces out of Huntsville, AL (yes, we live in TN). If you call Premier, tell Merry that Michelle sent you ;) Merry went above and beyond the call of duty to find the perfect stone for us. She worked with Chris (the owner I think? of Atl. Dorado) and after I talked at length to him on the phone, he hand picked my slabs because I abhor the color green and needed a hard variety of soapstone (the harder the soapstone, the more green it typically is). Since he found my slabs somewhere in NC (!!) I trusted his judgement and told him to purchase them sight unseen. My stone is very, VERY hard, but has very little green. Exactly what I wanted! I actually stabbed the surface of a piece of scrap with a screwdriver l and barely made little pockmarks. Perfect for a house with 4 kids :) The install looks great. I have no water rings or any of the problems some other GW'ers have reported. I'm officially in LOVE!


brianadarnell
bigjim24
Related Professionals
Bloomington Kitchen & Bathroom Designers · Roselle Kitchen & Bathroom Designers · Salmon Creek Kitchen & Bathroom Designers · Adelphi Kitchen & Bathroom Remodelers · North Druid Hills Kitchen & Bathroom Remodelers · Broadlands Kitchen & Bathroom Remodelers · Franconia Kitchen & Bathroom Remodelers · Lakeside Kitchen & Bathroom Remodelers · Linton Hall Kitchen & Bathroom Remodelers · Londonderry Kitchen & Bathroom Remodelers · Port Angeles Kitchen & Bathroom Remodelers · Trenton Kitchen & Bathroom Remodelers · Mountain Top Kitchen & Bathroom Remodelers · Avocado Heights Cabinets & Cabinetry · Liberty Township Cabinets & CabinetrytnhillbillytooOriginal Author
blfenton
sandy808
tnhillbillytooOriginal Author
dbmet
tnhillbillytooOriginal Author
Adrienne Gray
farmgirlinky
shelayne
NatalieChantal
oldhousegal
shelayne
tnhillbillytooOriginal Author
ww340
tnhillbillytooOriginal Author
steph2000
NatalieChantal
kmmh
scootermom
tnhillbillytooOriginal Author
tnhillbillytooOriginal Author
tinker_2006
steph2000
sandy808
tnhillbillytooOriginal Author
AilsaM
Lake_Girl
MIssyV
pupwhipped
mtnfever (9b AZ/HZ 11)
ejbrymom
SK97232
kevinw1
celineike
clg7067
tnhillbillytooOriginal Author
kateskouros
MIssyV