


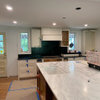
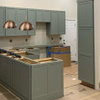
Pictures of finished 'budget' remodel - go Ikea!
reedrune
15 years ago


Sort by:Oldest
Comments (26)
Related Stories
REMODELING GUIDESFrom the Pros: 8 Reasons Kitchen Renovations Go Over Budget
We asked kitchen designers to tell us the most common budget-busters they see
Full Story
KITCHEN DESIGNStylish New Kitchen, Shoestring Budget: See the Process Start to Finish
For less than $13,000 total — and in 34 days — a hardworking family builds a kitchen to be proud of
Full Story
KITCHEN DESIGNKitchen Confidential: Go Bold on a Budget
Discover 5 ways this black and white beauty broke the mold but not the bank
Full Story
RANCH HOMESHouzz Tour: Budget Remodel for a Midcentury Oregon Rancho
With help from friends, an interior designer and her husband refresh an efficient, timeless home in Portland for $15,000
Full Story
KITCHEN DESIGNKitchen Remodel Costs: 3 Budgets, 3 Kitchens
What you can expect from a kitchen remodel with a budget from $20,000 to $100,000
Full Story
REMODELING GUIDESWhat to Know About Budgeting for Your Home Remodel
Plan early and be realistic to pull off a home construction project smoothly
Full Story
MOST POPULARHow to Refine Your Renovation Vision to Fit Your Budget
From dream to done: When planning a remodel that you can afford, expect to review, revise and repeat
Full Story
REMODELING GUIDESShould You Stay or Should You Go for a Remodel? 10 Points to Ponder
Consider these renovation realities to help you decide whether to budget for temporary housing
Full Story
DECORATING GUIDESBudget Decorator: Let’s Go Thrifting
Dip into the treasure trove of secondhand pieces for decor that shows your resourcefulness as much as your personality
Full Story
REMODELING GUIDES8 Ways to Stick to Your Budget When Remodeling or Adding On
Know thyself, plan well and beware of ‘scope creep’
Full Story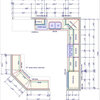
Fori
remodelfla
Related Professionals
Albany Kitchen & Bathroom Designers · Palm Harbor Kitchen & Bathroom Designers · Beverly Hills Kitchen & Bathroom Remodelers · Ogden Kitchen & Bathroom Remodelers · Omaha Kitchen & Bathroom Remodelers · Shawnee Kitchen & Bathroom Remodelers · Buena Park Cabinets & Cabinetry · Spring Valley Cabinets & Cabinetry · Tacoma Cabinets & Cabinetry · Wilkinsburg Cabinets & Cabinetry · North Bay Shore Cabinets & Cabinetry · Farragut Tile and Stone Contractors · Niceville Tile and Stone Contractors · Pendleton Tile and Stone Contractors · Roxbury Crossing Tile and Stone Contractorsbiochem101
sandiei
pharaoh
reedruneOriginal Author
jejvtr
Fori
rhome410
reedruneOriginal Author
krissd
modern life interiors
busybme
shelayne
dawn_t
shanghaimom
katieob
pickles_ca
rnest44
reedruneOriginal Author
reedruneOriginal Author
adi1972
rnest44
reedruneOriginal Author
desertsteph
janerabbit