


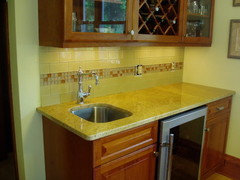
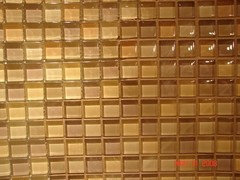
Glass tile install question
straw_bale_ln
15 years ago
Featured Answer
Comments (38)

sue_ct
15 years agostraw_bale_ln
15 years agoRelated Professionals
Four Corners Kitchen & Bathroom Designers · Georgetown Kitchen & Bathroom Designers · Lafayette Kitchen & Bathroom Designers · Springfield Kitchen & Bathroom Designers · North Druid Hills Kitchen & Bathroom Remodelers · Feasterville Trevose Kitchen & Bathroom Remodelers · Fullerton Kitchen & Bathroom Remodelers · Fair Oaks Kitchen & Bathroom Remodelers · Key Biscayne Kitchen & Bathroom Remodelers · Linton Hall Kitchen & Bathroom Remodelers · Fairmont Kitchen & Bathroom Remodelers · Norfolk Cabinets & Cabinetry · Charlottesville Tile and Stone Contractors · Englewood Tile and Stone Contractors · Plum Design-Build Firmsgshop
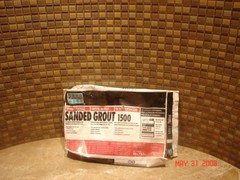
15 years agoberryberry
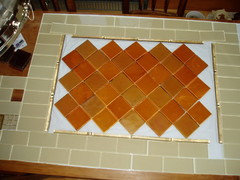
15 years agostraw_bale_ln
15 years agobill_vincent
15 years agohmsweethm
15 years agoredroze
15 years agohmsweethm
15 years agostraw_bale_ln
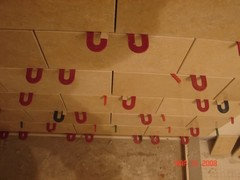
15 years agobill_vincent
15 years agohmsweethm
15 years agobill_vincent
15 years agohmsweethm
15 years agobill_vincent
15 years agobill_vincent
15 years agohmsweethm
15 years agobill_vincent
15 years agobill_vincent
15 years agoelizgonz
15 years agobill_vincent
15 years agoelizgonz
15 years agohmsweethm
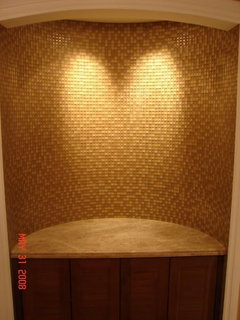
15 years agocallieandkarin
15 years agocallieandkarin
15 years agobill_vincent
15 years agohmsweethm
15 years agocallieandkarin
15 years agoamy_e
15 years agobill_vincent
15 years agosandia
15 years agobill_vincent
15 years agosandia
15 years agosandia
15 years agomicheleyobelle444
15 years agocindywhitall
8 years agoilovedenali
7 years ago
Related Stories

KITCHEN BACKSPLASHESHow to Install a Tile Backsplash
If you've got a steady hand, a few easy-to-find supplies and patience, you can install a tile backsplash in a kitchen or bathroom
Full Story
DOORS5 Questions to Ask Before Installing a Barn Door
Find out whether that barn door you love is the right solution for your space
Full Story
BATHROOM DESIGNShould You Install a Urinal at Home?
Wall-mounted pit stops are handy in more than just man caves — and they can look better than you might think
Full Story
FENCES AND GATESHow to Install a Wood Fence
Gain privacy and separate areas with one of the most economical fencing choices: stained, painted or untreated wood
Full Story
BATHROOM DESIGNHow to Match Tile Heights for a Perfect Installation
Irregular tile heights can mar the look of your bathroom. Here's how to counter the differences
Full Story
REMODELING GUIDESContractor Tips: How to Install Tile
Before you pick up a single tile, pull from these tips for expert results
Full Story
REMODELING GUIDESFinishing Touches: Pro Tricks for Installing Fixtures in Your Tile
Cracked tile, broken drill bits and sloppy-looking fixture installations? Not when you follow these pro tips
Full Story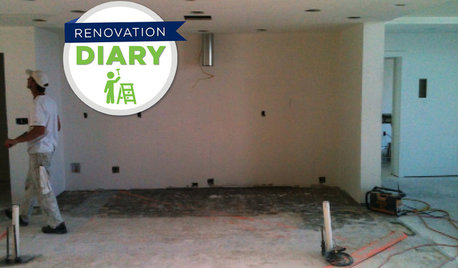
REMODELING GUIDESRanch House Remodel: Installing the Interior Finishes
Renovation Diary, Part 5: Check in on a Florida remodel as the bamboo flooring is laid, the bathroom tiles are set and more
Full Story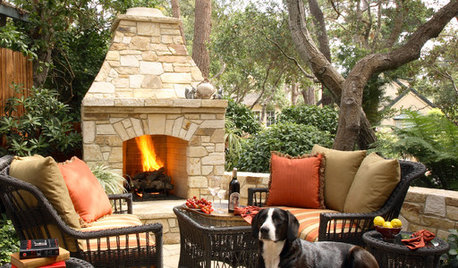
PATIOSSpring Patio Fix-Ups: Install an Outdoor Fireplace or Fire Pit
Make your yard the place to be by adding a fire feature that draws a crowd
Full Story
MATERIALSThe Most Popular Roofing Material is Affordable and Easy to Install
Asphalt shingles, the most widely used roof material in the U.S. are reliable and efficient, and may be right for you
Full StoryMore Discussions


bill_vincent