


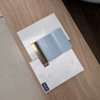
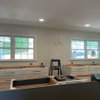
did you tile your subway tile backspash? would you do it again?
babushka_cat
13 years ago
Featured Answer
Comments (22)

xand83
13 years agodoggonegardener
13 years agoRelated Professionals
College Park Kitchen & Bathroom Designers · Peru Kitchen & Bathroom Designers · Philadelphia Kitchen & Bathroom Designers · Southampton Kitchen & Bathroom Designers · Woodlawn Kitchen & Bathroom Designers · Artondale Kitchen & Bathroom Remodelers · Fort Washington Kitchen & Bathroom Remodelers · Vashon Kitchen & Bathroom Remodelers · Vista Kitchen & Bathroom Remodelers · Dover Cabinets & Cabinetry · Glendale Heights Cabinets & Cabinetry · Los Altos Cabinets & Cabinetry · Ridgefield Cabinets & Cabinetry · Sunrise Manor Cabinets & Cabinetry · La Canada Flintridge Tile and Stone Contractorsartemis78
13 years agoartemis78
13 years agomacybaby
13 years ago
Stacey Collins
13 years ago
earthpal
13 years agonoellabelle
13 years ago
Fori
13 years agomacybaby
13 years agoFori
13 years agobabushka_cat
13 years agomomtofour
13 years agomacybaby
13 years agomomtofour
13 years agobabushka_cat
13 years agodianalo
13 years agormaxharrj
13 years ago
Circus Peanut
13 years agodianalo
13 years agomacybaby
13 years ago


Related Stories
KITCHEN DESIGN10 Gorgeous Backsplash Alternatives to Subway Tile
Artistic installations, back-painted glass and pivoting windows prove there are backsplash possibilities beyond the platform
Full Story
BUDGETING YOUR PROJECTHouzz Call: What Did Your Kitchen Renovation Teach You About Budgeting?
Cost is often the biggest shocker in a home renovation project. Share your wisdom to help your fellow Houzzers
Full Story
Disco Fever Hits Home Again
Add a dash of Studio 54 glitz with sparkling tile, tables, lights, and Diana Ross on the stereo
Full Story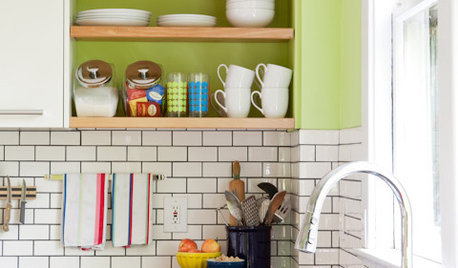
KITCHEN DESIGNSubway Tile Picks Up Gray Grout
Heading into darker territory, subway tile offers a graphic new look for kitchens, bathrooms and more
Full Story
REMODELING GUIDESClassic Subway Tiles Go Uptown
Get a polished, high-end look from subway tiles old and new
Full Story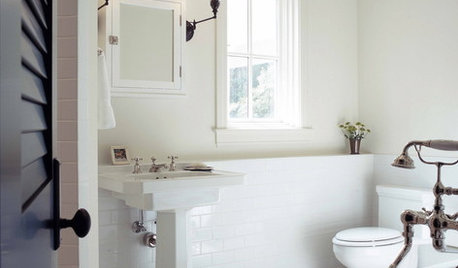
BATHROOM DESIGNSubway Tile Wainscoting Puts Bathrooms on the Right Track
It repels water. It looks clean. It works with many architectural styles. Looks like bathrooms have a ticket to a no-brainer
Full Story
KITCHEN OF THE WEEKKitchen of the Week: What’s Old Is New Again in Texas
A fresh update brings back a 1920s kitchen’s original cottage style
Full Story
VALENTINE’S DAYTell Us: Why Did You Fall in Love With Your House?
What was it about your house that made your heart flutter? Share your photo, and it could make the Houzz homepage
Full Story
Let's Dish! Did You Watch the Flipping Out Premiere?
Contemporary Remodel Kicks off Design Show's New Season. What Did You Think?
Full Story
ARCHITECTURERoots of Style: Where Did Your House Get Its Look?
Explore the role of architectural fashions in current designs through 5 home styles that bridge past and present
Full StoryMore Discussions


macybaby