


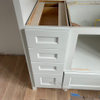
Next step in my counter top
CEFreeman
12 years ago
Sort by:Oldest
Comments (9)
Related Stories
KITCHEN DESIGN3 Steps to Choosing Kitchen Finishes Wisely
Lost your way in the field of options for countertop and cabinet finishes? This advice will put your kitchen renovation back on track
Full Story
KIDS’ SPACESStep Right Up to a Top Model’s Circus-Inspired Nursery
Based on the big top and set in a real castle’s turret, this nursery could be the setting for a storybook
Full Story
BATHROOM WORKBOOKA Step-by-Step Guide to Designing Your Bathroom Vanity
Here are six decisions to make with your pro to get the best vanity layout, look and features for your needs
Full Story
KITCHEN DESIGNHere's Help for Your Next Appliance Shopping Trip
It may be time to think about your appliances in a new way. These guides can help you set up your kitchen for how you like to cook
Full Story
PAINTING10 Rules for Your Next Painting Project
Take your next painting journey from ‘argh!’ to ‘ta-da!’ with these designer tricks
Full Story
KITCHEN COUNTERTOPS10 Top Backsplashes to Pair With Soapstone Countertops
Simplify your decision-making process by checking out how these styles work with soapstone
Full Story
COLORTime to Step Out of Your Color Comfort Zone?
If you always seem to pick warm tones, or you stick to the cool ones, bucking your natural inclination could bring new energy to a room
Full Story
KITCHEN DESIGN7 Steps to Pantry Perfection
Learn from one homeowner’s plan to reorganize her pantry for real life
Full StoryKITCHEN WORKBOOK8 Steps to Surviving a Kitchen Remodel
Living through a kitchen remodel isn’t always fun, but these steps will help you work around a kitchen in disarray
Full Story
REMODELING GUIDES6 Steps to Planning a Successful Building Project
Put in time on the front end to ensure that your home will match your vision in the end
Full StorySponsored
Custom Craftsmanship & Construction Solutions in Franklin County
More Discussions

live_wire_oak
library_girl
Related Professionals
Mount Prospect Kitchen & Bathroom Designers · Portland Kitchen & Bathroom Designers · Ridgewood Kitchen & Bathroom Designers · Salmon Creek Kitchen & Bathroom Designers · Yorba Linda Kitchen & Bathroom Designers · Glen Allen Kitchen & Bathroom Remodelers · Hickory Kitchen & Bathroom Remodelers · Manassas Kitchen & Bathroom Remodelers · Pico Rivera Kitchen & Bathroom Remodelers · Tempe Kitchen & Bathroom Remodelers · Gibsonton Kitchen & Bathroom Remodelers · Black Forest Cabinets & Cabinetry · Glendale Heights Cabinets & Cabinetry · North Bay Shore Cabinets & Cabinetry · Yorkville Design-Build FirmsCEFreemanOriginal Author
writersblock (9b/10a)
CEFreemanOriginal Author
live_wire_oak
CEFreemanOriginal Author
springroz
CEFreemanOriginal Author