


Attention pros. Need advice
gregmills_gw
10 years ago
Sort by:Oldest
Comments (5)
Related Stories

HEALTHY HOMEHow to Childproof Your Home: Expert Advice
Safety strategies, Part 1: Get the lowdown from the pros on which areas of the home need locks, lids, gates and more
Full Story
FEEL-GOOD HOMEThe Pros and Cons of Making Your Bed Every Day
Houzz readers around the world share their preferences, while sleep and housekeeping experts weigh in with advice
Full Story
LATEST NEWS FOR PROFESSIONALSFor Home Pros: How to Rock Your Houzz Profile
Attract more clients by putting on your best business face. Here's how
Full Story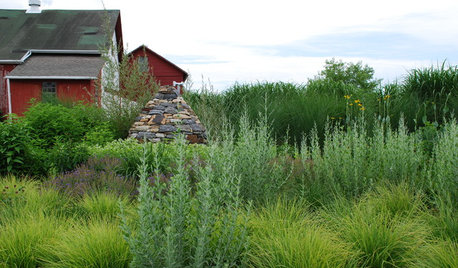
LANDSCAPE DESIGNProblem Solving With the Pros: An Abundant Garden Stretches Its Means
Swaths of resilient, eye-catching plants thrive with little care or resources in the landscape of a Pennsylvania farmhouse
Full Story
REMODELING GUIDESFrom the Pros: 8 Reasons Kitchen Renovations Go Over Budget
We asked kitchen designers to tell us the most common budget-busters they see
Full Story
DECORATING GUIDESWorking With Pros: When to Choose Full Design Services
Whether you want a single room or a whole house done, the maximum service level means the least work for you
Full Story
MOST POPULARFrom the Pros: How to Paint Kitchen Cabinets
Want a major new look for your kitchen or bathroom cabinets on a DIY budget? Don't pick up a paintbrush until you read this
Full Story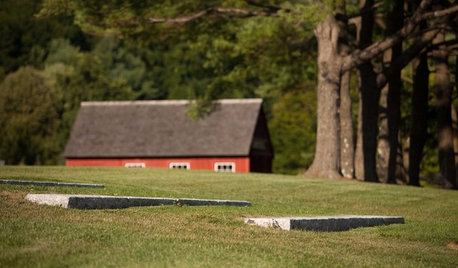
LANDSCAPE DESIGNProblem Solving With the Pros: Rustic Simplicity in a Country Garden
Editing thoughtfully and adding some magic result in a timeless weekend retreat
Full Story
KITCHEN DESIGNSmart Investments in Kitchen Cabinetry — a Realtor's Advice
Get expert info on what cabinet features are worth the money, for both you and potential buyers of your home
Full Story
DECORATING GUIDESFrom the Pros: How to Paint Interior Walls
A slapdash approach can lower a room's entire look, so open your eyes to this wise advice before you open a single paint can
Full Story

User
gregmills_gwOriginal Author
Related Professionals
Davie Flooring Contractors · Downey Flooring Contractors · Dunedin Flooring Contractors · Gainesville Flooring Contractors · Lynden Flooring Contractors · Salem General Contractors · Albany General Contractors · American Canyon General Contractors · Augusta General Contractors · Bay Shore General Contractors · Erlanger General Contractors · Florida City General Contractors · Hartford General Contractors · Medway General Contractors · Milford Mill General ContractorsMiaOKC
gregmills_gwOriginal Author
User