Shop Products
Houzz Logo Print
new_bee_gw

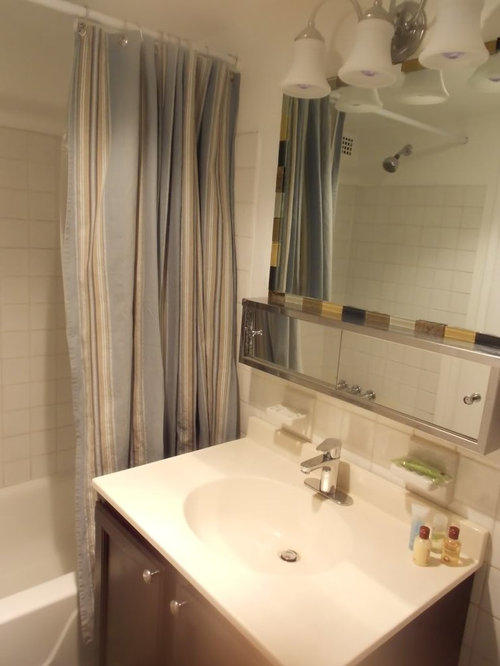
My quick and inexpensive kitchen/bath update

new.bee
11 years ago

Before

After


Painted walls, replaced faucet/light fixture, painted and gel stained vanity, glued glass tile around the mirror edge (it was turning black but was basically cemented to the wall, so not easy to remove.

Before

After

I painted, replaced hood and lighting fixtures (previously a boob light), went with gel stain over cabinets, and used "fake vinyl granite" over the existing mismatched laminate countertops. i would have replaced the hardware but ran out of time. The vinyl laminate is actually not pink at all but rather gold. See link below, which is very much true to color. So far, it's holding up beautifully. Will keep my finger crossed.

Here is a link that might be useful: fake vinyl granite

Comments (21)

  • ellyphant
    11 years ago

    It all looks great...that bathroom mirror fix is genius!

  • LeslieP
    11 years ago

    Amazing improvement! The bathroom is beautiful, you should be so proud of yourself!

  • new.bee
    Original Author
    11 years ago

    Thank you, I'm pretty happy. The original idea was to remove the mirror and that mirror box underneath. Then the tenant said the box was practical, and we found out that the mirror couldn't be removed without taking the wall with it. I got a 5.00 glass tile sheet from HD and used epoxy to glue the tiles around the edge. It's not perfect (see the clamp top left?) but will be fine until a complete future bathroom redo.

  • terezosa / terriks
    11 years ago

    That fake granite looks like an interesting product and perfect for the kind of situation where you need to to a quick update. It's very realistic looking in the pictures. I can envision people using it freshen up a kitchen to sell rather than investing in expensive granite that a buyer may not like.

  • madtown_2006_gw
    11 years ago

    I agree with elly phant - the mirror fix is genius! Very creative and pretty! I am actually wondering if I should try that in my outdated powder room.

    I had never seen the fake vinyl granite - very interesting! Again, something I am kind of inspired to use in my own home. The counters in our laundry room are BRIGHT yellow and since the laundry is pretty far down on the priority list, this would be a fun update!

    GREAT JOB!

  • Bothell
    11 years ago

    new bee - we had the same bathroom mirror/shelf combo & it never ocurred to me to put tile around it. Instead it & some of the wall behind it, got taken out this summer. What a great idea you had.

  • new.bee
    Original Author
    11 years ago

    I bought the fake vinly granite on Overstock for a lower price. Also, you can get it on ebay for less (ezfauxdecorating or something like that).
    Ideally, one would remove the sink and use one long sheet with a cutout. I didn't remove the sink but just cut around it and then caulked around the rim. Also, I have seams, which may be the weak points.
    Disclosure: I have no financial interest in this product.

  • williamsem
    11 years ago

    What a difference! Looks very nice. I love seeing how a room can look completely different without a full tear out. Great job!

  • blondepegasus
    11 years ago

    Your makeovers look fantastic! I had not heard of the vinyl granite before. What can you tell us about the durability? Also, how hard was the install, especially around the edges? I have been looking for a solution for our nightstands, which were expensive but haven't held up on the tops (scratches). I've been considering buying granite slabs to cover the tops but it would cost almost as much as buying new nightstands. This seems like the perfect solution!

  • mitchdesj
    11 years ago

    Great job, everything looks fresh !!! that's cool.

  • new.bee
    Original Author
    11 years ago

    I got a 500.00 quote for laminate, 750.00 for granite counter tops, so laminate sure didn't make sense. However, I didn't want to put granite on old cabinets.
    It was really easy to work with the vinyl and stick it on, but then my longest run is only 5 feet or thereabouts. The edges were pretty easy, too, even the rounded ones, for which I used a hairdryer. First, it looked like the vinyl wouldn't stick at the bottom of the edge, but the next day, it did. It looks actually very clean with no air bubbles. I also had to put pieces together, but you can't really see the seams, but again, I expect that these will be the weak points.
    No idea, how durable it will be, but it seems fairly thick vinyl. I used a scrubbing sponge to remove some dried paint and caulk off a day later, and it didn't scratch the surface. Of course, the true test will be a hot pan and standing water. So far, I can't find any reviews that say how long it lasts.
    I have to say that it actually looks surprisingly good. Obviously not like real granite, but even the carpet installation guy and a contractor thought I had put new counters in.
    There are several web sites that sell and advertise that stuff.
    http://ezfauxdecor.com/
    http://www.instant-granite.com/
    http://www.applianceart.com/Instant_Granite_Film_s/104.htm
    and below another link of someone who used it (but I think she got the stuff for free).

    Here is a link that might be useful: someone who used the fake instant granite

  • xoxogg
    11 years ago

    I think you did a really good job. Was it hard to work with the gel stain? Did you varnish after? What products did you use? Any tips?

  • deeinohio
    11 years ago

    You turned your bathroom into a really calm and serene retreat.

    Great job on the kitchen, as well.

    Dee

  • nosoccermom
    11 years ago

    Another link on the "faux granite."

    Here is a link that might be useful: faux granite countertops

  • Tmnca
    11 years ago

    Wow, great updates! The bathroom looks so much nicer, I love the mirror tile and curtain.

    Thanks so much for sharing about the vinyl granite - we have old, marked up, yellow-y "cultured marble" in our bathrooms and I hate it. But the upstairs bathrooms have8-10' long countertops so replacing them would be very expensive. I think you just gave me the perfect solution, although I am not sure how it will work with undermount sinks. Perhaps I will have to replace the sinks (which have also seen better days).

    Too bad it won't be an option for our kitchen, which has tile. I think we'll end up going with laminate there.

  • mtnrdredux_gw
    11 years ago

    That is night and day! Great job.

    RIP, Snoopy

  • nosoccermom
    11 years ago

    I think it may actually be easier with undermount sinks because you could wrap it underneath. If you use it, can you report back on your experience?

    Here is a link that might be useful:

  • Tmnca
    11 years ago

    That does looks great. I guess I could loosen the sink, drop it a bit to wrap the film under... but our bathrooms have a bevelled edge around the undermount sink not a straight edge as shown, so I am not sure how the flim would adapt to the change in diameter and bevel at the same time, even if it melts a bit with the heat gun. But I think I will give it a go, first buy just enough to do the powder room with the 4' countertop and if it works there I can do the upstairs bathrooms too! I put it on the to do list for the next few months... I'll definitely report back!

  • gmp3
    11 years ago

    Wow, great updates, great budget!

    Love it!

  • gmp3
    11 years ago

    Wow, great updates, great budget!

    Love it!

  • gsciencechick
    11 years ago

    Everything looks great! Love the dark stain on the cabinetry, and the bathroom mirror is fantastic!