Shop Products
Houzz Logo Print
diymadness

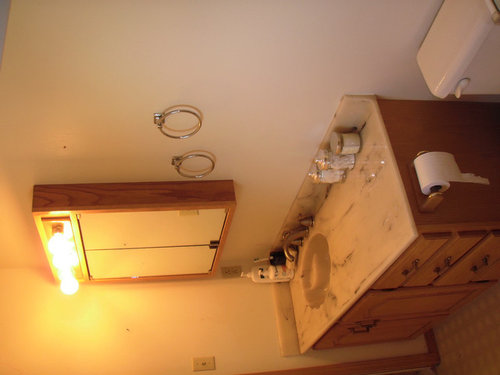
advice please on budget bathroom reno

diymadness
13 years ago

Hi everyone,

I would love your advice on my bathroom reno plan. I have been having problems with water leaking into the wall behind my bathtub, so, since the surround will have to be torn out anyway, I decided to bite the bullet and upgrade my dull, cheap looking bathroom (product of a 1990 reno before I bought the house). That said, I am on a serious budget. And my house is a modest one, and my style is simple and casual, so I don't need to rip everything out an install the latest and greatest (that's why I'm posting over here instead of the bathroom forum, which seems to favor very expensive renos).

Here's the plan:

-- Replace shallow tub with soaker tub.

-- Replace laminate tub surround with tile

-- Replace vinyl flooring with tile

-- Install ventilation fan

-- Keep existing vanity and toilet

-- Paint and get new shower curtain and bathroom accessories

I decided to go for a light, soothing, natural look -- stone-look tile, cream walls, white trim, bamboo blinds, a leafy shower curtain called "Shadow Leaves", and celadon-green accents. I have already decided on the tile. It's a travertine-look ceramic called Daltile Brancacci Fresco Caffe.

My major dilemma -- and where I could use some advice -- is the vanity area. The vanity is golden oak with a cultured-marble top. Above it is a large oak medicine cabinet with "Hollywood" lights. So all very dated. But the vanity is in good shape and super-functional, so I want to keep it. Here are my dilemmas:

-- Should I leave the vanity as is and just replace the hardware with something silver. It does match the natural oak flooring in the adjoining rooms. Or should I paint or stain it?

-- What about the medicine cabinet? I thought about just replacing it with a framed mirror and a separate light fixture. But I use the cabinet heavily (for hair and skin products, vitamins, etc.). So I don't know where all that stuff could go (and yes, I need it to be accessible. I guess I'm just high-maintenance.) I could try to get a more modern looking medicine cabinet but I assume it will have to match the vanity, so I need to figure that out first.

-- What about the area to the right of the medicine cabinet? What would look good there? Open shelving? A closed cabinet (next to a framed mirror maybe)? A piece of art?

I appreciate any and all ideas. I've attached a picture of the vanity area (sorry it's sideways).

Thanks!

Here is a link that might be useful:

Comments (51)

  • fnmroberts
    13 years ago
    last modified: 9 years ago

    This past winter we updated a bathroom used by guests. Fortunately, for us, tile was already in place around the tub/shower and in good shape, and we had no water leaks.
    So, our tub remains though the by-pass sliding door was removed in favor of one of the newer curved curtain rods.

    Same water closet as well.

    We retained the original vanity cabinet by painting it. Sanded, primed with BIN then 2 coats of Cabinet Coat brand paint. It really looks new! Went to a granite fabricator and selected a piece from their remnants which they finished, installed our new basin and drilled for a new faucet which we installed.

    Removed the builders mirror and inexpensive medicine cabinet, then reframed and installed a larger framed mirror cabinet over the basin.

    Replaced the builders strip light with a nicer one.

    Removed the vinyl flooring, then installed marble tile. My DH did everything up to and including the cement board for the tile but we hired a tile setter for the flooring install.

    Removed wallpaper and painted. With new hardware our investment was around $2,000. We thought that was modest for the face lift. I've linked before and after photos. Hope this helps.

    Here is a link that might be useful: Updated Bathroom

  • gwbr54
    13 years ago
    last modified: 9 years ago

    I'd definitely keep the vanity, whether you refinish it or not (it would look more updated were it re-finished). But there's no need for medicine cabinet to match. While more costly, but if at all possible, I'd try to get a new medicine cabinet. A medicine cabinet(s) the width of the vanity would double your storage. Or you could do a large mirror flanked by medicine cabinets (or any wall-hung cabinet, which would be less $$). I love the look of wall sconces placed right on top of the mirror too.

  • prairiedawnpam
    13 years ago
    last modified: 9 years ago

    An inspiration pic for you:

    Here is a link that might be useful:

  • diymadness
    Original Author
    13 years ago
    last modified: 9 years ago

    Hi everyone,
    Thanks so much for the advice and inspiration. Fnmroberts, your bathroom is great. Very soothing and beautiful (and on a reasonable budget). Love the train rack and photo over the toilet. I might just steal that. Gwbr54, thanks for the thoughts on the medicine cabinet. I will do some looking around for wider ones. I never considered that possibility. And prairiedawn, that is a beautiful picture.

    I notice that, in the inspiration pic that prairiedawn posted, there is a lot of dark wood. I see that in a lot of modern baths now. My worry, which may be unfounded, is that dark wood would be too formal and dark in my small, not-fancy bathroom. I am hoping to keep things looking light and fresh. Thoughts?

    Thanks again!

  • palimpsest
    13 years ago
    last modified: 9 years ago

    One thing I would not skimp on in any way is the bathtub and a good tile job around it. That is the most "fixed" part of a bathroom.

    You can change just about anything else but the tub and tile pretty easily.

  • gwbr54
    13 years ago
    last modified: 9 years ago

    Most importantly, use cement boards (such as Wonderboard or Durock) or cement fiber boards (such as Hardibacker)for tile backing around tub. Don't use Greenboard. See link on bath forum that discusses this. Depending on bathroom location, it can also be nice to have add'l soundproofing in the wall.

    Here is a link that might be useful: bath forum link FAQ

  • suero
    13 years ago
    last modified: 9 years ago

    Staining the vanity dark would look really nice with your choice of tile. Do replace the hardware. Setting the floor tile on diagonal would make the bathroom look larger.

  • paintergirl94
    13 years ago
    last modified: 9 years ago

    I'm doing my own bathroom and on a budget, as well. Here are a couple of pics. The tub we did a white subway tile with some of the floor tiles as accents. The vanity is oak painted black, the counter is painted, too.
    I would probably keep your counter, and find a pretty mirror and light fixture. Maybe re-purpose the medicine cabinet, but it is very "dated". You have plenty of space to put some sort of storage unit on the wall, or maybe some shelves. But, you have a great space to get creative with!

  • diymadness
    Original Author
    13 years ago
    last modified: 9 years ago

    Thanks! I have a contractor doing the tiling. I have done a lot of the work on my house myself, but I'm slow, and this is my only bathroom so I need it done fast.

    I just went to the paint shop and picked out a sample of BM Barely Beige to try on the walls. I'm starting to think that staining or painting the vanity darker (thanks for your pics, paintergirl) is a good idea. I don't want the whole room to feel beige and blah (like it does right now). I know that there are a couple of great threads about refinishing cabinets in darker colors. I will have to decide whether to try polyshades (seems like there are mixed reviews) or to just paint.

    Above the vanity, I'm now thinking of a nice dark framed mirror over the sink. And then, to the right of the mirror, some glass shelves. I could put my "bathroom stuff" into baskets and put them on the shelves. My fear with open shelving is that it will look cluttery. The nice thing about medicine cabinets is that they keep everything out of sight. Hmmmmm. Maybe if I stain the vanity, I could just get a nice new dark medicine cabinet. I saw a big one at Home Depot for under $200 (and that's how the budget starts to break down...). So many decisions for such a little room.

  • fnmroberts
    13 years ago
    last modified: 9 years ago

    I absolutely agree with the poster advising cement board behind your tile. Hardyboard is what we used on our floor because it is suppose to be waterproof.

    I also know how components can drive up the $$$'s. Our update began with my wanting the wallpaper removed and fresh paint. DH said he wasn't doing anything without also removing the vinyl floor. Project creep is what we call it.

    Comment about glass shelves. Lots of dust is created in a bathroom and you will be constantly cleaning the shelving. The new medicine cabinet you're considering would solve all the storage and tidiness issues. If there is no plumbing or electrical in the wall you could recess one though reframing might be necessary. Then you could consider sconce or pendant lighting.

    Good luck with your decision process.

  • paintergirl94
    13 years ago
    last modified: 9 years ago

    We bought a medicine cabinet at Green Demolitions for $20. It looked brand new. We put it to the right of the vanity (inset). It's a wood finish and I plan on painting it to match the vanity. I got a mirror at Home Goods, it was the wrong color, so I painted that too. And, bought a light fixture at HD for $15 on sale. I wanted a chandelier over the sink, but we just wanted it done.
    My next project is the wall finish. I have a dark brown base and I think I'm gong to do some kind of pattern....maybe a damask....changes daily.

    Craigslist is always an option!! I shop around, A LOT!

  • andee_gw
    13 years ago
    last modified: 9 years ago

    If you are concerned about the budget, you might keep the medicine cabinet. Whatever you do to the vanity, do the same to the cabinet. Look to see if you can exchange the light fixture. You probably can -- take the whole thing down anyway to paint the wall behind and refinish the cabinet and rewire it then.

  • diymadness
    Original Author
    13 years ago
    last modified: 9 years ago

    Thanks! fnmroberts, you are so right about glass shelves. Everything on them will get a coating of dust and that sticky stuff that seems to accumulate in bathrooms (I assume it is from hairspray, perfume, etc.) Okay, thanks for talking me out of that. Medicine cabinet it is. I've linked the one I'm thinking of. I will put a light fixture above (another decision yet to be made).

    So that means darkening the vanity. I'm thinking of trying a mixture of Polyshades Bombay Mahogany and Walnut (recommended by Redbazel). I guess if I mess it up I can always paint over it.

    Any thoughts for what would be nice over the vanity but to the right of the medicine cabinet (where the unused towel rings are now -- I find them difficult to reach)? I'm thinking of a framed photograph over the toilet, but that leaves an space of empty wall in between. Maybe that's okay.

    Thanks again for the feedback. My friends think I'm insane when I obsess like this -- so it's good to have a place to think it all through.

    Here is a link that might be useful: medicine cabinet

  • diymadness
    Original Author
    13 years ago
    last modified: 9 years ago

    Hi Andee. You posted while I was writing my last message. I never thought of changing the lights in the existing medicine cabinet. What a good idea. But how, I wonder? Are there components that I could buy?

    Off to google this....

  • gwbr54
    13 years ago
    last modified: 9 years ago

    I'd move the towel rings to the short wall near the door. If possible, I'd recess the medicine cabinet (gives you more room), and add additional mirror to the area above the vanity. Above the toilet, I would do artwork of some sort.

  • diymadness
    Original Author
    13 years ago
    last modified: 9 years ago

    gwbr, great idea about moving the towel rings to make them more accessible.

    I've been thinking about Andee's suggestion about replacing the Hollywood lights. What if I removed the Hollywood lights and put in a piece of oak plywood in it's place, and maybe added some crown molding around the top. Then I could refinish the whole thing darker like I plan to do to the vanity. Then I could attach a new light fixture to the new wooden area above the mirrors. Maybe something like the link below. What do you think? It would definitely be less expensive and I could keep my much-loved product storage. Would it look odd or cobbled together? I have a little wood-working and rewiring experience, so I think I could do this. But it would have to be worth the time. Thoughts?

    Here is a link that might be useful: light fixture

  • kjmama
    13 years ago
    last modified: 9 years ago

    Just a quick reaction - The vanity is fine, but to me the medicine cabinet and lights are very dated looking. I like the idea of recessing it - or just a mirror.
    Good luck - we are having to do this too, and the budget is king!

  • mzdee
    13 years ago
    last modified: 9 years ago

    You may find it easier to paint the vanity. Staining the "new wood" can be frustrating. If you can, replace the vanity. In my former house I had a medicine cabinet with and unframed mirror. Loved it. They are not expensive. Got it at Home Depot.

    Good Luck with your renovation. I did a renovation of an "only bath" and boy was that challenging :)

  • diymadness
    Original Author
    13 years ago
    last modified: 9 years ago

    Thanks everyone. I was up late putting a first coat of Polyshades on the vanity to darken it. It looks better already. I'll post pictures when done. I also think I'll just bite the bullet and get a more modern medicine cabinet and light fixture.

    The contractor comes tomorrow. I'm pretty excited. I think I'll go to Homesense (same as Homegoods, I think) tonight and look for accessories.

  • diymadness
    Original Author
    13 years ago
    last modified: 9 years ago

    Well -- as many have said, Minwax Polyshades is pretty hard to work with. I mixed 50-50 Bombay Mahogany and Antique Walnut. I sanded first and used steel wool between coats. I've now got two coats on the vanity and it still looks pretty blotchy and it's a medium reddish brown, not the rich dark brown I was hoping for. I'm still hoping that another couple of coats will do the trick. If not, I'll just paint it a brown-black color. Cross your fingers for me.

  • lyfia
    13 years ago
    last modified: 9 years ago

    It might help if you mix a little bit of lacquer thinner into the polyshades mix to make it a little more runny as that would allow you to get it more even I would think. Take longer to dry though and you probably need more coats that way.

  • bleigh
    13 years ago
    last modified: 9 years ago

    Haven't read through all the replies...sorry if my suggestion is similar to one already posted. I have those horrid honey oak cabinets in my house...I just painted the master bath cabinet Behr's Bitter Chocolate and changed out the hardware. It looks SO much better and I'm actually happy in that room now. I would highly recommend painting your cabinet. It's a very cheap update as you don't need much to cover that small cabinet. You can find some really pretty light fixtures at the home improvement stores for very reasonable (or online if you prefer). I had those Hollywood lights too and changed them out right after moving in. I think I spent $60 on the fixture over our small bath cabinet and it's perfect. Also, could you maybe put up a small wall shelf (possibly with doors) over the right side of the vanity and install a mirror over the sink side? You could possibly do this much cheaper than buying a new medicine cabinet.

  • diymadness
    Original Author
    13 years ago
    last modified: 9 years ago

    Hi everyone. Just an update on my bathroom progress. I just put a third coat of Polyshades on the vanity. It's looking less blotchy, but still pretty streaky and very red. I was hoping for a dark brown. I'll try one more coat tomorrow and see how it looks. I probably should have just painted.

    I also made a run to the hardware store to get new brushed nickel hardware for the cabinet. While I was there I had a look at towel rods, toilet paper holders, etc. I was amazed at how expensive they are. Yikes.

    Still pondering what to do above the vanity. Thanks for all your thoughts. I've been looking at pictures for inspiration, but I'm not seeing any vanities with the off-center sink. I'm basically torn between a new medicine cabinet over the sink with a couple of glass shelves to the right for a few accessories. Or, alternatively, a mirror over the sink and a closed cabinet to right. Hmmmmmm.

  • elle3
    13 years ago
    last modified: 9 years ago

    Someone recently redid their kitchen cabs using General Finishes gel stain in Java...They are the beautiful, dark finish you are looking for. I don't know if you can put it over the polyshades, though. Maybe someone with more knowledge than I can chime in.
    Do a search for Java--it wasn't that long ago.

  • franksmom_2010
    13 years ago
    last modified: 9 years ago

    For towel rings, tp holders, etc., take a look at Walmart and Target. I bought some hardware there, and in tiny print on the package, I saw that it was made by Liberty, who also makes a lot of what's for sale at the home improvement stores, but it was significantly less expensive.

  • gwbr54
    13 years ago
    last modified: 9 years ago

    It would probably feel more spacious with the mirror over sink and cabinet to the right. That way when you bend over to wash face, you have more space.

  • Happyladi
    13 years ago
    last modified: 9 years ago

    Can you post a picture of your vanity now?

  • diymadness
    Original Author
    13 years ago
    last modified: 9 years ago

    Here is where the color is after 4 coats of Polyshades.

    As you can see, it's a very red mahogany color. Not the dark brown that I envisioned. The color is looking more even now, but it's still a bit streaky. Every coat seems to improve the look, so I am tempted to keep going. It has been a lot of work, and I am reluctant to give up. But maybe I should cut my losses and just paint it over with BM Bittersweet chocolate.

    So here's my question -- would this color work? How does it look in your opinion? I've lost perspective. Could this go with the soothing, natural look that I'm hoping for?

  • diymadness
    Original Author
    13 years ago
    last modified: 9 years ago

    By the way, thanks for all the advice that people have offered here. I'll look at Walmart for hardware. And I'll start looking around for wall cabinets.

  • diymadness
    Original Author
    13 years ago
    last modified: 9 years ago

    Hi everyone,
    I know I'm probably over-thinking things here. Part of me says, just put the new hardware in, put the doors back, and see how you feel about it after everything else is in place. The reddish tones might add some warmth to the room and contrast with the planned green accents. I can always repaint if I'm unhappy later.

    And then, part of me says, just paint it over it now, when everything is taken apart. My worry is that the mahogany colour says "formal furniture" not "simple and spa-like".

    Please -- I need a little common sense advice here.

  • diymadness
    Original Author
    13 years ago
    last modified: 9 years ago

    A friend just came by for a visit and said that it is a nice color, much better than the oak. But he also said that it reminded him of an "office" color, not a bathroom color. I assume that he means it looks a little formal. But he also said, it looks great, just put the hardware in and be done with it.

  • Happyladi
    13 years ago
    last modified: 9 years ago

    If you do another coat why not get a different color, one without the red tones?

  • diymadness
    Original Author
    13 years ago
    last modified: 9 years ago

    That's a thought! But what color? I'm currently using a 50/50 mix of Bombay Mahagany and Antique Walnut. Maybe just the Walnut? Would using another color cause streakiness, I wonder?

    Here is a link that might be useful: polyshade colors

  • franksmom_2010
    13 years ago
    last modified: 9 years ago

    Really, if it were me, I'd just leave it for now. Wait until the tile is in and everything else is done, then if you still don't like it, you can always go back.

    We have floor to ceiling wood in almost our entire master bath, and turns out it's stained that Antique Walnut. I hated it from the beginning, but we changed out hardware, added a curtain, new towels and accessories in a seaglass color and white, and IMO, it looks very pretty. The dark wood color with the nickel hardware and "spa" colors looks pretty classy, but still casual.

  • boysrus2
    13 years ago
    last modified: 9 years ago

    diymadness, I wish I'd seen your post earlier. I re-did the finish on one of our bathroom vanities a few months ago to update the look. Followed instructions found on the kitchen forum from celticmoon. She used General Finishes java & espresso gel stain. It took me five days for our double vanity (6 doors and 2 drawers) - not much hands on time, mainly dry times between coats. The gel stain is easy to work with. I changed the yellow/brown fruitwood stain to a dark chocolate espresso color. Celticmoon refinished all her kitchen cabs from an oak stain to espresso and has photos posted. Good luck! It sounds like you're well on the way to a beautiful bathroom.

  • diymadness
    Original Author
    13 years ago
    last modified: 9 years ago

    Hi boyrus! Did you strip your vanity first? I was trying to avoid the hassle of having to strip the existing finish, but it looks like I got myself a whole different hassle! I'll go look up celticmoon's thread...

  • boysrus2
    13 years ago
    last modified: 9 years ago

    diymadness, no stripping required. I saved the directions and here they are as so kindly written by celticmoon:

    SHOPPING LIST:
    -electric screwdriver or screw drill bits
    -mineral spirits to clean the years of gunk off the cabinet
    -miracle cloths (optional)
    -fine sandpaper
    -box-o-disposable gloves from Walgreens or the like
    -old socks or rags for wiping on coats
    -disposable small plastic bowls or plates, and plastic spoons or forks for stirring/dipping (optional)
    -General Finishes water base Espresso stain (pretty thick, but not quite a gel) NOTE: This one may not even be a needed step if the Java gets it dark enough.
    -General Finishes Java gel stain (poly based)
    -General Finishes clear top coat (poly based)
    -old sheets or plastic sheeting or newspaper

    Rockler woodworking stores are a good place to find the General Finish products. Or some larger hardware stores. Quart of each was more than enough for my 60 doors and drawer fronts and goes for $12-14 at Rockler. There are smaller sizes if your project is small.

    SETUP AND PLANNING:
    You will need a place to work and leave wet doors to dry overnight - I set up 2 spaces: garage for sanding/cleaning and basement for staining/sealing. Use newspaper or plastic to protect the surface and floor. Figure out how you will prop doors to dry. Plan blocks of 20-30-minutes for sanding/cleaning bundles of, say, 6 doors at a time. Then just 10-minute sessions to wipe on coats. The coats will need to dry for about 24 hours, so figure that each section of the kitchen will be doorless for 4 or 5 days. Divide the job up into manageable chunks.

    PREPARATION:
    Take off doors and drawer fronts. Try using screw drill bits on an electric drill if you don't have an electric screwdriver. Remove all the hardware. *Mark alike things so you know what goes back where.* Clean the doors thoroughly. Not with TSP but with something pretty strong and scrub well. There's years of grease there.
    Sand LIGHTLY, just a scuffing really. Just enough to break the finish and give it some tooth, no more than a minute a door. A miracle cloth is good for getting most of the dust off. Then wipe well with mineral spirits to clean and get the last of the gunk off.

    STAINING:
    In order, we're gonna put on:
    -General Finishes Espresso water based stain (1 coat) - optional
    -General Finishes Java gel stain (couple coats)
    -General Finishes Clear urethane gel topcoat in satin (couple coats)

    But first put on work clothes, tie up your hair (men, you may skip this step, LOL) and pop your phone into a baggie nearby (you know it will ring). Glove up.
    *First do a trial on the back of a door and check if Java coats alone suffice. If the Java alone is to your liking, just skip the Espresso and return it.*
    Open and stir up the Espresso stain, then spoon some into a plastic bowl. Close the tin so it doesn't get contaminated. Slide a sock over your hand, grab a gob of Espresso and smear it on. Wipe off the excess. Let it dry well - overnight is good. It will lighten as it dries, but then darken again with any other coat or sealer. A second coat might result in a deeper tone at the end - though it seemed like the second coat was just dissolving the first. YMMV.

    Repeat with Java gel. This is thicker and poly based (*not water cleanup!*= messier). Color is a rich dark reddish brown. Wait for the second coat to judge if the color is deep enough for you. I wanted a very deep dark color, like melted dark chocolate. So I went pretty heavy on these layers. *I did not sand between coats*.
    Repeat with clear gel topcoat. This will give you the strength you need in a kitchen.

    Do the same process with the cabinet sides, face and toe kick area. Might need to divide that up also, and stagger the work: doors/cabinets/doors/etc.

    NOTE: The cloth or socks used for the gels are very flammable! Collect and store them in a bucket of water as you go and then dispose of them all properly.

    FINISHING AND REASSEMBLY:
    I suggest you put the doors back up after one clear coat, then you can check everything over and darken an area with more Java if needed, followed by a clear coat. When it all looks right, go over it all again with another clear gel coat. Or two. (See my follow up notes below). Install your hardware.
    The feel of the finish should be wonderful, really smooth and satiny. Color deep and rich - way nicer than that faded, beat 80's oak color.

    FINAL THOUGHTS:
    Definitely experiment first with the back of a door or drawer front to be sure it is the look you want. Yes, this takes a couple days to coat, dry, recoat, dry, etc but you may discover that the Java alone does the trick and this will save you a LOT of work. Front-end patience is worth it.

    This is a pretty easy project to do. Hard to screw it up. The worst is the prep - relative to that, smearing on the coats is cake. I had over 60 pieces (big kitchen) AND island sides and book shelves, etc and I admit I lost steam partway through. Had to push myself through the last of it. But it was worth it. Folks think I got all new cabinets - it looks that good.

    Now the finish will not be as durable as factory finish - go at it with a Brillo pad and you WILL abrade it. But it has held up pretty well. And after a year of pretty heavy use, I had just a few nicks, easily repaired.
    (6/08 Add: I'm now (18 months later) seeing some wear near the pulls on the most used cabinets. Will add color with Java if it bugs me.)
    (9/09 Add: Never did bother to touch up those couple spots. Bugging me a bit more, and I will get to it soon. It is the drinking glass cabinet and the snack cabinet, LOL. And the garbage pull-out. The rest still looks perfect. Lesson: Use an extra coat or 2 of gel on the way frequently used cabinets.)

    I added smashing hardware, raised my pass-through, resurfaced the Corian (also simple but messy and tedious) and replaced the DW and sink. It looks gorgeous to me and I really enjoy the space - how it sits all quiet, clean and serene, then gets all crazy with the food and folks du jour. I couldn't be happier, especially that I didn't have to work another year just to pay for the update!!

    Good luck with your project!! And let me know if you try it and how it turns out.

    -Kris (aka Celticmoon)

  • boysrus2
    13 years ago
    last modified: 9 years ago

    diymadness, a few suggestions if you decide to move forward.

    Get the blue nitrile plastic gloves. The regular ones disintegrate.

    Skip cleaning the vanity as you just stained and go directly to the light sanding.

    Miracle cloths are what my hardware store called a tack cloth.

    I didn't bother with a bucket of water for the gel soaked socks. I put mine in a plastic grocery bag and left it out in my yard away from the house. Each day I added my used socks to this bag and disposed of it at the end of the project.

  • Happyladi
    13 years ago
    last modified: 9 years ago

    I think the color looks fine. Why not just put it all back together with new hardware and live with it for a couple of weeks. You can always change it if you decide you don't like it.

  • diymadness
    Original Author
    13 years ago
    last modified: 9 years ago

    Thanks so much, boysrus. I'm not sure if we can get General Finishes in Canada. I'll check the hardware store tomorrow. But I think I saw some kind of gel stain the last time I was there. Do you think that I could just apply a coat or two of a dark gel stain over the Polyshades finish to "brown it up" a bit? Do you think it will "stick" on top of all that poly? Should I scuff the finish with sandpaper first?

  • boysrus2
    13 years ago
    last modified: 9 years ago

    I found a General Finishes web site and there was a search function for retailers in various areas. Hopefully they sell in Canada too. I'm no expert but I'd do the light sanding step before applying the gel stain. It was an easy step. I mixed the gel stain it up in the container with a plastic spoon and used the spoon to glop it on the doors. Then wiped it down with a sock and used a fresh sock to wipe up any excess. One coat may do it for you. Get the gel clearcoat for the final finish. If you do ever need to do a touch-up (say your tile guy dings something), you can touch it up with a q-tip right over the clear coat.

  • WalnutCreek Zone 7b/8a
    13 years ago
    last modified: 9 years ago

    DIYMadness, you have already put so much work into the polyshades, I would hate for you to switch to the gel - only because the two may not be compatible at all. Why don't you just get another polyshade in Classic Black or Tudor and put a coat of one of those on and see what happens.

  • diymadness
    Original Author
    13 years ago
    last modified: 9 years ago

    Oh dear. I am feeling so undecided. I put another coat of the Polyshades on last night and it does look nice now -- dark and even. But it definitely is "mahogany" -- deep, dark red. Not the espresso color I had envisioned. But I am now hesitant to start putting on other products and other colors. I'm worried that it will look uneven, or that I will just end up with a mess. Arg -- this is what I get for being impulsive and not doing enough research up front. Anyway, I am heading out to a music festival today, so I am going to take a break from obsessing about stain and see how I feel when I get home. Maybe I will just put the new hardware in and see how I feel about it once the tile is in. The overall impression of the room is more important than the precise shade of stain on the vanity, right? Although -- I suspect that I will have a hard time finding a wall cabinet (for over the vanity) to match this stain color -- I've looked around and there is a lot of "espresso" and white (and still a bit of golden oak). Maybe a "cherry" cabinet would co-ordinate, if not match. Anyway, I need to get my mind off all this for a few hours. Have a good weekend, everyone!

  • franksmom_2010
    13 years ago
    last modified: 9 years ago

    By all means, take a break! Good grief, you started this thread 4 days ago! Too much self-inflicted agony at this point...been there, done that. Step away from the bathroom!!

    Another thought on fussing with what you have...I'd at the very least let that Polyshades cure fully for a week or two before I did anything else. If you start sanding or adding on different chemicals at this point, you're likely to end up with a mess. Just leave it alone, and see how you feel about it later.

    For the cabinet, could you choose something close to the original color of the vanity, and just use the same stain you have? Or, you could paint it to match the wall color, or you could finish it to match the metals in the room, or???

  • natal
    13 years ago
    last modified: 9 years ago

    Fnmroberts, is your vanity oak? I'm hoping to tackle a bathroom reno next year and I was originally planning on painting the oak vanity espresso, but am rethinking that knowing how dusty a bathroom gets on a daily basis. I might be happier with it painted white. If yours is oak I'm curious how much the grain shows through.

  • robin_g
    13 years ago
    last modified: 9 years ago

    My advice on the lights, having done a bathroom reno a few years back: the overhead lights (either downlights as you posted or the Hollywood lights) cast harsh shadows. I put lights on either side of the medicine chest. The medicine cabinets were from Lowe's (two side by side, each with two doors--I had a huge recessed space to fill when the old 1950s one came out!)

  • fnmroberts
    13 years ago
    last modified: 9 years ago

    natal

    Never thought about the dust issue, but we do have an ebony vainity in our Powder Room and dust does show there. Guess I'm glad white was the color selected. The cabinet for the bath linked earlier is maple, so we had almost no grain to hide while painting.

    To paint, my DH uninstalled the cabinet and removed it to another room. This enabled it to be turned and painted on only the horizontal sections at one time. Yes, this took several days but since we had much in-the-room work, was determined to be easier for our project.

    Our paint selection was a self-leveling brand named Cabinet Coat. I suspect that after priming, two coats would cover the grain of oak. Test the inside of a drawer or door face to determine. Hope it works for you.

  • bleigh
    13 years ago
    last modified: 9 years ago

    natal,
    I just painted the oak cabinet in our master bath bitter chocolate. I sanded and primed and the grain still shows through. BUT, I wanted to see the grain. It's very subtle and only really noticed at certain angles. While I don't typically love oak, unless it's antique or on a floor, I do love wood and seeing the grain gives a bit of organic texture that I love. I have two little ones who love to brush their teeth in my bathroom and the toothpaste spatter is very noticeable (at least they brush well). Dust hasn't been a problem as the surface is vertical.

    diymadness,
    I agree with the suggestion of taking a break. If the cabinet looks good then just leave it even if it's not the exact color you imagined. Don't worry about the wall cabinet above being a perfect match either. If you find something close enough it will be fine. The light will hit what's on the wall differently than what is below the countertop. A slight difference won't really be noticeable. Maybe you could silver/gold leaf the wood on the wall cabinet if you don't like the wood not matching exactly?? Ideas for when you've had some R&R from this room. Hope you had a great time at the music festival!!

  • Happyladi
    13 years ago
    last modified: 9 years ago

    I stained my base cabinets and I painted my over the toilet wall cabinet white rather then trying to match the base cabinets. I think the white looks nice, it matches the white trim and doors.

  • natal
    13 years ago
    last modified: 9 years ago

    Fnmroberts and Bleigh, thanks for the info! Our vanity cabinet was made by a friend years ago. The bathroom is small and we needed to optimize space, but the raised design on the door and drawer fronts is such that it collects dust. I'm thinking about having new door & drawer fronts made for the cabinet and will probably choose maple.

    I've heard Cabinet Coat mentioned a number of times on these forums. I don't know if it's available locally though. I'll have to start checking.