


How do you remove seeds from homemade Blackberry Jam?
napagirl
15 years ago
Featured Answer
Comments (24)

Terri_PacNW
15 years ago
greenbean08_gw
15 years agoRelated Discussions
Do you deseed blackberries?
Comments (21)I use a food mill for many, many food applications and taking the seeds out of berries is an important one. It helps to mash them a bit then thru the mill and the juice and seeds and pulp separated..... then put the seedy part into the jam pan with some water and warmed a bit and thru the mill again. Sometimes, I do add some whole berries to make it chunky, but I have found that if you leave all the seeds in, it is too seedy. The mill is also great for removing seeds and skins from tomatoes, seedy grapes. I don't make a big production out of it... just do the daily pickings ...deseed, measure and freeze until I am ready to make jam. hope the link works Here is a link that might be useful: http://www.amazon.com/s/ref=nb_sb_ss_c_0_9?url=search-alias%3Dgarden&field-keywords=food+mill&sprefix=Food+m...See MoreBlackberry Jam and Jelly from same batch of fruit
Comments (14)Oh, that is so funny! Good thing the wise people of the Harvest Forum set you straight before you made some nasty, seedy jam! I myself do not enjoy the blackberry seeds, so I use my Roma tomato press to remove most of them. Makes the task a breeze! And then my favorite blackberry jam recipe is as follows: Wild Blackberry and Earl Grey Jam (Source: adapted from Christine Ferber's Mes Confitures and inspired by the Little Red Bike Cafe) 10 oz. boiling water 4 Earl Grey tea bags (I used Twinings) 3 pounds wild blackberries (cultivated ones would be good, too) 6 3/4 cups granulated sugar (you could go as low as 5 cups for a jam that is less sweet) zest and juice of one large lemon 1/2 teaspoon butter Bring water to a boil, then steep the tea bags for five minutes. Squeeze the excess liquid out of the tea bags and discard. Set brewed tea aside while you prepare the fruit. Pick over the blackberries. Rinse them quickly in cold water without soaking them. In a preserving pan, combine the blackberries, sugar, lemon zest and juice. Bring to a simmer. Pour into a ceramic bowl and stir in the tea. Cover the fruit with a sheet of parchment paper or plastic wrap and refrigerate overnight. The next day, if you like, run the fruit preparation through a Roma-type strainer before cooking it down. (I used the berry screen, and I ran the pulp through a couple of extra times to get out every drop of berry goodness before discarding the remaining leathery fibers and seeds. Of course, if you like the seeds in your jam...never mind.) Bring this preparation to a boil along with 1/2 teaspoon of butter, stirring gently. Continue cooking on high heat at a full, rolling boil for 15 minutes, stirring constantly. Check the set on a cold plate (it's done when you push the jam and it wrinkles--mine took about 20 minutes). Put the jam into jars immediately, seal, and process for ten minutes in a boiling water bath. This makes about six half-pints. Here is a link that might be useful: Lindsey's Luscious (my food blog)...See Moreraspberry jam - remove seeds, add more berries?
Comments (10)I don't know if you are averse to using pectin, but here is a recipe using Pamona's from the North American Raspberry and Blackberry Assn: Edited by Olychick: the recipe calls for 4 tsp pectin, but the directions call for 4 CUPS of pectin, obviously a typo.... 8 cups strained seedless black raspberry pulp 4 teaspoons calcium-water mixture prepared per Pomona's Pectin package 2 Tbsp lemon juice 2 cups sugar 4 teaspoons Pomona's Universal Pectin Directions: For Fruit Mixture, combine black raspberry pulp, calcium-water mixture, and lemon juice in a 6-quart or 8-quart stainless steel pot. In a separate container, combine 2 cups sugar and 4 cups Universal Pectin. Heat Fruit Mixture slowly to boil. Turn down heat, add Sugar-Pectin Mixture to Fruit Mixture, mix for 2 minutes to dissolve sugar. Turn up heat (a bit above medium on a gas stove) Bring to good boil, turn off heat. Fill jars to 1/4 inch from top, apply lids. Process in hot water bath canner: 10 minutes at sea level, 15 minutes at 5000 ft altitude. Shelf life one year. Note from Pete Tallman: Standard supermarket pectin formulas like Sure-Jell don't work with such low sugar percentages. This recipe was developed according to cooked jam recipes from instructions included in Pomona's Universal Pectin, which is available at many natural food stores. See www.pomonapectin.com for list of stores. See Pomona's Universal Pectin recipes for use with alternative sweeteners. Source: Peter Tallman, developer of new black raspberry variety "Niwot" Here is a link that might be useful: Seedless black raspberry jam This post was edited by olychick on Mon, Jul 7, 14 at 22:08...See MoreHow do I start tomatoes from seed?
Comments (0)Image by: PCG #1 Get Fresh Seeds For the best chances of success, acquire your seeds from reputable commercial sources. As tomato seeds age, their germination rate decreases. It is best to use seed that is less than 4 years old; however, seed that is much older can usually be germinated if has been stored in cool and dry conditions. #2 Get a Seed Starting Mix Garden soil is not a good choice, as it compacts too easily and can harbor organisms that cause diseases. A commercially prepared seed starting mix, usually a combination of peat moss, vermiculite and perlite, is recommended. Avoid mixes that have a high fertilizer content, as this causes more problems than good. Commonly used and recommended mixes are Jiffy Mix, ProMix, MetroMix and Fafard. Many other brands, or even homemade mixes, can be used. Combine the seed starting mix thoroughly with warm water to bring it to a useable state. This may take quite a lot of mixing, as completely dry mixes can be difficult to wet. Sometimes it's best to let the moistened mix sit overnight to be sure that it is evenly wet. The final mix should be damp like a wrung-out sponge, not soaked or soggy. #3 Select Some Containers Tomato seeds will germinate in anything as long as the seeds get moisture and warmth. After germination and initial growth, the seedlings need to be potted up to larger containers. Containers must be able to drain excess water. If using old or previously used containers, its best to sterilize them with a 10% bleach solution. Your choice of containers for potting up depends on the number of plants you desire. Professional nurseries use growing "flats" with various-sized plastic cell inserts. Many sizes and kinds of flats are commercially available to the home grower, but they are not essential. Many home growers use styrofoam or plastic drinking cups with holes poked in the bottom. Just about anything will work as long as excess water can drain. #4 Determine When to Start Many novices fail at starting tomatoes simply because they start too early. Given the proper care, full-sized tomato transplants can be grown in 6 to 8 weeks. Before planting seeds, you must determine when your plants can be safely placed into the garden. Planting outdoors is best done about 1 or 2 weeks after the average last frost date for your area. Ask friends or use web resources to find your average last frost date, then do the math to calculate your seed starting date. #5 Plant Your Seeds Fill a small container with damp seed starting mix. Plant your seeds about 1/8 inch (3 mm) deep. Firm the mix lightly to ensure that the seed is in direct contact with the moist mix. The seed needs to absorb moisture during the germination process. You can plant lots of seeds close together because the resulting seedlings will be moved to larger containers after germination (when the first true leaves appear). It is a good idea to provide some sort of covering over your germination containers to preserve moisture. You can place the container in a plastic bag or cover it with a sheet of plastic. Allow for some air to circulate but don't let the mix dry out. Dry seeds will not germinate. #6 Patiently Wait for Germination Place the germination container in a warm location out of direct sunlight. Light is not needed during the germination process, but will not be harmful as long as high temperatures are avoided. Tomato seeds usually germinate within 5 to 10 days when kept in the optimum temperature range of 70 to 80F (21 to 27C). Germination is delayed by lower temperatures and accelerated by higher temperatures. Temperatures below 50F (10C) or above 95F (35C) are detrimental to germination. Keep a close eye on the first seedlings, as they need to be moved into bright light as soon as they emerge from the soil. They will explosively reach for light, and if the light is not adequate, you will get 3-inch-long (8 cm long) stems shortly after germination - this is very undesirable. If this occurs, you could try to transplant to a deeper container, or you may want to start over. #7 Put the Seedlings under Light Very strong light is needed to support tomato growth. A heated greenhouse is the ultimate location to continue growing your seedlings. A second choice would be a cold frame (possibly with supplemental heat for cool nights). Many home growers use inexpensive fluorescent shop lights. A south-facing windowsill can work but usually presents more problems than the fluorescent shop light setup. If fluorescent shop lights are used, the leaves of the plants must be within inches of the bulbs. Use your own creativity to make a setup that gets the plants directly under the bulbs. The lights should remain on for 16 to 18 hours per day. #8 Monitor the Plants as They Grow On Tomato seedlings grow best at a temperature of about 65F (18C) with some air circulation and lots of light. When watering, most growers soak the mix and then let it get nearly dry before providing more water. When the plants develop their first true leaves, they should be transplanted into larger individual containers. The plants actually benefit from this re-potting step, as it helps them develop a strong root system. The plants may be set deeply into their new containers to shorten the height of the seedling. Most commercial seed starting mixtures have a small amount of fertilizer that will support small seedlings for some time. Depending on the components of your starting mix, you may need to begin fertilizing. If you do fertilize, do it very, very sparingly with a weak dilution. Depending on the size of your containers and your growing conditions, you may need to pot up a second or third time to prevent your plants from becoming rootbound. The plants require good lighting to continue to grow well. Place the plants where they get plenty of sunlight, and if that is not possible or adequate, use fluorescent fixtures, or specialized high-intensity grow lamps, or use a combination of natural and artificial lighting. Keeping large tomato plants indoors, under artifical lighting, can be quite difficult. To avoid problems, don't start too early. The best solution to the lighting dilemma is to plan your seed starting date so that the transplants reach a reasonable size along with the arrival of suitable outdoor temperatures. #9 Harden Off your Transplants Introduce the plants to outdoor conditions slowly. This is called "hardening off". If it is not done slowly your plants may be shocked and their growth may temporarily cease. The longer the plants remains indoors, the harder it will be to acclimate them to the outdoors. Avoid full sun and wind when you first move them outside. Cold frames can be used to harden off the plants. The covers can remain in place on inclement days and removed on moderate days. Temporary structures can be built from plastic sheeting. Buildings and fences can be used to provide sun and wind protection while the plants adapt to outside conditions. If really cold weather is forecast After the transplants are hardened off, they can be planted to their final outdoor growing locations either in the garden or in large growing containers. Most agree that any early blossoms should be plucked off prior to transplanting. Others leave the early blossoms in place, especially if the transplant is strong, healthy, and not rootbound. Common Problems Leggy Seedlings The plants can become "leggy," the stems being elongated and limp, and the foliage sparse. Leggy seedlings usually occur due to insufficient lighting, too much heat, or too much fertilizer. Suggested remedies, short of starting over, are to repot the plants deeper as described earlier in Step #8, and to use a fan to improve air circulation and keep temperatures moderated, resulting in stockier and stronger plants. Damping Off Characterized by lack of germination (pre-emergent) or causes narrowing of the newly emerged stems at the soil line and the tiny seedlings then flop over and die (post-emergent). Various fungi are responsible for the condition and they are found in high concentrations in any mix with real soil. That's why it's best to use the artificial seed starting mixes mentioned in step #2. Also, it's very important to be sure that plastic domes or baggies on your containers are not airtight. If these precautions are observed, it is unlikely that you will experience damping off. Slow Growth When seedlings refuse to grow it is usually because the temperature is too low or the nutrient level is insufficient. Stuck Leaves Sometimes the cotyledons (the first leaves formed from the seed) have trouble getting loose from the seed coating. Be patient, as the leaves will usually escape. You could wet the seed coating, or you could try to carefully pinch off the seed coat, but if you pinch off the cotyledons, the seedling will likely die. A simple way to wet the seedlings is with a spray bottle of water set to mist. A small drop of saliva is also very effective at loosening seedcoats. Over-watering Many growers fail with tomato plants because they over-water. Soggy soil will cause seed to rot. Once the seedlings are growing, they should be watered thoroughly then left un-watered until they are almost ready to wilt. Over-fertilizing Overfertilizing can cause seedlings to die, to stop growing, or to grow rapidly into spindly plants. One or at most 2 applications of very dilute fertilizer are adequate to get a seedling through to transplant size. Credits:This FAQ is a collaborative effort of Gardenweb members. Specifically, Carolyn137, chemocurl, Earl, funky_demon, Fusion_Power, gardengalrn, Gimme3Steps, greggf, hermantomato, John_Colorado, korney19, Linda_Xn_10_CA, LizzieA, mindsmile, mnewsom30, naturelle, NCTomatoman, Paul2101, reginak, Sally_84, sarah_may, tmflyfish, vaped, zabby17 image by : Paul2101 Good luck and feel free to ask detailed questions in the Growing Tomatoes Forum...See More
centralcacyclist
15 years agoreadinglady
15 years agogranjan
15 years ago
Lars
15 years agocolleenoz
15 years agoTerri_PacNW
15 years agolisacdm
15 years ago
annie1992
15 years agogourmet1
10 years agomabeldingeldine_gw
10 years agoanoriginal
10 years agoannie1992
10 years ago
Cloud Swift
10 years agoflowergirl70ks
10 years agoclanmclain
7 years ago
Olychick
7 years agoH B
7 years agoH B
7 years agolascatx
7 years agoannie1992
7 years agomarymd7
7 years ago
Related Stories
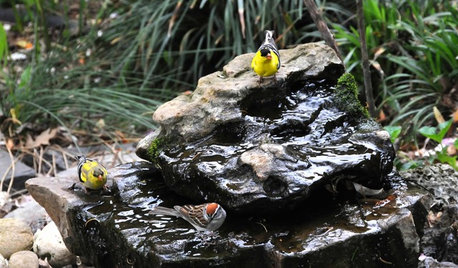
OUTDOOR PROJECTSBring In the Birds With a Homemade Bubble Rock
An avian expert from Southern Indiana shows how to make a burbling fountain that migrating birds will love
Full Story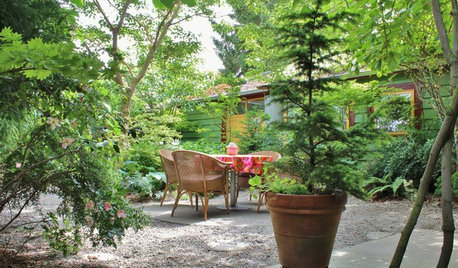
INSPIRING GARDENSFrom Concrete Lot to Gracious Organic Garden in Seattle
Plants, pests and even weeds have a place in this landscape, which offers an edible bounty and a feast for the eyes
Full Story
DIY PROJECTSCreate a Pretty Jewelry Stand From Vintage China
Give treasured dishes new life as a beautiful jewelry stand with this DIY project
Full Story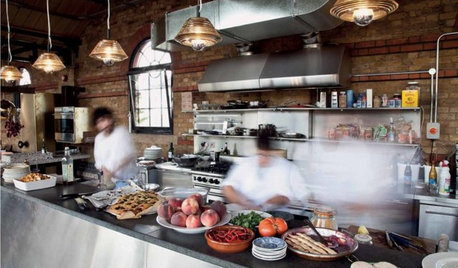
KITCHEN DESIGN16 Practical Ideas to Borrow From Professional Kitchens
Restaurant kitchens are designed to function efficiently and safely. Why not adopt some of their tricks in your own home?
Full Story
MOST POPULAR16 Ways to Get More From Your Small Backyard
Make a tight or awkward yard a real destination with these design tricks from the pros
Full Story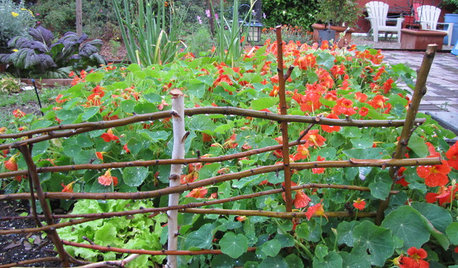
GARDENING AND LANDSCAPINGEdible Flowers Offer a Sweet Taste from the Garden
Flowers that beautify the landscape can also pretty up the plate or sweeten a spread
Full Story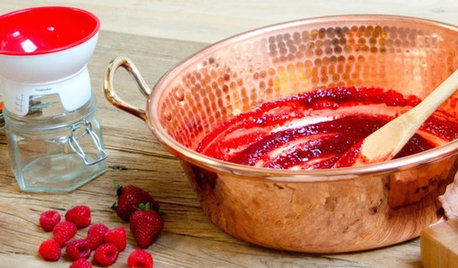
SHOP HOUZZHouzz Products: Save a Taste of Summer
Can't bear to part with the flavors of summer peaches, berries and tomatoes? Then jam on it!
Full Story
GARDENING GUIDESYour Garden Is Stirring — Here’s What to Do in February
February is a good time to start seeds, shape up shrubs and watch for the earliest blooms. Here’s what to do in your part of the U.S. now
Full Story
GARDENING GUIDESTexas Gardener's February Checklist
Show roses some love around Valentine's Day and set the stage for future garden growth with seeds and starts
Full Story
GARDENING AND LANDSCAPINGWorld of Design: 10 Home Gardeners Show Us Their Sweet Summer Harvests
From New York to Tokyo, these gardeners have turned their yards, terraces and rooftops into places of bounty
Full Story

jessyf