Food Photo Tips: Part 10 -
Hi again everyone. I'm back with another entry on how to use your digital camera for taking tabletop photos.
I apologize again for the delay in posting this next-to-last tutorial.
After publishing the last entry I had computer problems and couldn't work until our repair man came with a new graphics card, which is now installed.
The Self-Timer Function
Perhaps you are accustomed to using the self timer so this will be nothing new for you, but if you have hesitated to try this very useful function on your P & S (point and shoot) camera you will be pleased to see how easy it is to not only to put yourself into a picture but also to sharpen some of your tabletop photos by avoiding camera shake when you press the shutter.
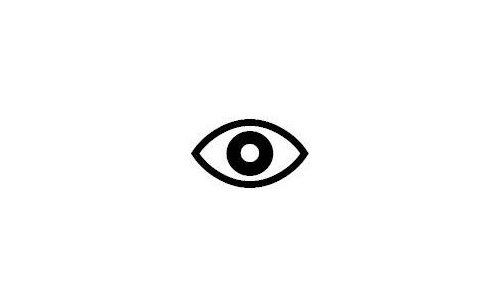
Here is the icon for the self-timer and where it may appear on the back of your camera body:
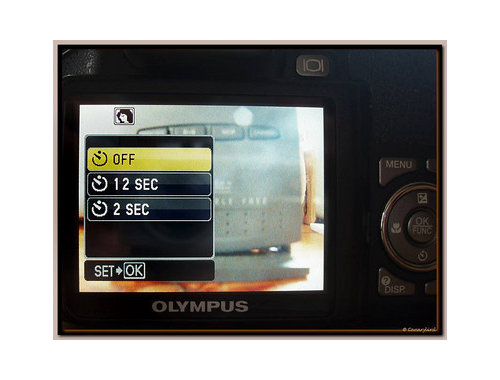
And here are the settings on my camera, which may be different on yours:
And as seen displayed in the camera menu after entering the self-timer option you could have: OFF, 12 Seconds, 2 Seconds.
The procedure to use the self timer couldn't be simpler.
Assuming the camera is either firmly attached to a tripod or resting on a stable surface, find the self-time menu and decide how long you want the camera to wait before it takes the picture.
If you are going to jump into a group photo, then give yourself the longest time in order to settle yourself comfortably in the photo, eg 12 seconds.
On the other hand, if you are going to use the timer to avoid possible camera shake during a tabletop photo shoot while you stand behind the camera, then set the shortest time lag.
Then press the OK button.
Press the camera shutter button half way down and look to see that the green focus light doesn't blink. (If it blinks then you have to move the camera further or closer to your subject since blinking means the camera can't focus at the distance you have chosen.) When the green light is steady, press the shutter button all the rest of the way down. Take your finger off the camera and either run to join your group or wait without touching while it beeps a countdown and takes the photo. You've just used the self timer!
By doing this you have avoided any possible movement of the camera that could occur as your finger presses the shutter button.
While the camera is in countdown, you can do other things, such as holding a white reflector near your subject to improve the lighting.
That's another advantage to using a tripod. Your hands are free while the camera takes the photo.
The Flash Menu
The flash menu is usually accessed by pressing the lightening bolt flash icon on the back of the camera touchpad.
See again the above photo of the back of the camera with red arrows. Pressing the touchpad at that point brings you into the flash menu, where the icons are quite easy to understand.
You may need to press the flash pop-up button (3rd photo) to begin using the flash.
The flash will fire automatically when there is insufficient light. The camera decides if you need flash or not.
Red-eye reduce mode. The camera emits pre-flashes before firing the regular flash in order to avoid red-eye.
Fill-in flash. The flash will always fire regardless of light conditions. Useful for eliminating deep shadow on the subject's face when subject has back to sunlight, or in similar circumstances where you want to eliminate shadow.
Always emits pre-flashes for red-eye reduction.
Flash off. When the lightening bolt is surrounded by a circle or square, it means the flash will not fire even in low light conditions.
Remember that a P & S camera flash will make your food look very flat and unappetizing, so don't ever use it for food photos.
Photographing Silverware
Although it doesn't quite fit in to the subject of food photography, a tablesetting is often included in a closeup food photo.
Flatware can be a difficult subject to photograph due to the reflective surfaces, especially when dealing with spoons, where the room surroundings are often reflected in the bowl.
I'm going to show examples taken in daylight by a window using white and black backgrounds, with and without a tripod.
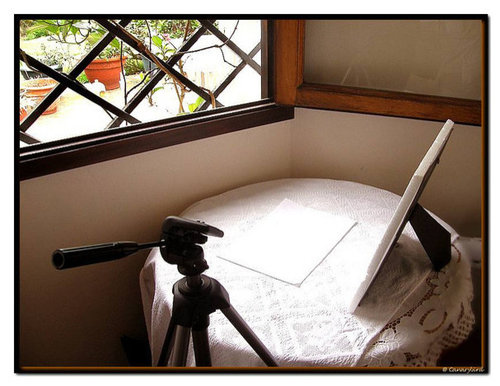
Here is my setup, using one and later two styrofoam reflectors on the dark side.
Here below are examples on black velveteen. (One of my old Christmas party tops pulled from the back of the cupboard!)
The first photo shows a bad example of how a handheld camera shot at this arrangement of three spoons reflects my hands and camera.
In the next two photos, the spoons have been arranged differently so they reflect more the surrounding room.
The following photos will enlarge with a mouseclick.
Here at the left is another example of a bad reflection. Although the pattern of the silverware shows up nicely, the bowl again reflects the photographer.
The centre photo shows a closeup using macro mode where the pattern is the prime object. But the picture on the right is not a photo at all, but rather one taken in a flatbed scanner.
Don't forget that for posting to auction sites a scanned image may serve your purpose.
Using the Tripod and Self-Timer
When you have your camera set up on a tripod you will surely be able to take clear, sharp images of something as fine as silverware, where you want to display the pattern clearly.
In order to get yourself and your hands out of the picture, using the tripod and the self timer allows you to duck out of the way so you are not reflected in the silverware.
Here below is the sequence for doing this:
1) Photo left - set up the flatware on black velveteen, black or white paper or cloth and with camera on the tripod, adjust the level of the view and zoom a little until you are happy with the image in the viewfinder or LCD screen.
2) Photo centre - set your timer for the delay in seconds, enough for you to move away from the camera. Press the OKAY button to confirm your choice.
3) Photo right - press the shutter halfway and when the green focus light gives a small beep and a steady green light... press the shutter the rest of the way down.
You haven't yet taken the picture but the camera is now counting down the number of seconds you have set, so move yourself out of the way. The shutter will open and the camera will take the photo without your touching it.
Remember that if in step 3 the green focus light blinks rather than stays steady, the camera can't focus at the distance you have set.
Change your zoom level (more zoom or less zoom) or if necessary, move the tripod further away.
Here's the photo just taken in the example above, at left. Centre and right photos are a couple more done using tripod and timer where the reflection in the spoons is of the window.
I hope you are understanding it all and if you have questions please ask here or PM me.
So thanks for joining me. The next tutorial will be the last one, so I hope to have it ready soon. . And please feel free to save the pages on your computer.
Sharon (Canarybird) :-)
(All text and photos copyrighted)
Free for personal, non-commercial use


Lars
canarybird01Original Author
Related Discussions
Self-contained, Closed System Vivariums
Q
Tablesettings part 2
Q
Food Photo Tips: Part 10 Self-timer, Flash & Silverware
Q
Food Photo Tips: Part 10 Self-timer, Flash & Silverware
Q