Food Photo Tips: Part 5 - Artificial Light
Hi again everyone. I'm back with another entry on how to use your digital camera for taking tabletop photos.
Finding the right illumination for taking food photos after dark can be even more challenging than finding the right window for daylight photos and much has been written about it.
It would be an ideal situation if we all had a room off the kitchen with studio softbox lights set up over a table where we could just whip down the plated food, snap the shutter and then breeze back into the kitchen to serve the family dinner before it got cold. Those with large, well lit kitchens are lucky to have perhaps focal lights over a counter, or a well illuminated baking centre, ideal for photos.
It is known that the larger the light source, the softer will be the shadows and conversely, the smaller and closer the light source, the sharper will be the shadows. So an ideal studio situation would be to have an illumination diffused enough so that it cast a flattering light without creating heavy shadows, used perhaps together with secondary lights and reflectors. Flash should never be used for food photos as it flattens the images so the result is most unattractive.
But most of us have to cope with less than perfect conditions with over the counter strip lighting, lights in the stove exhaust hood, a lamp over the dining table or a small desk spot in a corner of the kitchen.
This is an extensive subject which has turned into a large entry for today, so I'm going to separate it into paragraphs of different situations, showing how to cope with a certain type of lighting and equipment so you are able to digest it a bite at a time.
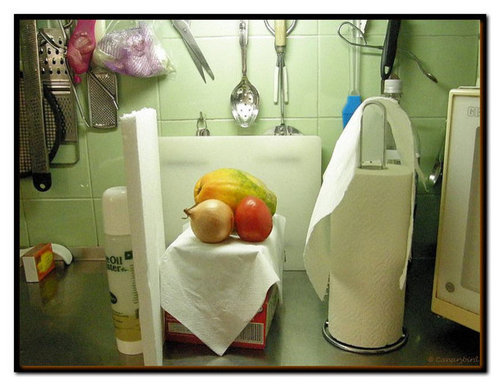
- Worst Case Scenario - The Small Kitchen - One under-cupboard tube FLUORESCENT LIGHT:
In this case, my tiny kitchen ...which has one old fashioned 8 watt fluorescent tube to illuminate the counter.
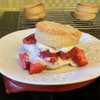
Above you see the improvised studio: a white cutting board placed behind, a white paper towel as reflector hanging over the paper roll, a piece of white foam as reflector left, and the subject placed on a white paper napkin draped over two cereal boxes. Took just a minute to set up, and it worked fine, considering the less than ideal setting. Here's the result:
Since indoor lighting is much weaker than daylight, the shutter speed of your camera will be slower, and the Scene settings such as Indoor, Candle and Available Light on your point & shoot will make that adjustment when you choose that scene. When the shutter stays open longer, any slight movement of the camera will cause a blurry photo. To put it simply, you really need a tripod when taking photos indoors after dark unless you can brace yourself and the camera so there isn't the slightest movement. To take this photo above in the weak light from the little 8 watt bulb I made several tries handholding the camera but without success, so I set up the tripod and was able to get a fairly decent photo.
If you are trying to photograph your food in these light circumstances, you will need a tripod. In most cases there just isn't enough light to do it otherwise when avoiding flash.
The camera was set to Scene: INDOOR, White Balance (WB) set to FLUORESCENT 1 (that's the first of those centipedes on your WB menu), and the Exposure Value (EV) was raised to 0+.3....that's one notch up from 0.0.
More details on settings for anyone who likes to know: Shutter speed 1/25s Aperture.f/4.2 .ISO 800.
How are you doing so far? I hope you find it still easy to understand.
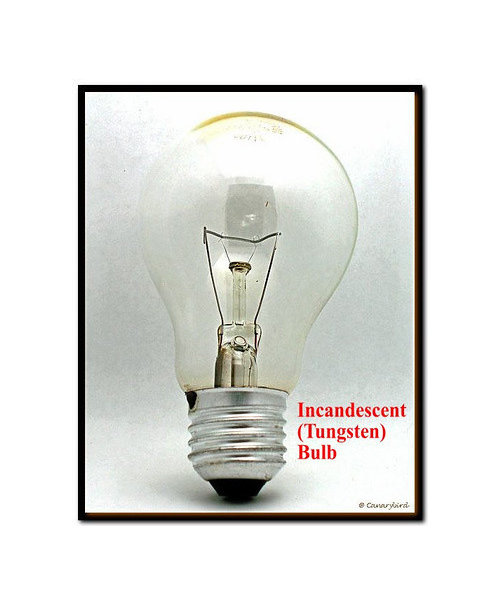
2. Overhead Lamp - TUNGSTEN - single 60 watt bulb
These are the incandescent light bulbs which are being phased out to be replaced by the new CFL (compact fluorescent lamp) bulbs which are much brighter at lower wattage and cooler temperatures.
But many of us still have these in our homes and so I used this as an example of how to get by with just one such desk or floor lamp shining down on your subject.
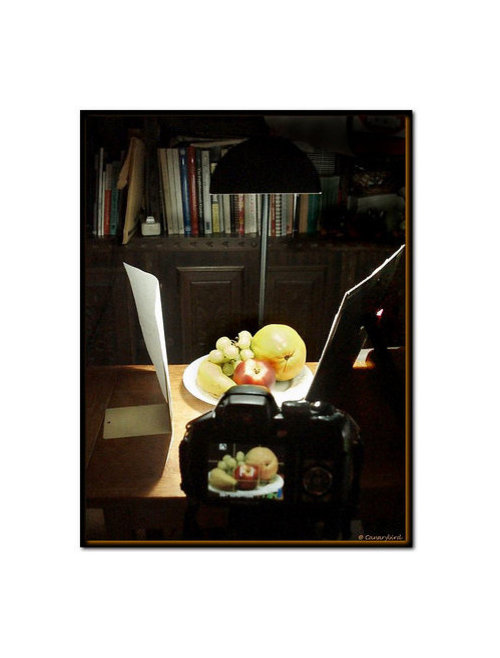
You may have to raise it up nearer to the lamp by using some books and a cloth covered tray.
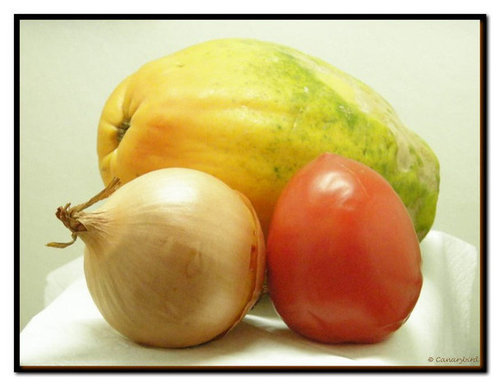
In this case I just put the plate on a small side desk under the light, and set up reflectors on either side.....the right side with the old photo frame and a piece of white printer paper clipped to it and on the left side another piece of white paper taped to the bookend. I'm quite pleased with the result, although it could have been a little brighter if I had used the EV (Exposure Value) button to lighten the photo with a setting of +0.3.
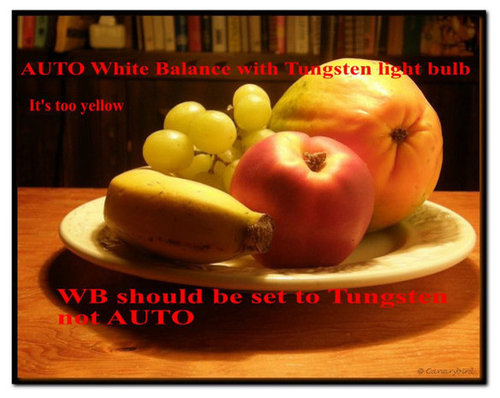
Such a brightness can be adjusted in a post editing program. See what happens in the second picture when the AUTO white balance misread the light. This often happens when you forget to change it to TUNGSTEN,
The camera in the left photo was set to Scene: PORTRAIT, White Balance (WB): TUNGSTEN, with no EV +/-.
More details: Shutter speed 1/40 Aperture f/3.9 ISO 100
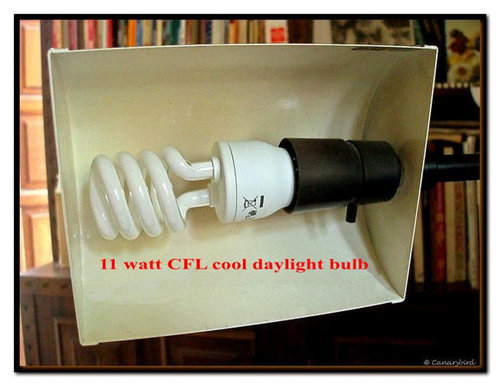
3. Overhead Lamp FLUORESCENT 1 Â 1 CFL bulb
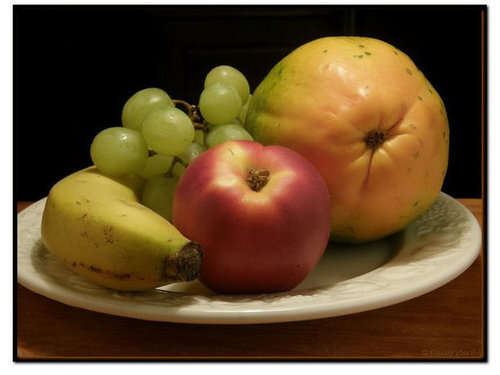
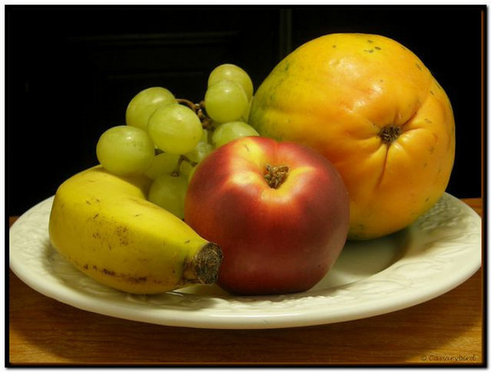
Here I changed the incandescent (tungsten) bulb for a new compact fluorescent bulb (CFL) at 11 watts in cool daylight colour.
Here is the picture that came from using that lamp, with the same setup as above in number 2, with reflectors either side.
These bulbs are wonderful because they donÂt heat up, they use lower wattage for the same light intensity as a tungsten bulb and they last for ages.
The camera was set to Scene: PORTRAIT, White Balance (WB): FLUORESCENT 1, with no EV +/-.
More details: Shutter speed 1/40 Aperture f/3.5 ISO 100
4. Overhead Lamp and Small Spot  FLUORESCENT 1  2 CFL bulbs
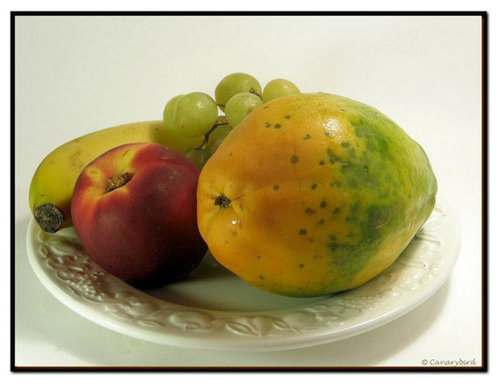
Here is another setup on my desk, with a white paper sweep as backdrop , an overhead swivel desk lamp
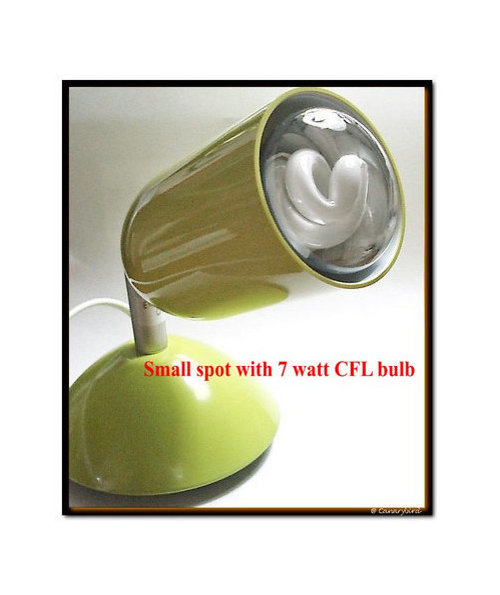
with a 15 watt CFL bulb and a mini spot light on one side with a 7 watt CFL bulb, the photo frame on the right as reflector with a piece of white printer paper clipped to it.
If you were doing this in a photo studio, the lights used would be of a higher wattage and the whole setup would be more professional and perhaps the reflector on the right would be
replaced by a third spotlight. The photo resulting from this homemade arrangement is on the right above.
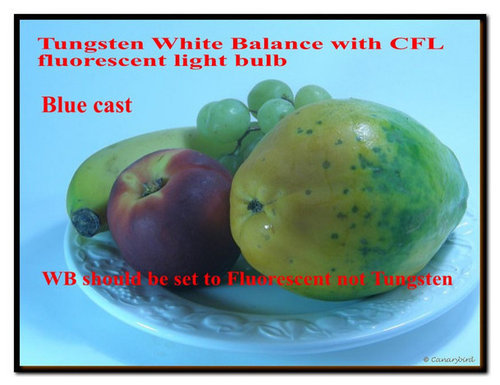
IÂve used the first of the three fluorescent settings my camera offers. ItÂs a little warmer than the other two.
This is what happens when you mistakenly use a TUNGSTEN setting for your White Balance (WB) instead of a FLUORESCENT setting (Remember the centipedes).
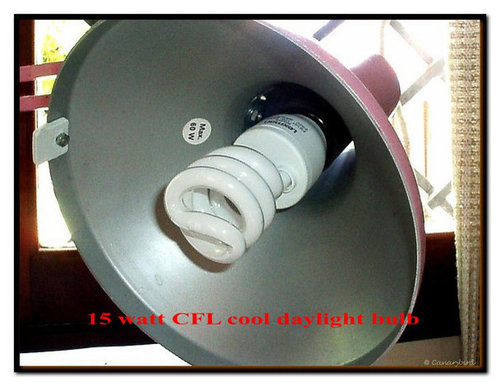
More about those CFL lamps:
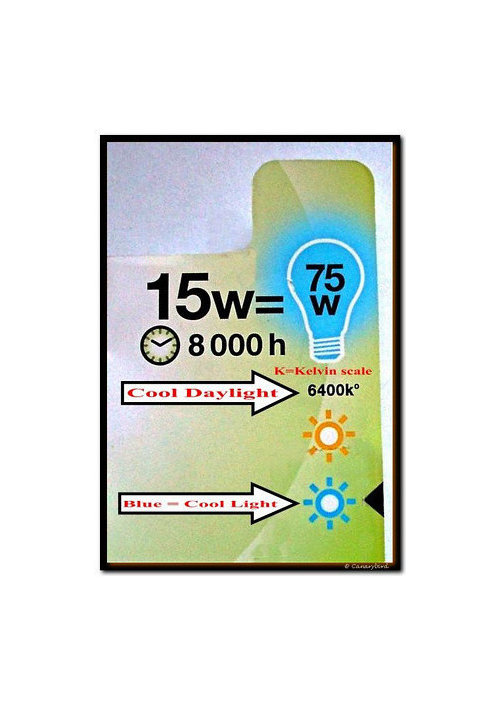
HereÂs the one in my desk lamp. It uses 15 watts and puts out the same light as a 75 watt tungsten bulb. IÂm also showing the card it came on as well as a closeup of the tiny 7 watt spot.
You can see that the 15 watt bulb is rated as cool and it has a Kelvin value of 6400k.
The Kelvin scale is one used to determine the temperature colour of light. The higher the number, the bluer or colder is the light. The lower numbers are for warmer light.
The Kelvin rating of 5000k and 5500k are considered to be the same as pure white and noon sunlight and are therefore best for taking photos that resemble daylight.
The store where I bought mine didnÂt have any at that rating but the 6400k , which you see marked on the card from the package, is also considered a daylight fluorescent lamp.
If you need a warm fluorescent CFL for your house, look for a Kelvin rating around 3000k. Candlelight is rated at 1500k.
The camera was set to Scene PORTRAIT, White Balance FLUORESCENT 1, with no EV +/-
More details: Shutter Speed 1/25, Aperture f/4.0, ISO 100
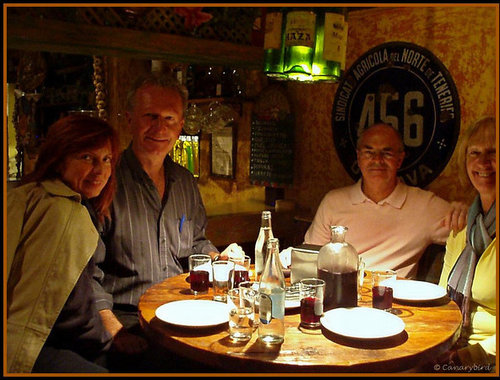
5. Restaurants  Overhead Tungsten Lamp(s) + Candles
You may have to look underneath the lamp to see if itÂs a tungsten (incandescent) bulb or a CFL (fluorescent) but when itÂs combined with candlelight for a cosy romantic setting you could wonder what setting to use on your camera without resorting to flash. I would go for the INDOOR Scene setting and then try looking through the viewfinder with the White Balance (WB) set at TUNGSTEN and if everything looks blue, then you know you have to switch the White Balance to a fluorescent setting.
The camera was set to INDOOR Scene, WB TUNGSTEN, with no EV +/-
You could also try out the Scene setting of AVAILABLE LIGHT if you have that on your camera. It has a slower shutter speed so you will have to brace the camera and hold tightly
and avoid any movement when you press the shutter. This is true of all photos you take in low light without a tripod.
If there is more candlelight than electric light, try the CANDLELIGHT setting as well. A look through the viewfinder before snapping the shutter will tell you if the
setting is right for that scene. You can ask your table partner to hold up a white napkin on the dark side of the subject to reflect some light onto it while you take the photo.
I have done that. Of course it might attract some attention, but where we live there are many tourists and they often take photos of the food on their tables while on holiday, so here it's not unusual to do so.
More details of 2 photos above: Shutter Speed 1/60, Aperture f/2.8, ISO 2500
Shutter Speed 1/20, Aperture f/2.8, ISO 2500
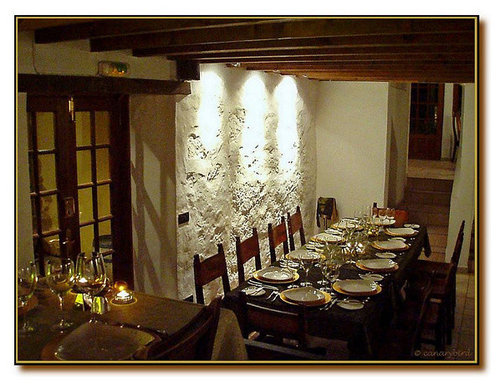
Another Restaurant Example: Overhead Tungsten Lamp :
Here there must have been more than one bulb in this quaint array of bottles but you can see the atmosphere, bright on the table and indirect light on the diners.
I believe I set the scene to PORTRAIT, but it could also have been INDOOR, The White Balance (WB) was set to TUNGSTEN with no EV+/- change.
More details of first photo: Shutter speed 1/20 (IÂm amazed it turned out without blur), Aperture f/2.8, ISO 2500
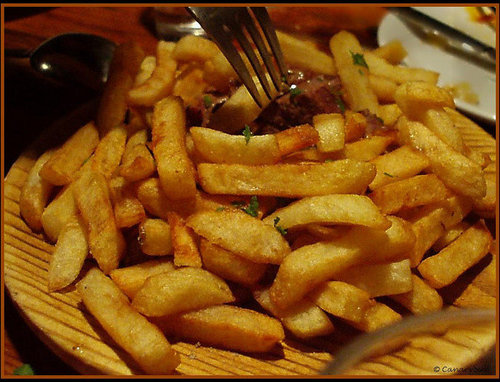
Second photo of chips: Shutter Speed 1/125, Aperture f/2.8, ISO 2500.
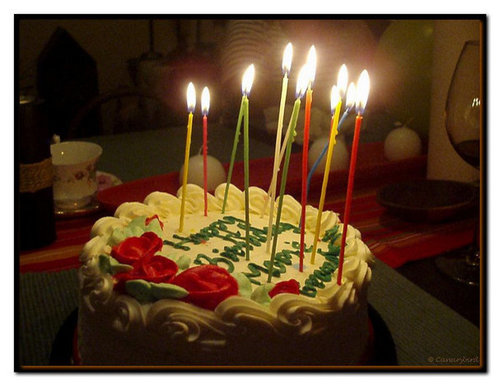
6. Candlelight
I didnÂt have a tripod for this but I braced myself and stopped breathing for a moment (not a good thing to do on your birthday)
while pressing the shutter. Normally you would need a tripod for such a low light photo. I still donÂt know how it came out without blurring.
The scene was set to CANDLELIGHT, White Balance (WB) AUTO and no EV+/-.
More details: Shutter Speed 1/250, Aperture f/2.8, ISO 2500
Well I hope you have enjoyed reading today's entry and have found it useful. If you have questions please post them here or send me a PM. :-)
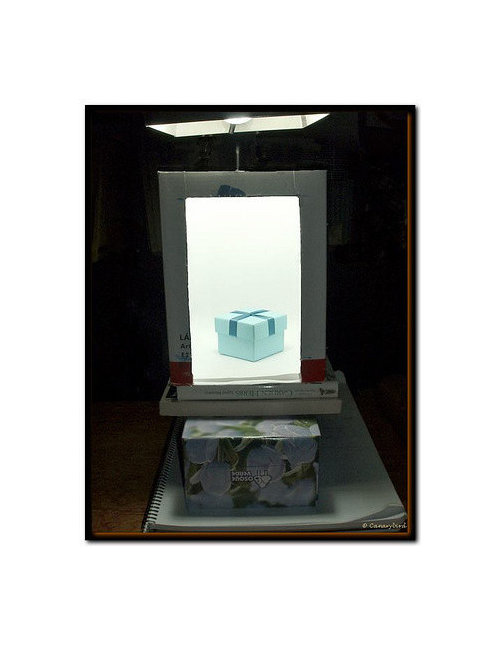
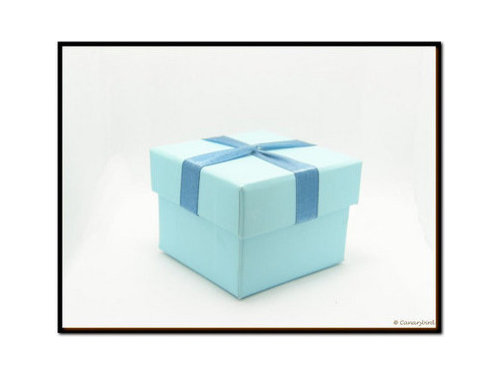
Next week IÂll show you how to make a mini light box and later weÂll make a full sized one. I have mine started but need some more materials from the craft shop.
In the meantime hereÂs a preview of the mini light box and what you can do with it:
So thanks for joining me. I'll be uploading the next installment soon. And please feel free to save the pages on your computer.
Sharon (Canarybird) :-)
(All text and photos copyrighted)
Free for personal, non-commercial use


happygram
shaun
Related Discussions
Food Photo Tips: Part I - Lighting
Q
Food Photo Tips: Part 2 - Lighting & White Balance
Q
Food Photo Tips: Part 4 - Seamless Backgrounds
Q
Food Photo Tips: Part 6 - Mini Light Box & Macro
Q
canarybird01Original Author
phyllis_philodendron
canarybird01Original Author