The topic of sanding and buffing was brought up in the gallery, particularly achieving a deep shine as in some of Donna Kato's work. This is something I've been working on for awhile. For some of my polyclay work, a deep glossy shine isn't needed, or I haven't been able to figure out how to achieve that effect yet, like the pansy canes which have lots or texture/veining that sanding would ruin the details of. I explained my method of buffing for those in the gallery posting titled 'Recylcled Art:..'
When I started working on my ginger jars, clocks, and jewelry, all things that I wanted a really smooth, glossy, shiney finish on, I did some research on sanding and buffing methods. I should probably explain that at the present time, although I am very interested in having a bead tumbler (an inexpensive rock tumbler with adaptations) and possiably a dremel tool, too, I've decided to hold off on purchasing them until this move is over and we are settled in to a new apartment. What I don't need right now is MORE STUFF to pack! LOL
So this is the method that I've been using to get the shine/finish that I want in pieces that can be sanded and buffed.
I use the two grades of wet/dry sanding sponges, 100/220 grit, and 400/600 grit. I've been using the Eversand brand because
A: that's all that I've been able to find at my local craft store, and
B: they seem to do the job.
I try to keep in mind too, when I'm working on a project, that the smoother I can keep my work when making it, the less work I'll have sanding and buffing after it's cured.
So I start my sanding with the finest grit I can. To explain this better, if there are no gouges (ie from fingernails or fingerprints) or scratches, there really isn't any reason to start my sanding work with the 100/220 grit. I DO try to run a final check over every piece before baking, still there are times when an imperfection escapes notice. Sometimes I get REALLY lucky - (that doesn't happen very often LOL) and I can skip sanding with the 400/600 grade.
I think up to this step, I use what everyone else uses. What comes next came from trial (and lots of error) and a little of DH advice and suggestions. I found a sanding sponge, made by 3M I believe. I wish I had saved the packaging so I could give the name and details for it. To be honest with you, when I purchased it, I didn't realize that it WAS a sanding sponge. I purchased it with the intention of using it as a sanding block to use with my next step but that's getting ahead of myself. It's apparently a fine finishing sponge or block. It's approximately 10 centimeters in length by 7 centimeters in width, with a depth of about 2.5 centimeters, and is a dark gray or light black in color. I wet sand with this for approximately the same amount of time/effort as I do with the wet/dry sanding sponges. I've found that to be important because with my eyesight not what it used to be, I can't always visually see the results. If the skin on my fingers isn't all dried out from the clay, or roughened by the previous sanding I've done, I can tell by feel when I've when I've wet sanded enough with the sanding sponge.
My next step involves Super Film Sanding & Finishing Film. This is a miracle product as far as I am concerned! LOL But seriously, the Super Film is produced by Houston Art, and I found it at Michaels. The package reads: Ultra Fine Grain, Long Lasting, Use Wet Or Dry, Leaves A Smooth, Glass-Like Surface. Trust me when I say, this stuff does everything the packaging claims! That is, if it's used correctly!
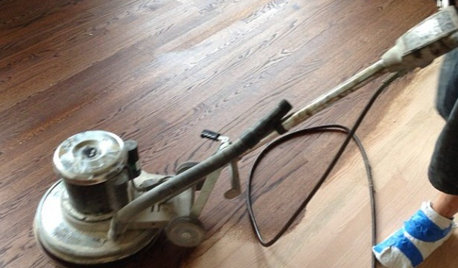
You use Super Film just as you use all the other wet/dry sandpaper- wet! My best tips are when you are wet sanding, use a couple of drops of dish soap or liquid soap in your sanding water. I do my sanding with a nice medium sized plastic bowl to hold my soapy water, it's big enough to rinse my sanding sponges, film, and whatever I'm sanding. I also use cool, but not COLD water. That keeps my piece from being misshaped, and my fingers from feeling like ice cubes! I've found using the soap makes my sanding sponges last longer as it keeps the pc residue from building up on the sanding surface and a clean sanding sponge works much better, thus shortning my sanding time.
Very important tip for Super Film! The package reads: To clean: Wash off SUPER FILM with PINK SOAP and water to provide precise and consistent results time after time. I thought that was an unneccesary step since I was already sanding with soapy water. WRONG! I use cheap pink dish soap to clean my Super Film after using it, and rinse it really well with water, and it makes the Super Film last a lot longer. Don't ask me why this works, but it does. And since you only get 3 sheets per package (each sheet size 5" x 5 3/4") and this miracle product DOES cost a little more than my other sanding products, that's an important consideration to me.
My only complaint and it's a very minor one, is that the sheets of Super Film are not quite as flexible as I would wish. The only time that that causes any problems for me is when I'm finishing beads for jewelry. I haven't tried a sanding block with it yet, that may be an improvement but we'll see.
Anyways, getting back to the Super Film. When sanding with this stuff, it's not only very easy for the most part to see when I've sanded enough, but I can easily feel it as well. It really does give a smooth glassy finish.
After I've finished sanding, I rinse my work under cool running water. Just rinsing it in the water I've been using for sanding is not a good idea as there is all kinds of 'grit' floating around in there. Even if I can't see it at the time, when I go to buff, I can tell it's there, the surface starts to look like I'm sanding again (rough or even more discoloring) NOT a good idea.
after rinsing, I either set each piece aside to dry or I dry it with a soft terry dishtowel I keep especially for pc work. Drying with the towel is like doing a little prebuffing.
I still buff, you have to pretty much. And yes, I use my favorite denim shirt for buffing. Then I either glaze for added shine and protection (depending on what the piece will be used for or where!) Or leave it as it is.
My ginger jars are a 'shining' example of the results of my sanding and buffing routine. I really wish it would have shown up better in the photo's. You really can't tell just by looking at them that they are made from polymer clay. I wish you could see the amazement on people's faces when they pick up one of my ginger jars! I always want to laugh because they expect the jars to be much heavier as a ceramic or glass piece would be, and they're inevitably dumbfounded to discover that they are made of polymer clay. "This is plastic?? Oh my gosh! I can't believe it!"
Maybe someday, polymer clay will be universally recognized as a true art form, and not just as a hobby, or a kids craft form. But I'm going off on a different tangent here.
NOW IT'S YOUR TURN! I CHALLENGE YOU- Share your favorite sanding, buffing, finishing method. Tips, tricks, secrets, come on, SHARE 'EM! We are a Clay Community here, right?
I've been doing this for such a short time, I'm starving for advice and idea's here. If I can stick my neck out, and share my pitiful knowledge, you can too!
Lamb


rosie_ga
rosie_ga
Related Professionals
Austin Furniture & Accessories · Englewood Furniture & Accessories · Franklin Furniture & Accessories · Jacksonville Furniture & Accessories · San Diego Furniture & Accessories · Washington Furniture & Accessories · Atlantic Beach Furniture & Accessories · Carlsbad Furniture & Accessories · Fort Carson Furniture & Accessories · Hoboken Furniture & Accessories · Hoffman Estates Furniture & Accessories · Holliston Furniture & Accessories · Garden Acres Interior Designers & Decorators · Ridgefield Interior Designers & Decorators · South Miami Heights Home Stagerslamb43Original Author
rosie_ga
akaLia