Or you can call this "Leaving a breadcrumb trail". This is a story of Documentation.
This is intended for the individual who is embarking on the Building A Home process, and who has NEVER thought to do this. The following is an EXCELLENT example of why you may want to consider doing this. Hopefully others with similar experience will chime in, and perhaps even fine tune or add to this process. Do not expect it to be pretty, and it does not need to be perfect, but it DOES really need to be done!!
The topic here is "DOCUMENT: Take Pictures Of your Walls, Ceilings, Floors, and etc., Capturing The Location of Pipes, Wires, and Whatever - BEFORE the Drywall Goes Up.
And KNOW THIS - while you are taking the pictures, you actually know where you are at the time. Viewing your pictures in three months, you will have NO IDEA where you were unless you Identify The Room, and Mark A Starting Point.
If this interests you, please read on. I will explain How To, then I will give you a fabulous example with pictures.
TIP: In the future months, you will be LIMITED to what the Camera saw - ie, what is shown within the edges of the picture frame. Please do not forget this!!! If you've had Camera 101, they usually mention this, but it is a completely alien perspective to the uninitiated.
So you will need to simply:
1.) Identify your location;
2.) Move around the room methodically (and not jump around different locations)
3.) overlap your image areas.
PLAN THE EVENT.
- Discover the date when your drywall is going in. Do not expect your Builder to keep you apprised - you need to follow the progress constantly and ASK THE BUILDER for a date of When drywall is going in.
- Plan YOURSELF - When & Where? IE, What Time of day is sunlight Where in your house? Think of that as you plan your starting point for taking pictures.
- If you do not have the time, and the schedule will bear, ask them to leave you at least one day to take pictures. This is not unreasonable, and it should be arranged.*
- Take supplies - Camera with fresh batteries, room on the chip or film, water, snacks, a notepad / legal pad, tape, and black magic-marker.
DOCUMENT YOUR HOUSE.
- Start wherever you want - top to bottom, or bottom-to-top. Think that this might be SUNLIGHT CONTINGENT; meaning what time of day do you have What type of light Where in your house so you can see? Might make sense to begin in the basement, for example.
- Pick your Starting Room(s). Identify The Room. Since to your Camera's eye, ALL rooms in your house look like a bunch of lumber running in different directions, you WILL NEED to Identify The Room and Mark A Starting Point (Yes, I know you are different, and a SuperHero, but please trust me on this one).
- After your starting room(s) are chosen, take your black marker & notepad (we used 8.5 x 14 pad) and write something that YOU know will Identify the Room, and what you are photographing. EXAMPLE: write "Basement Storage Area and Exersize Room - start at Outside Door, work Clockwise".
- Take a picture of your notepad showing this note, which both Identifies The Room, and Marks A Starting Point.
- After you've taken a picture of your Notepad, which Identifies the room that you are in & the direction in which you will be working, begin taking pictures.
- Back far enough away from the wall that you capture the wall - floor to ceiling - in one picture. You may want to turn the camera so it takes "vertical" picture. In above example of moving clockwise, as you take the picture, note what is on the Righthand side of the picture.
- The 2nd picture that you take, make sure your Identifying mark is now on the left-hand side of the picture. Take your 2nd picture, and note what is again on the right-hand side of your picture.
- Set the camera where your 2nd pic right-hand mark is now on the lefthand side, and take your Third picture.
- Repeat until the room or area has been Documented.
NOTE: For walls where not much is going on, you might want to maintain this distance. Where walls have a lot going on - electric + hvac + plumbing + outlets & switches, you might want to FIRST DO THE OVERALL, then NEXT DO A CLOSEUP for that area.
- Move into your next area, and again write on your Notepad for example "Basement Guest Bathroom, begin on tub wall & move counter-clockwise".
Now, if you're thinking "You're KIDDING \- what a pain!! This is a LOT OF TROUBLE!". Then please at least skim the below Success Story, and then re\-consider: Which is really more trouble?? I spend 4 hours or one single day taking pictures of my walls? or my entire Family is delayed for one to three MONTHS while the builder has to rip out ALL THE DRYWALL in these areas to find the problem because one of his subs made a mistake?? Rental extensions & work vacation changes & storage extensions & school delays & extra expense & interest rate changes & lost\-interest\-rate\-locks & Holiday intrusions & hospital expenses when you get your ulcer or totally stroke\-out, & etc., etc., etc.
A Tale of Validation for Preparation (also called "The Builder Owes You a Big One")
If you read the above, we did this. We documented. I have an older, lower MPx camera, the house was dark, it was 3 weeks after my dearest sweet kitty Fresca had to be let go to her ancestors, two weeks since I'd been sent on a cross-country business trip, and the day after getting back into town from burying my step-father - but we did it anyway. Storms had knocked out the Oven in our rental, and the Wed before the Funeral our clothes dryer quit.
We took pictures anyway.
The Superintendent this week admitted that he thought we were crazy taking so many pictures.
The Tale:
Wednesday of this week, my phone rang. It was DH (Dear Husband) who says "how busy are you?". Well I was at work, and had been up since 2:30am to get ready for work, then drive the 45 minutes out to the construction site to set up 5 hoses, 5 timers & 5 sprinklers, then begin setting timers on the water sprinklers by 4am since they installed Sod the day before - before driving the hour into work & only being 30 minutes late**.
me: "What's wrong now??" (experienced, can you tell??)
DH: "The Plumber was testing the water upstairs, and found out that the hot faucets give cold, and the cold faucets give hot - only upstairs. We need to go through the pictures, and send the Superintendent any picture which shows any plumbing pipes or junctions that might lead to the upstairs."
Well, I know that we took almost 400 pictures, which I diligently backed-up onto an external drive (which I keep with me). I was half crazed from 60 minutes' sleep, so sure! Why not?
I went through the pictures & pulled out 50 or so, zipped them in to 6 different files labeled by room grouping, and sent them via email to the Superintendent. The plumber went over to the Super's house, and they reviewed the pictures. In 45 minutes, BECAUSE WE HAD PICTURES OF EVERYTHING, they found the problem, and had planned an easy solution.
WHAT THIS PREVENTED:
If we had not had pictures of the walls & infrastructure, they would have had to rip out drywall until they found the problem. For us, potentially (in order):
- Basement - ALL the HVAC run in the unfinished ceiling, because plumbing is behind it;
- Basement - ALL the drywall in the "boxed in utility corridor" section where they boxed in the HVAC & plumb & wiring - adjacent to stairs, in the Game Room, along the length of the Bathroom - over tub & over toilet, the ceiling & walls of 2 Closets;
- Main Floor - ALL the shelving in the back of the food pantry, maybe the Butler's Pantry too, then drywall & part of the ceiling along that back wall;
- Main Floor - ALL the drywall in the mudroom "owners closet" and bench area, and part of the ceiling;
- Main Floor - ALL the drywall on two walls of the laundry room;
Then if they still had not found it, Laundry ceiling, garage walls, then on upstairs, Cabinetry & Walls, until they found it.
Doesn't that sound like fun?????? Sounds like a minimum six week delay to me, and THOUSANDS and THOUSANDS of dollars out of builder's pocket, and thousands out of mine because I now loose my mortgage lock, storage extension, mover's changed, longer interest on a construction loan, more time in a tiny apartment, and by the time we moved it would be Holidays. In addition to the fact that EVERYTHING that would have to be re-done: re-ordered, re-installed, re-nailed, re-trimmed, re-painted, etc., etc., etc.
An Example of Pictures:
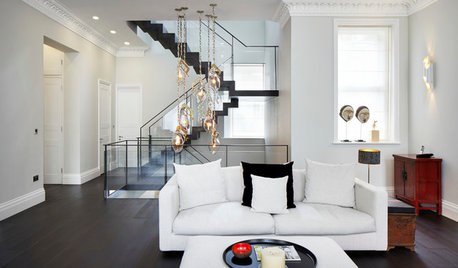
This is an example some of the pictures we took just to show you that "it doesn't have to be pretty, but it has to be done". This one is actually in that basement boxed-in, overhead "utility corridor" where they would have to have ripped out:
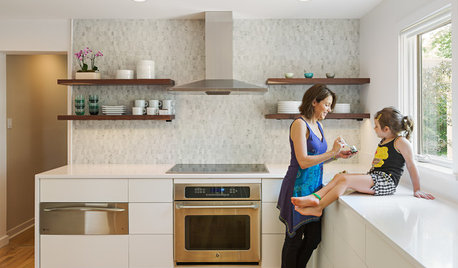
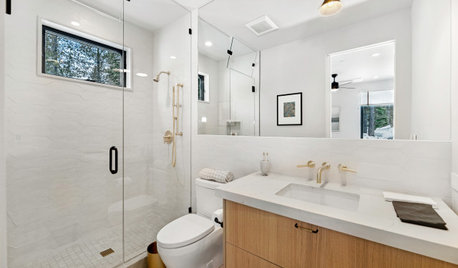
Just a random example of a wall in the kitchen - but an example we took which shows a LOT if you look - propane lines, electrical lines, ceiling can, plug outlets, direct wire for VaH & RangeTop, etc. - all in relation to the window:
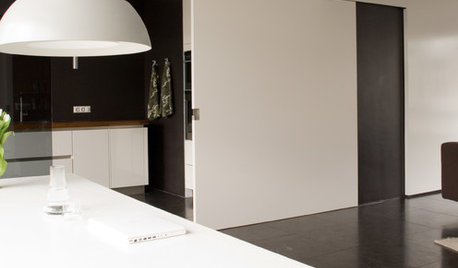
This is the area of the wall where they planned the swap of hot-to-cold:
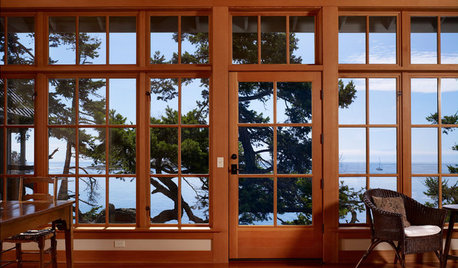
This is how we documented this AFTER the fix, so when they seal up the wall, and if we need to know in 5 years where this is, again - we have it documented:
HOPE THIS HELPS SOMEONE!
Footnotes:
\*Under Plan The Event, just to give you an idea, it took us the better part of a 2\-day weekend to photo 4350 sq.ft. on three levels. But then we are OCD & pretty slow moving & particular. Might not take you that long.
\*\*Yes this does seem a little un\-coordinated, but that was not my plan. I knew when the yard was going in, and took a day of vacation. When i got there, the builder STILL had not put water to the exterior hose\-bibbs \- even though I emailed 1 month in advance to do so, again 1 week in advance, AGAIN 3 days in advance, and phoned twice the way they were laying Sod. When I showed up on site, my hose\-bibbs were STILL not flowing, and I had my materials & had taken a day of vacation, and when I saw that he was off "playing" on his grading machine on a different lot \- I completely lost it. Yes, he left his dozer, and it took them ALL DAY to finish the plumbing to the point that the the bibbs would work. Yes, he was speechless when at the top of my lungs I asked him "then WHY ON EARTH DID YOU ORDER THEM TO LAY SOD IF YOU DON'T HAVE WATER???" Bonehead. Seriously. His response "well, there's water to the tank". I said "YES!! There's WATER IN THE GROUND!!! What GOOD does it do me if I can't get access to it????" That shut him up.
It was a fun day!! (NOT. to me this is abysmally sad) My throat is still sore.......


Hershey Harris