


bathtub installation questions - Mongo, anyone else?
kgsd
14 years ago
Sort by:Oldest
Comments (7)
Related Stories

DOORS5 Questions to Ask Before Installing a Barn Door
Find out whether that barn door you love is the right solution for your space
Full Story
KITCHEN DESIGNThe Cure for Houzz Envy: Kitchen Touches Anyone Can Do
Take your kitchen up a notch even if it will never reach top-of-the-line, with these cheap and easy decorating ideas
Full Story
LAUNDRY ROOMSThe Cure for Houzz Envy: Laundry Room Touches Anyone Can Do
Make fluffing and folding more enjoyable by borrowing these ideas from beautifully designed laundry rooms
Full Story
CLOSETSThe Cure for Houzz Envy: Closet Touches Anyone Can Do
These easy and inexpensive moves for more space and better organization are right in fashion
Full Story
DECORATING GUIDESThe Cure for Houzz Envy: Family Room Touches Anyone Can Do
Easy and cheap fixes that will help your space look more polished and be more comfortable
Full Story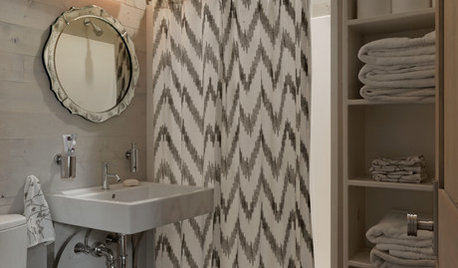
BATHROOM DESIGNThe Cure for Houzz Envy: Bathroom Touches Anyone Can Do
Take your bath from blah to ‘ahhhh’ with just a few easy and inexpensive moves
Full Story
KITCHEN BACKSPLASHESHow to Install a Tile Backsplash
If you've got a steady hand, a few easy-to-find supplies and patience, you can install a tile backsplash in a kitchen or bathroom
Full Story
BATHROOM DESIGNShould You Install a Urinal at Home?
Wall-mounted pit stops are handy in more than just man caves — and they can look better than you might think
Full Story
FENCES AND GATESHow to Install a Wood Fence
Gain privacy and separate areas with one of the most economical fencing choices: stained, painted or untreated wood
Full Story
MATERIALSThe Most Popular Roofing Material is Affordable and Easy to Install
Asphalt shingles, the most widely used roof material in the U.S. are reliable and efficient, and may be right for you
Full Story

MongoCT
kgsdOriginal Author
Related Professionals
Fox Lake Kitchen & Bathroom Designers · Newington Kitchen & Bathroom Designers · Soledad Kitchen & Bathroom Designers · Avondale Kitchen & Bathroom Remodelers · Dearborn Kitchen & Bathroom Remodelers · Roselle Kitchen & Bathroom Remodelers · Tulsa Kitchen & Bathroom Remodelers · Fort Myers Glass & Shower Door Dealers · Fort Worth Glass & Shower Door Dealers · Kendall Glass & Shower Door Dealers · Morristown Glass & Shower Door Dealers · Longmont Glass & Shower Door Dealers · Palisades Park Cabinets & Cabinetry · North Plainfield Cabinets & Cabinetry · Salt Lake City Window TreatmentsMongoCT
pepperidge_farm
kgsdOriginal Author
kgsdOriginal Author
MongoCT