


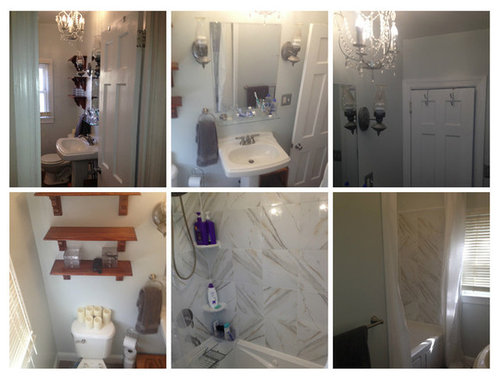
done 100% DIY 44 sq bathroom in 100 yr old house
lizdc
10 years ago
Sort by:Oldest
Comments (19)
Related Stories
BASEMENTSRoom of the Day: Swank Basement Redo for a 100-Year-Old Row House
A downtown Knoxville basement goes from low-ceilinged cave to welcoming guest retreat
Full StoryBEFORE AND AFTERSSee a DIY Powder Room Transformation for $1,100
Determination, DIY skill and a stunning tile feature wall helped make this formerly dark and gloomy powder room feel spacious
Full Story
SMALL KITCHENSThe 100-Square-Foot Kitchen: One Woman’s $4,500 DIY Crusade
Teaching herself how to remodel, Allison Macdonald adds function, smarter storage and snazzier materials
Full Story
MOST POPULARThe 100-Square-Foot Kitchen: A Former Bedroom Gets Cooking
DIY skill helps create a modern kitchen where there wasn’t one before
Full Story
SMALL KITCHENSHouzz Call: Show Us Your 100-Square-Foot Kitchen
Upload photos of your small space and tell us how you’ve handled storage, function, layout and more
Full Story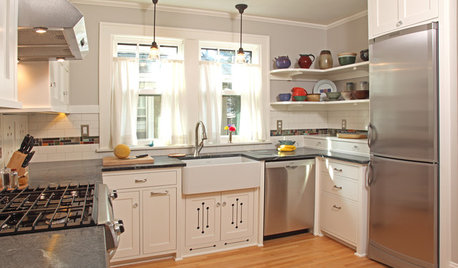
KITCHEN DESIGNThe 100-Square-Foot Kitchen: Farm Style With More Storage and Counters
See how a smart layout, smaller refrigerator and recessed storage maximize this tight space
Full Story
SMALL KITCHENSThe 100-Square-Foot Kitchen: No More Dead Ends
Removing an angled peninsula and creating a slim island provide better traffic flow and a more airy layout
Full Story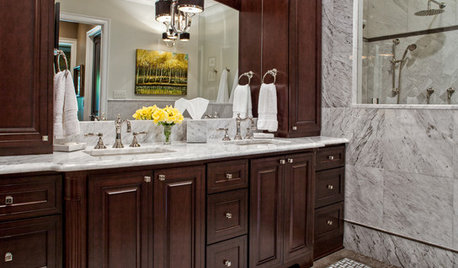
REMODELING GUIDESBathroom Workbook: How Much Does a Bathroom Remodel Cost?
Learn what features to expect for $3,000 to $100,000-plus, to help you plan your bathroom remodel
Full Story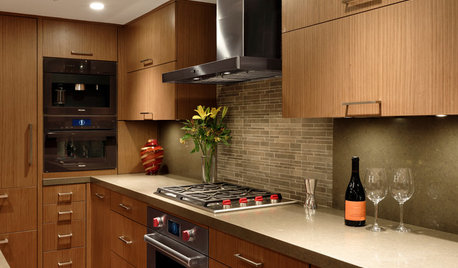
SMALL KITCHENSThe 100-Square-Foot Kitchen: Fully Loaded, No Clutter
This compact condo kitchen fits in modern appliances, a walk-in pantry, and plenty of storage and countertop space
Full Story
HOUZZ TOURSHouzz Tour: Just-Right Realism in an Eclectic Family Home
With 1,100 square feet, a modest budget and 2 young children, a San Francisco family embraces a creative DIY approach
Full StoryMore Discussions


lizdcOriginal Author
lizdcOriginal Author
Related Professionals
Commerce City Kitchen & Bathroom Designers · Lockport Kitchen & Bathroom Designers · Ridgewood Kitchen & Bathroom Designers · Southampton Kitchen & Bathroom Designers · University City Kitchen & Bathroom Remodelers · Hunters Creek Kitchen & Bathroom Remodelers · Malden Glass & Shower Door Dealers · Newtown Square Glass & Shower Door Dealers · Novato Glass & Shower Door Dealers · Reston Glass & Shower Door Dealers · Suwanee Glass & Shower Door Dealers · San Tan Valley Glass & Shower Door Dealers · Stoughton Cabinets & Cabinetry · Aurora Window Treatments · La Jolla Window Treatmentsraehelen
a2gemini
lizdcOriginal Author
lizdcOriginal Author
lizdcOriginal Author
raehelen
crl_
lizdcOriginal Author
enduring
hunzi
lizdcOriginal Author
lizdcOriginal Author
lizdcOriginal Author
jrueter
Olychick
lizdcOriginal Author
Olychick