


Concrete counter and copper vessel sinks
cornweer
19 years ago
Sort by:Oldest
Comments (27)
Related Stories
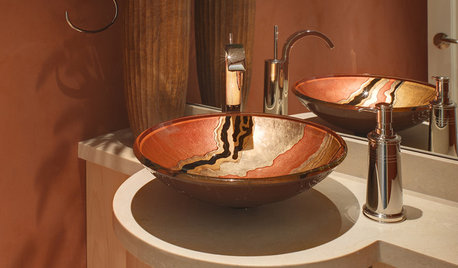
BATHROOM DESIGNVessel Sinks: Elegant Updates on a Classic Form
14 Ways Wash Basins Add Glamour to Bath and Powder Rooms
Full Story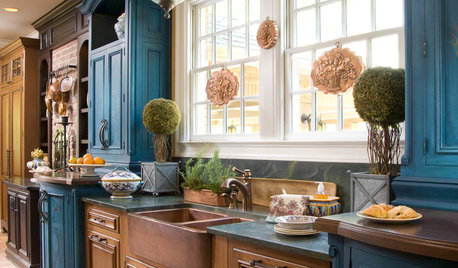
KITCHEN DESIGNKitchen Sinks: Antibacterial Copper Gives Kitchens a Gleam
If you want a classic sink material that rejects bacteria, babies your dishes and develops a patina, copper is for you
Full Story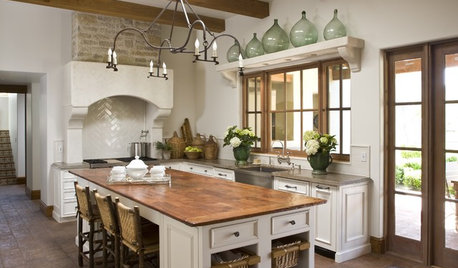
KITCHEN DESIGNSurprise Contender: Copper for Kitchen Countertops
Unexpected and full of character, copper is getting buffed for its growing appearance on the countertop scene
Full Story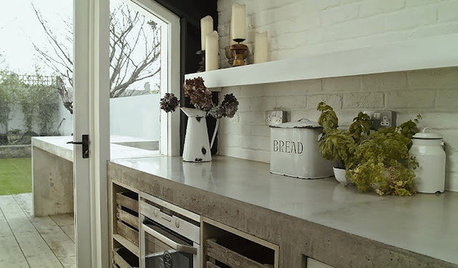
KITCHEN COUNTERTOPSKitchen Counters: Concrete, the Nearly Indestructible Option
Infinitely customizable and with an amazingly long life span, concrete countertops are an excellent option for any kitchen
Full Story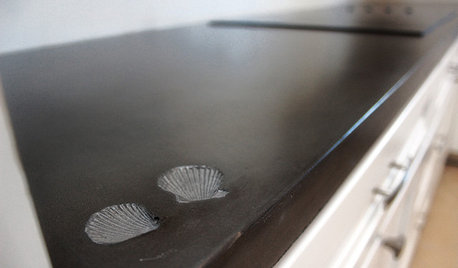
KITCHEN COUNTERTOPSElephants of the Kitchen? What to Know About Concrete Counters
Concrete countertops are beautiful, heavy and cool — and have their own peculiarities. And a lot in common with certain gray pachyderms
Full Story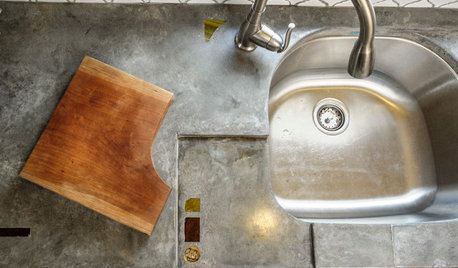
KITCHEN COUNTERTOPSCast Concrete Countertops With a Personal Twist
From frame making to pouring to inlays, learn how concrete counters are cast — and how an artisan embellishes them
Full Story
PRODUCT PICKSGuest Picks: Copper Craze
When gold and silver feel too expected, go for accessories and tableware in rosy-toned copper
Full Story
REMODELING GUIDES15 Ways to Design With Copper
Get Inspired to Add the Long-Lasting Beauty of Copper to Your Home
Full Story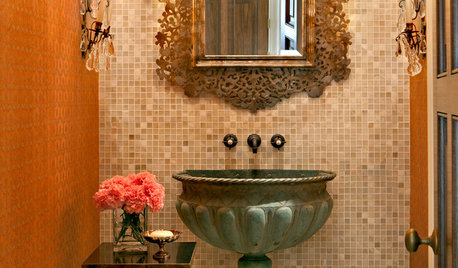
DECORATING GUIDESFor Your Next Sink, Think Unique
Any kind of vessel can do the trick — from buckets to barrels, outsized shells to old-fashioned washers
Full Story
BATHROOM DESIGNHow to Choose the Right Bathroom Sink
Learn the differences among eight styles of bathroom sinks, and find the perfect one for your space
Full Story

cabogirl
sweetpea_path
Related Professionals
Amherst Kitchen & Bathroom Designers · Hammond Kitchen & Bathroom Designers · La Verne Kitchen & Bathroom Designers · Mountain Top Kitchen & Bathroom Remodelers · Leander Glass & Shower Door Dealers · Miami Glass & Shower Door Dealers · Burr Ridge Cabinets & Cabinetry · Richardson Cabinets & Cabinetry · Tenafly Cabinets & Cabinetry · Tooele Cabinets & Cabinetry · North Bay Shore Cabinets & Cabinetry · Colorado Springs Window Treatments · Del City Window Treatments · Patchogue Window Treatments · Rockville Window TreatmentscornweerOriginal Author
thetews
pammo
quilter1955
cornweerOriginal Author
kvil
cornweerOriginal Author
kvil
msazadi
mollysuemolly
mitchdesj
cornweerOriginal Author
SnowQueen_NJ
bill_y
cwbest
cornweerOriginal Author
cwbest
cornweerOriginal Author
redbazel
vern1
casey2383
cornweerOriginal Author
audrey_ca
liz_h
mjr32